|
 06/12/2013
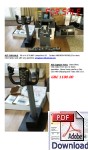
OK,
got some details from Andrew about the
kit he wants to sell. So, I've put it all into a .pdf. 06/12/2013
OK,
got some details from Andrew about the
kit he wants to sell. So, I've put it all into a .pdf.
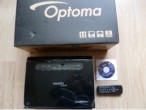
Just click on the image on the left for more info &
pricing. What I'm told is that most of this stuff is brand
new and never used hence the pricing. Personally I think Andrew
is being a little 'optimistic' with his pricing, but at the end of the
day it's not my kit :o)
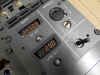

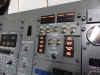
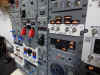
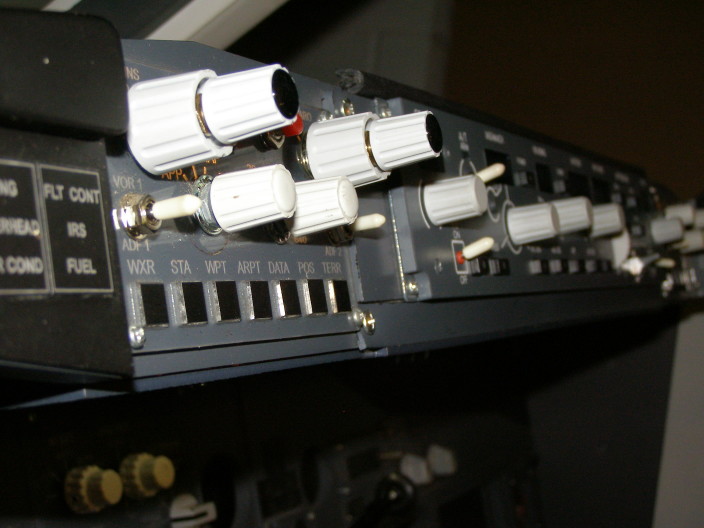
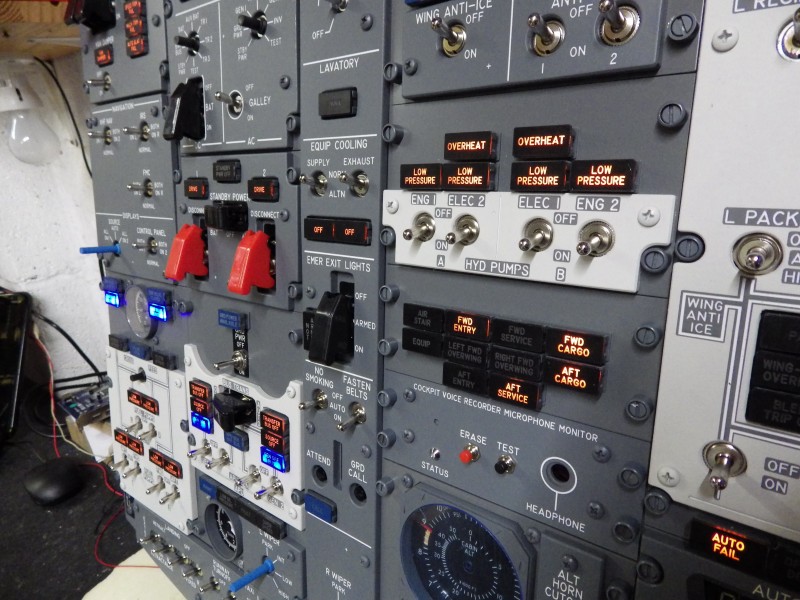
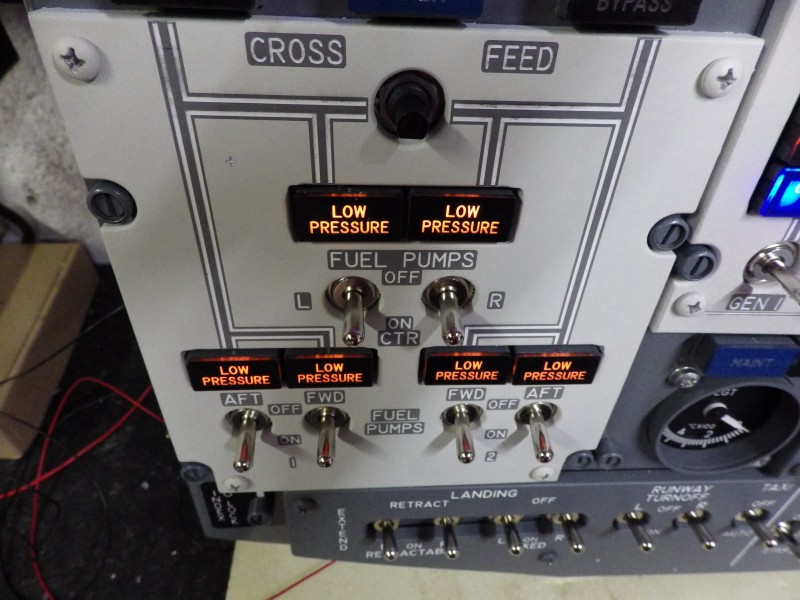
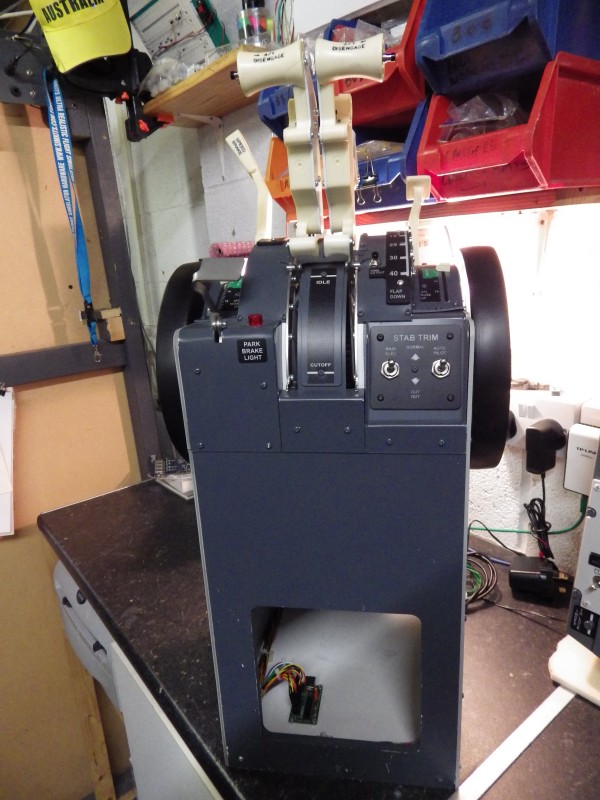
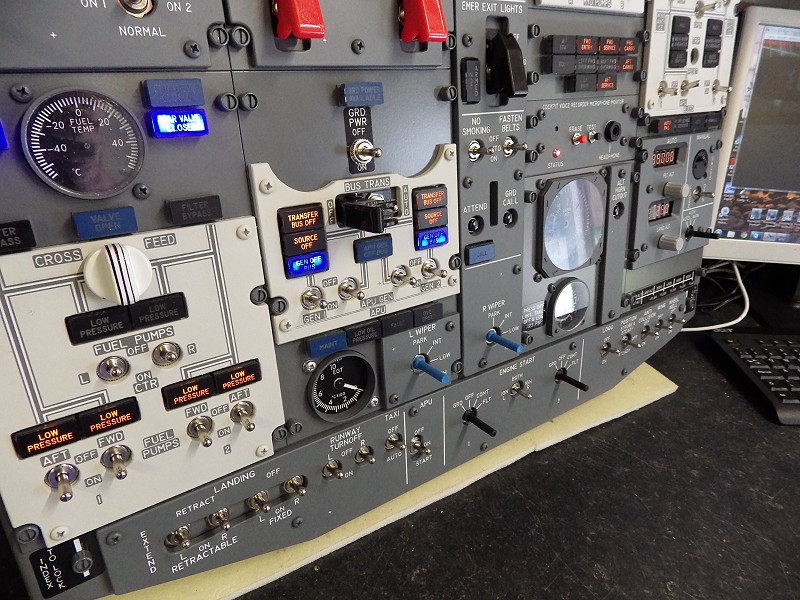
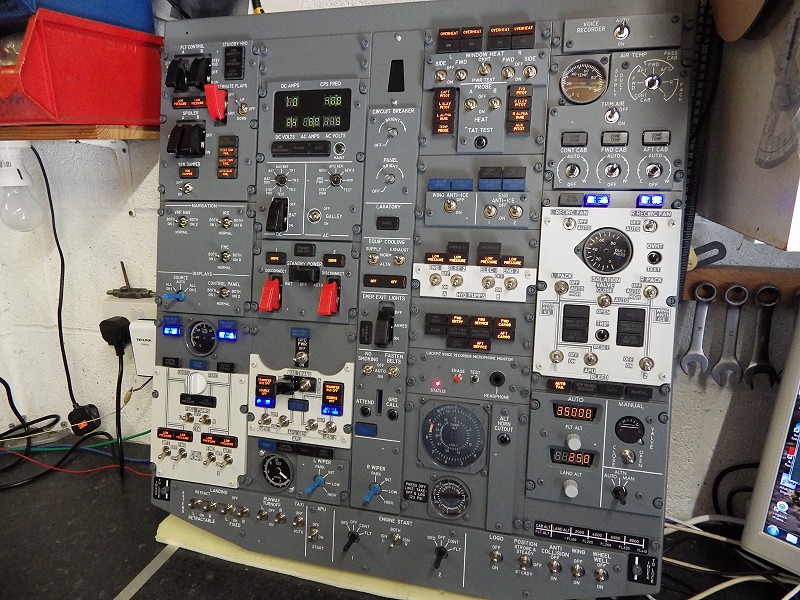
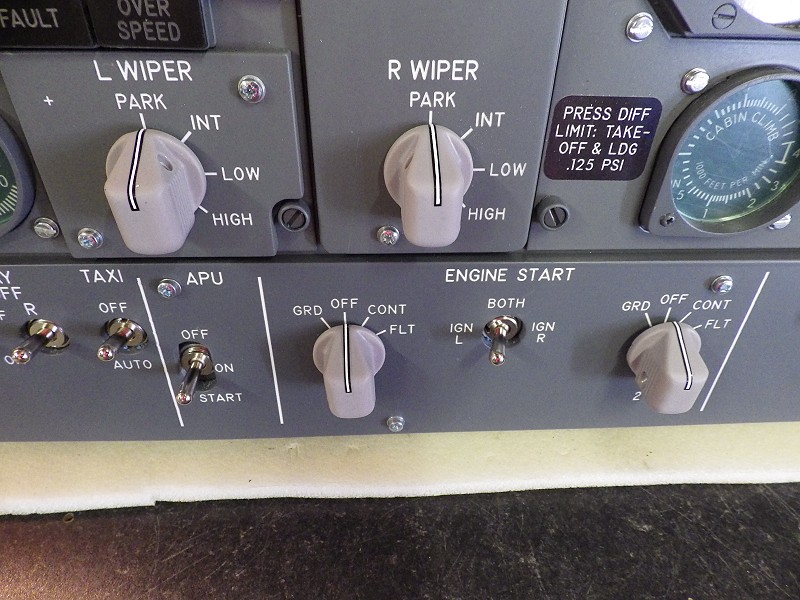
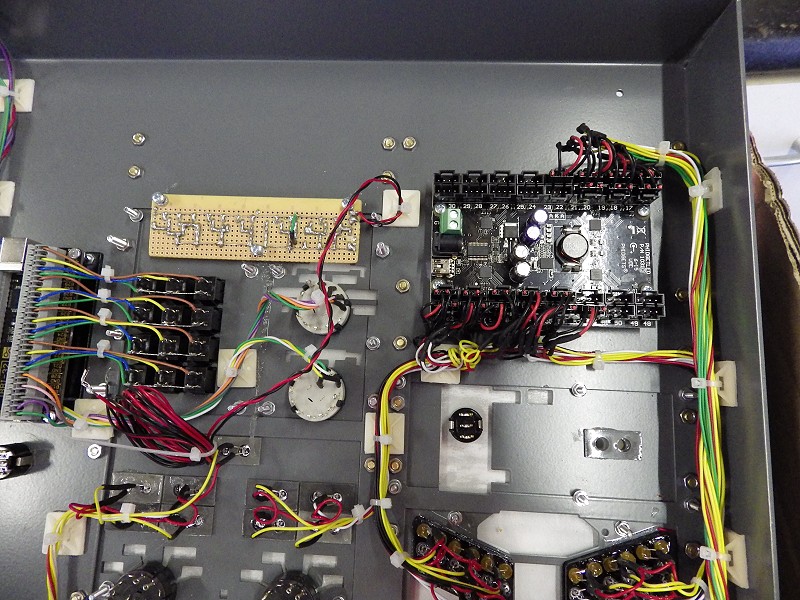
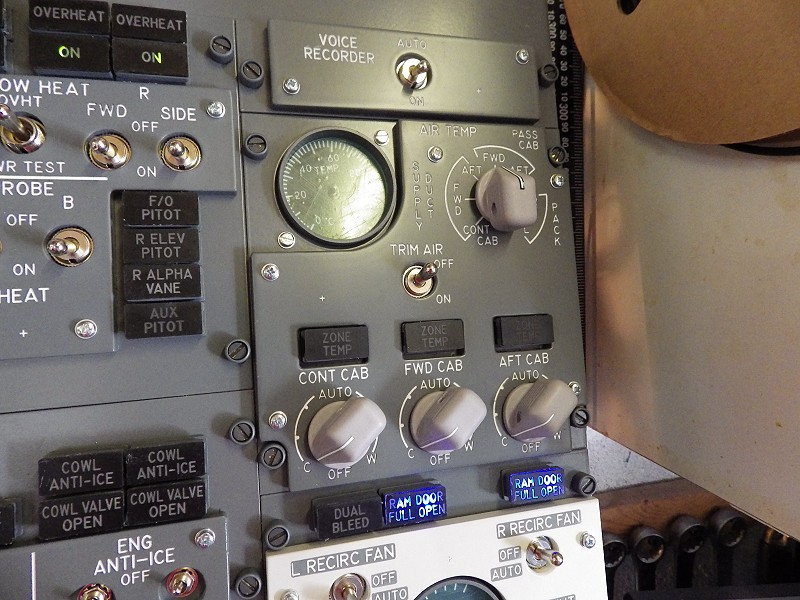
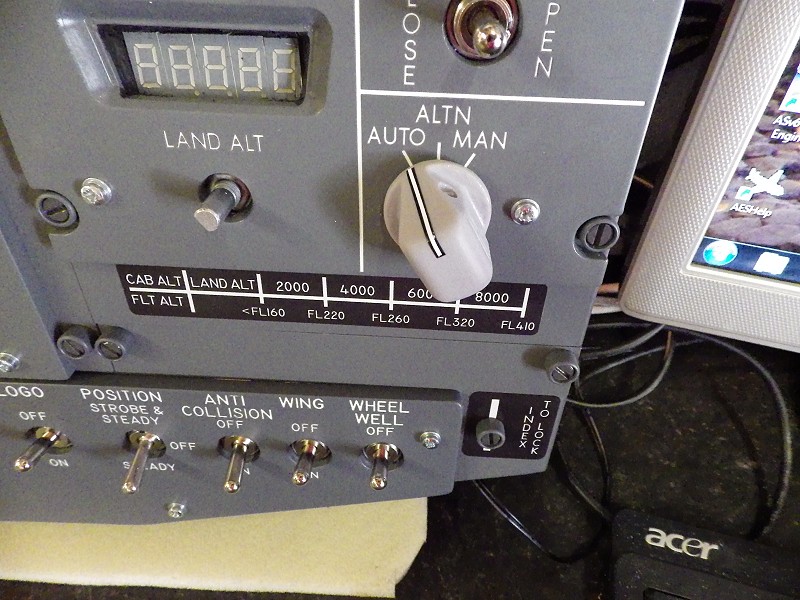
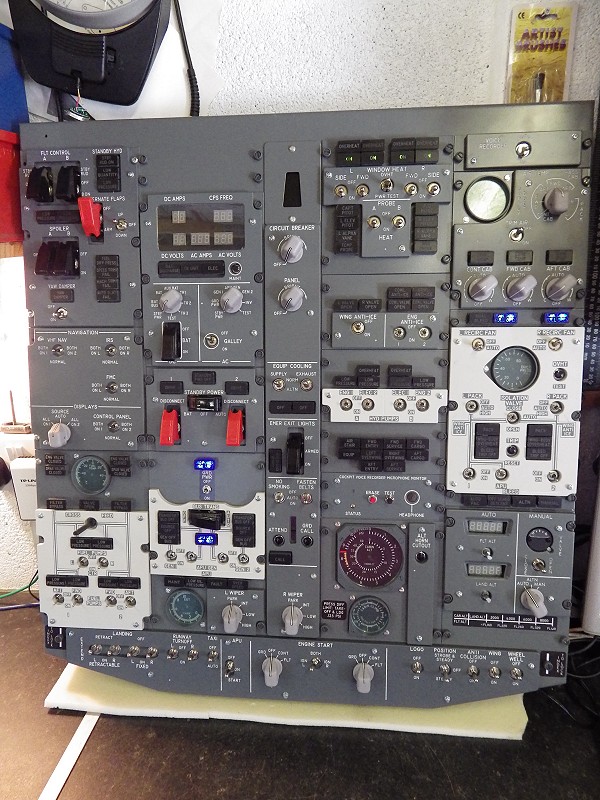
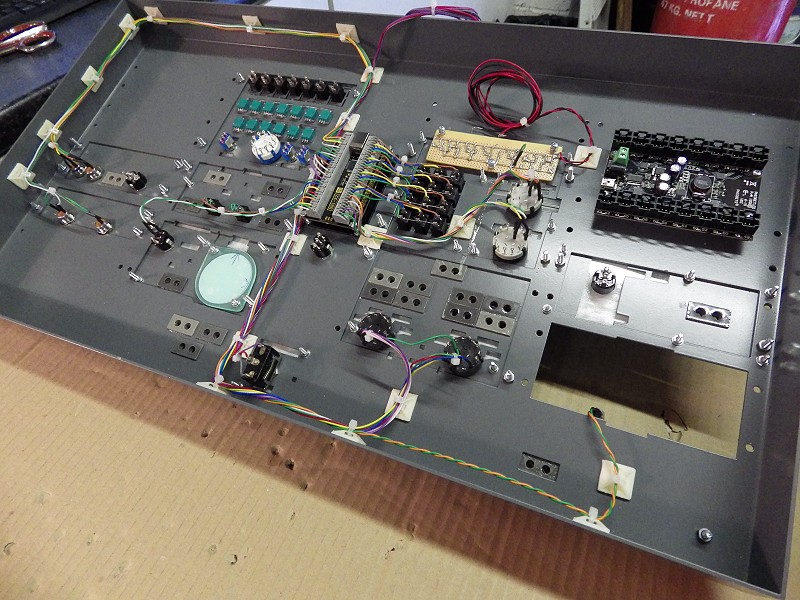
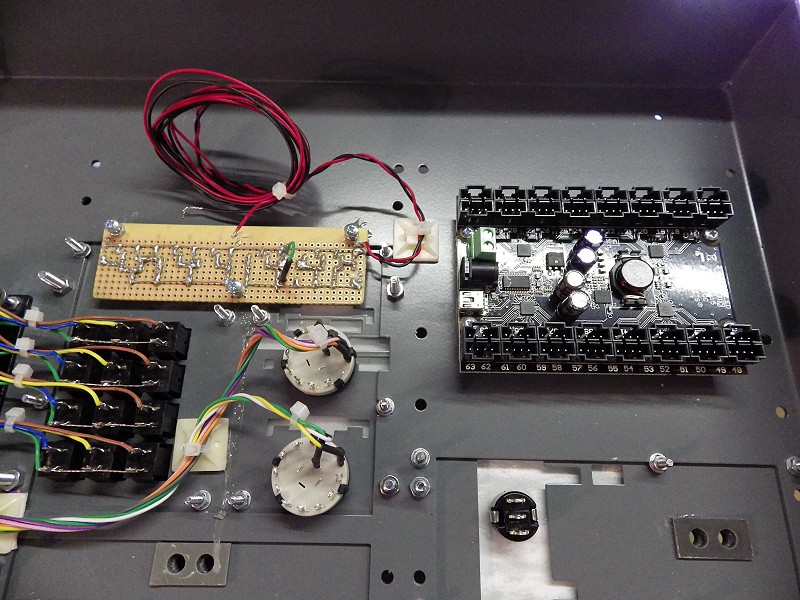
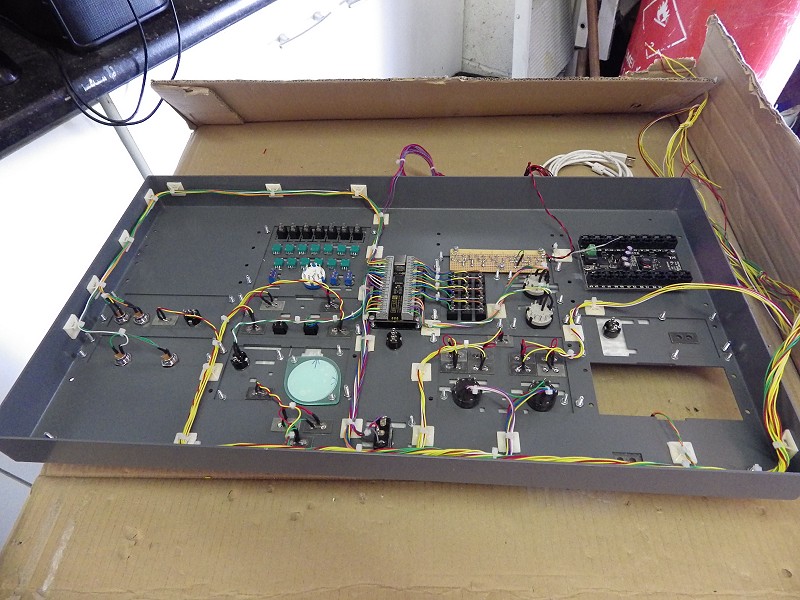
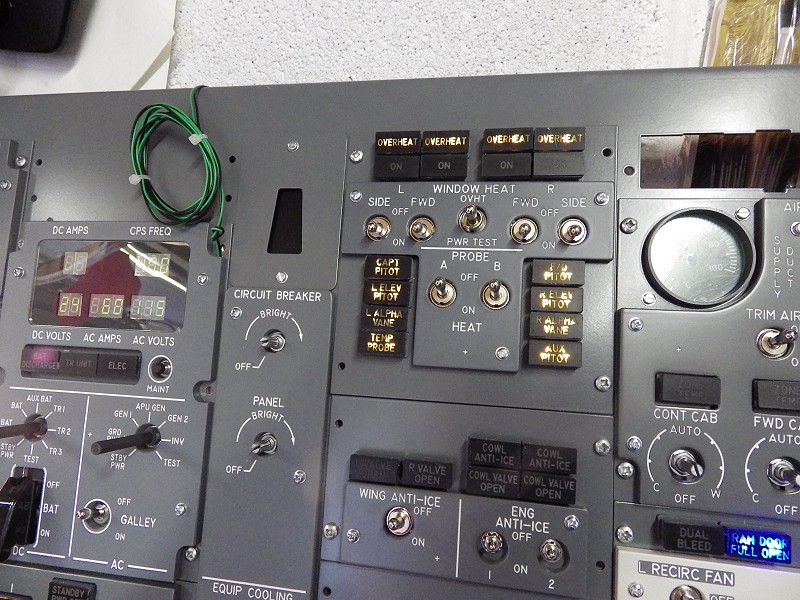
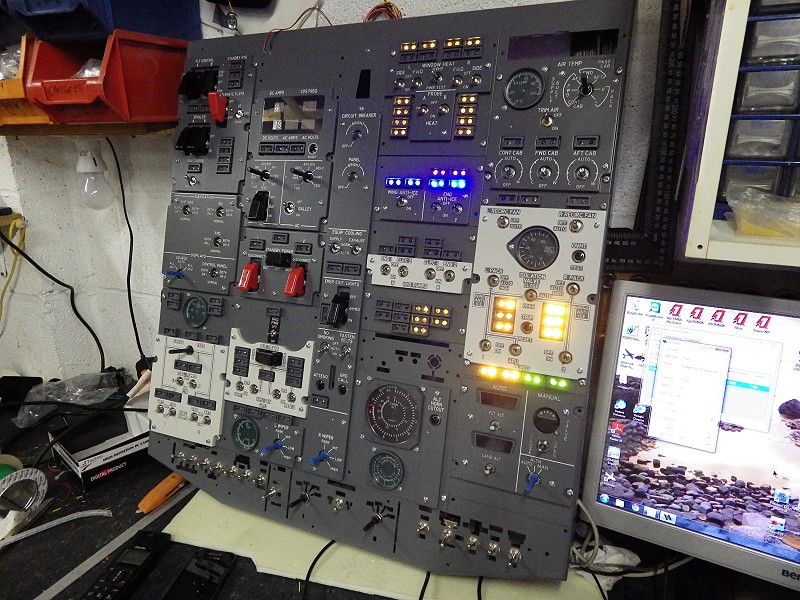
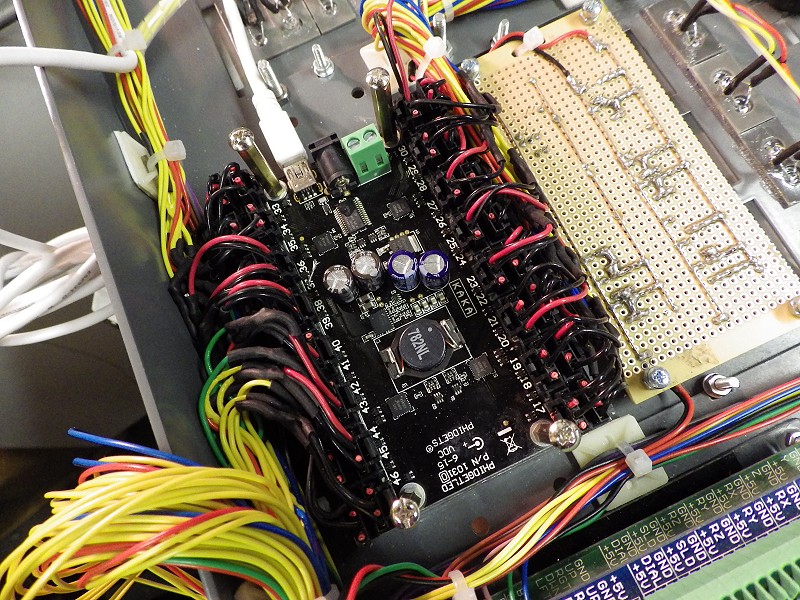
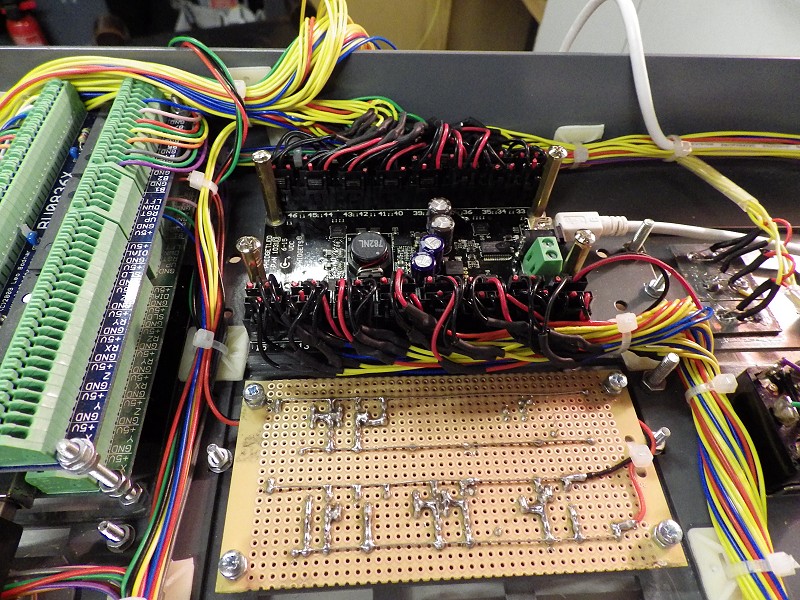
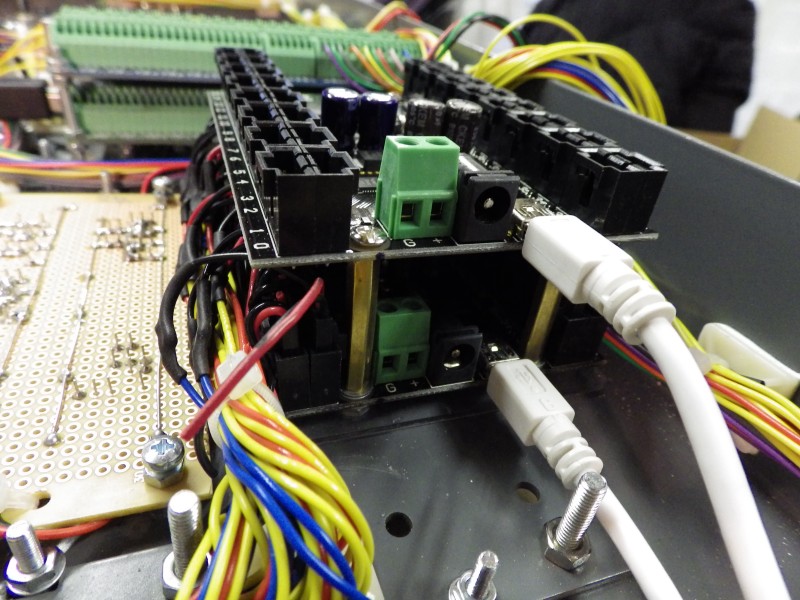
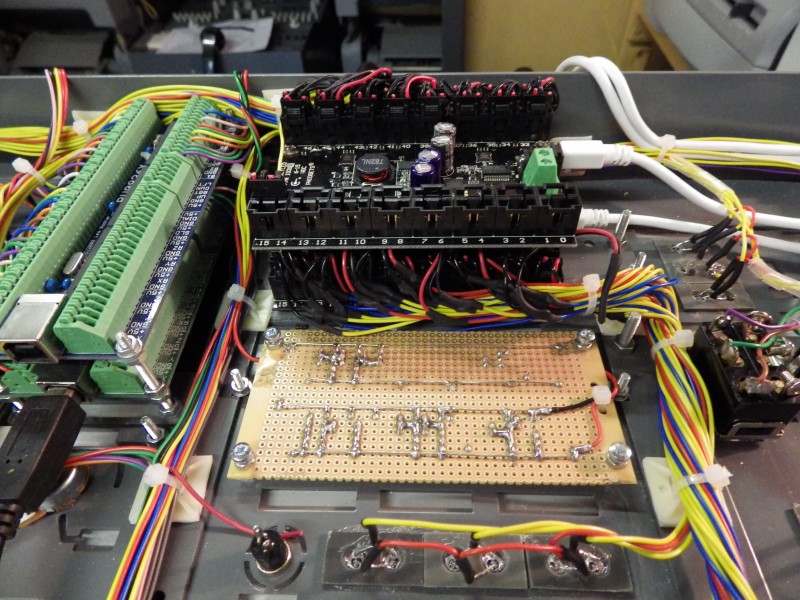
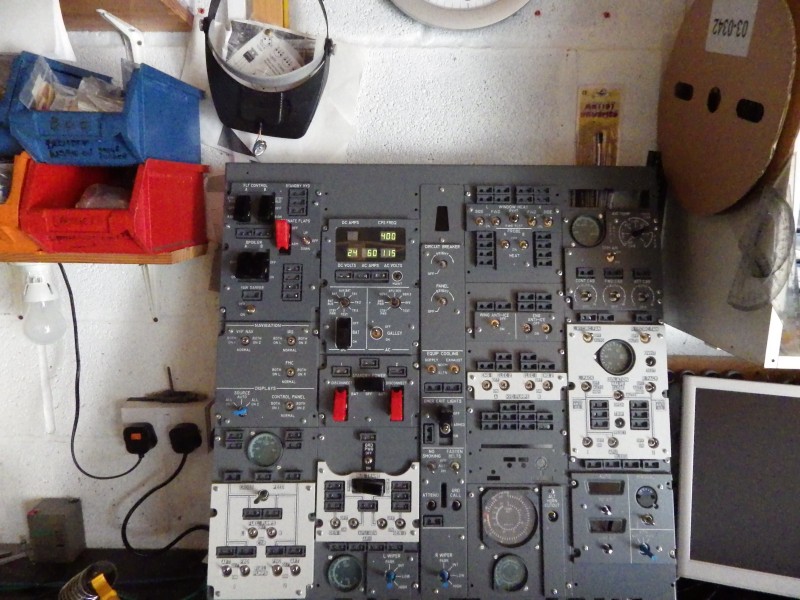
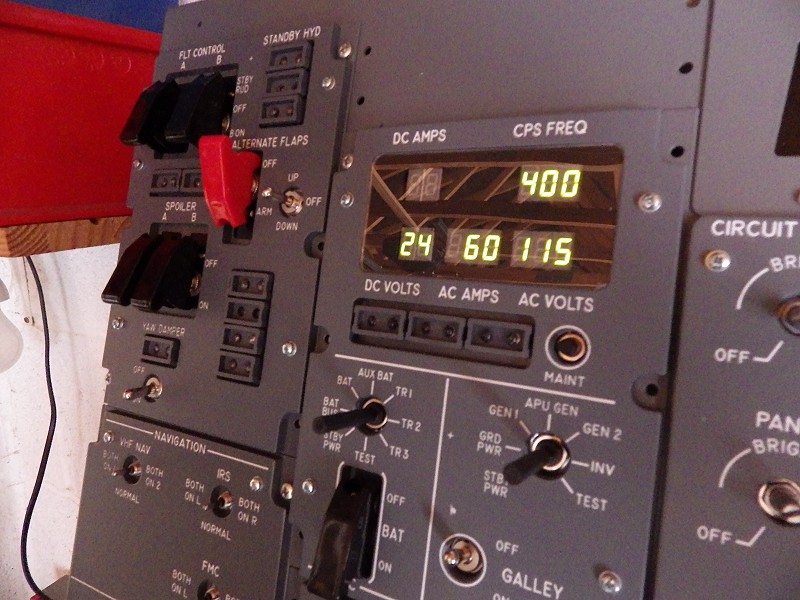
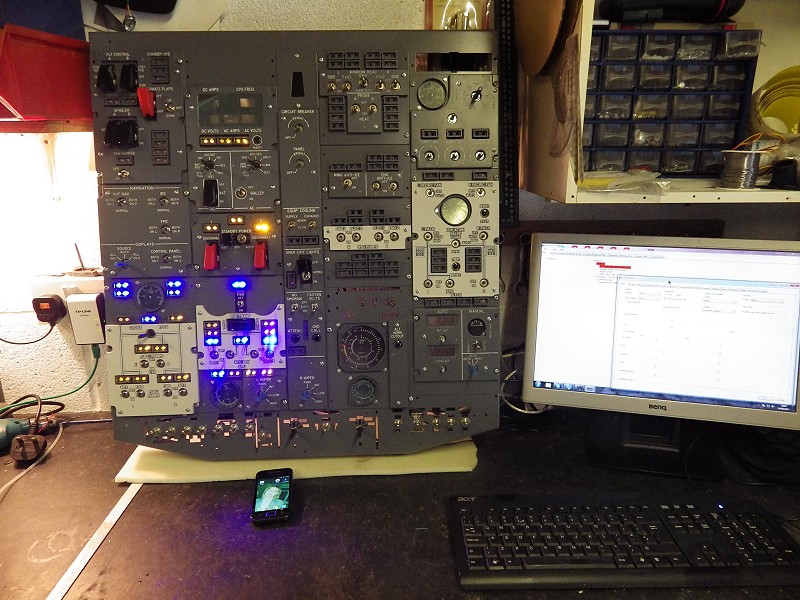
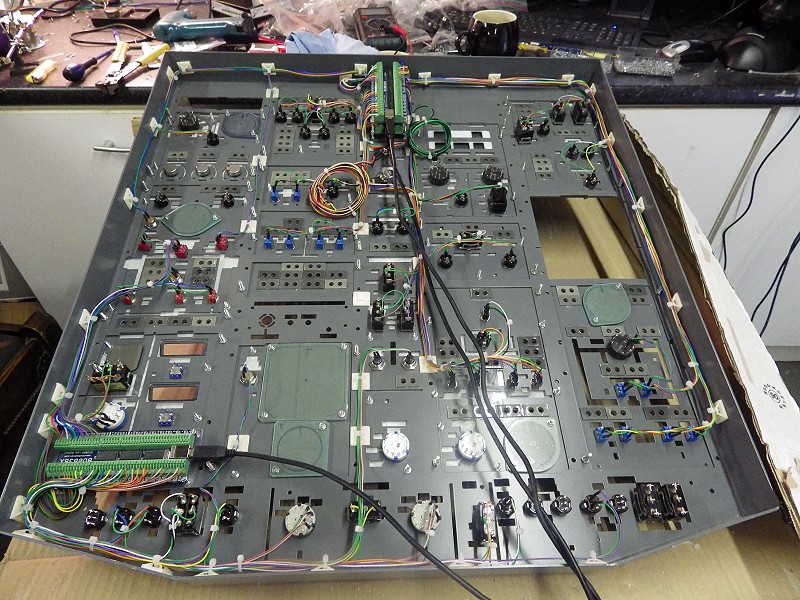
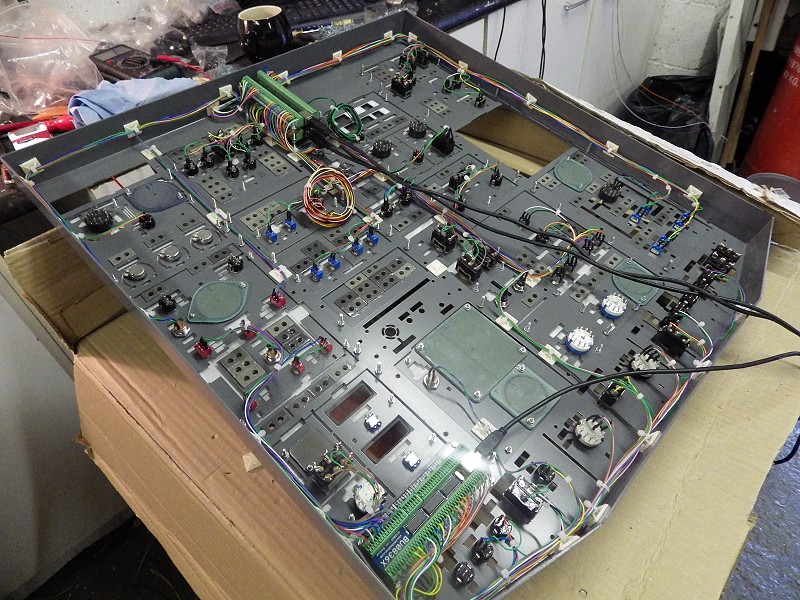
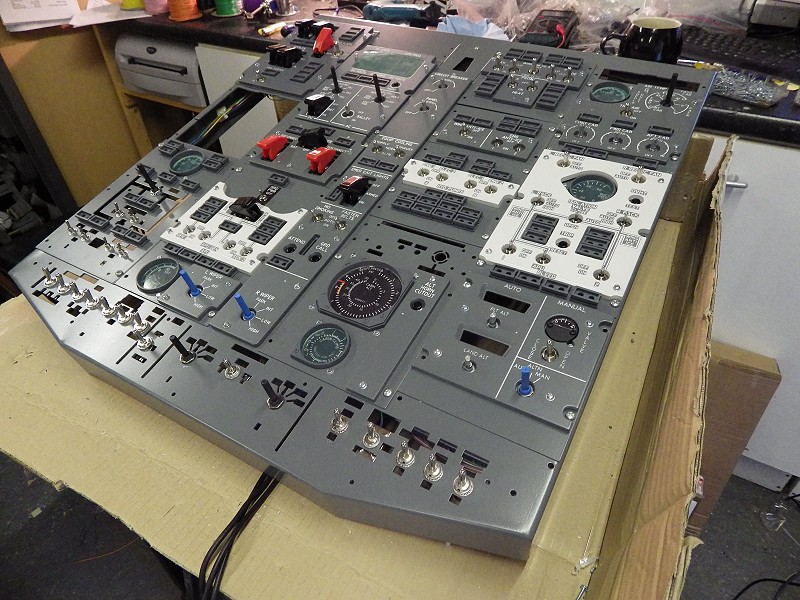
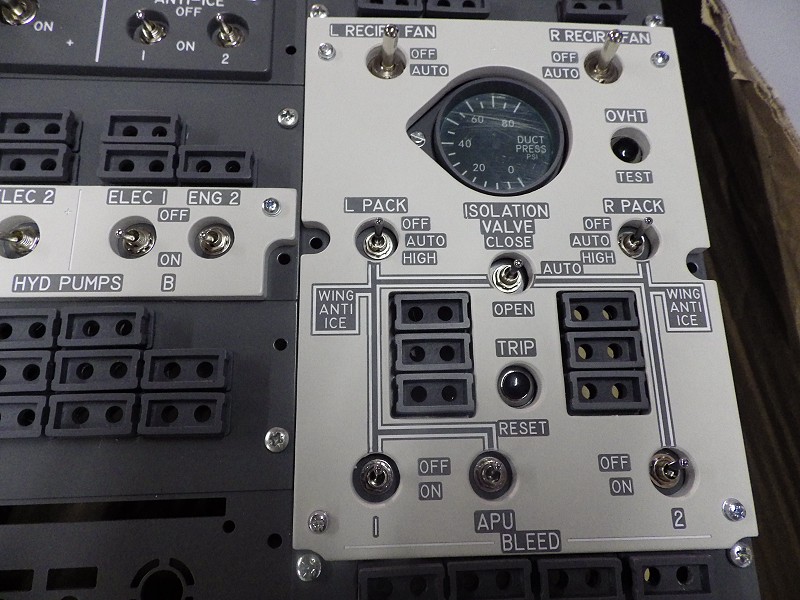
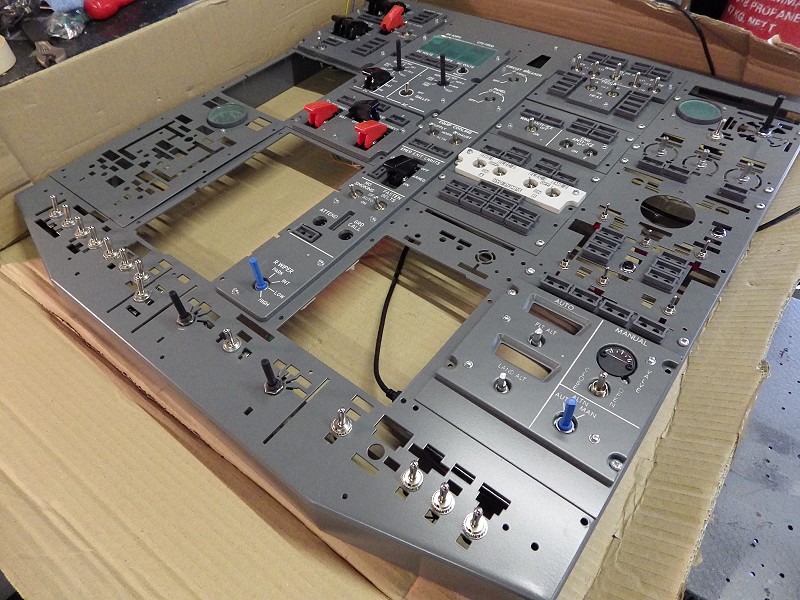
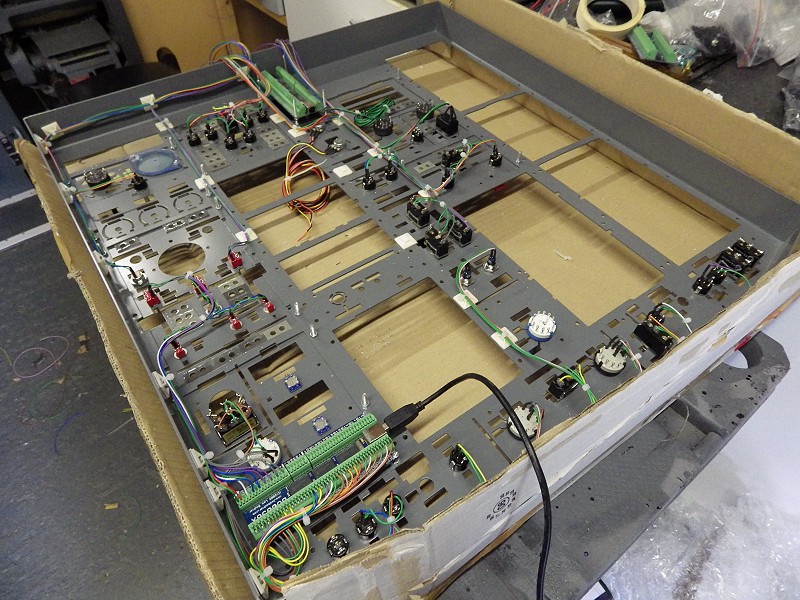
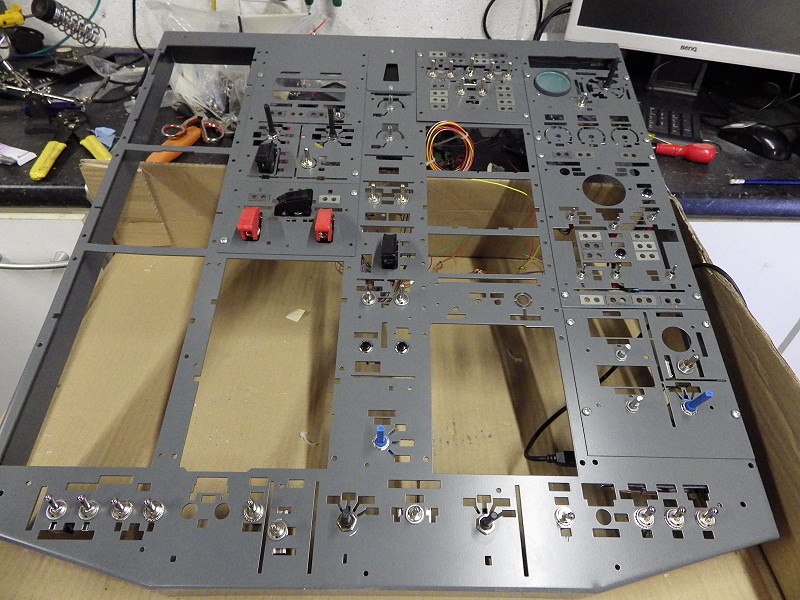
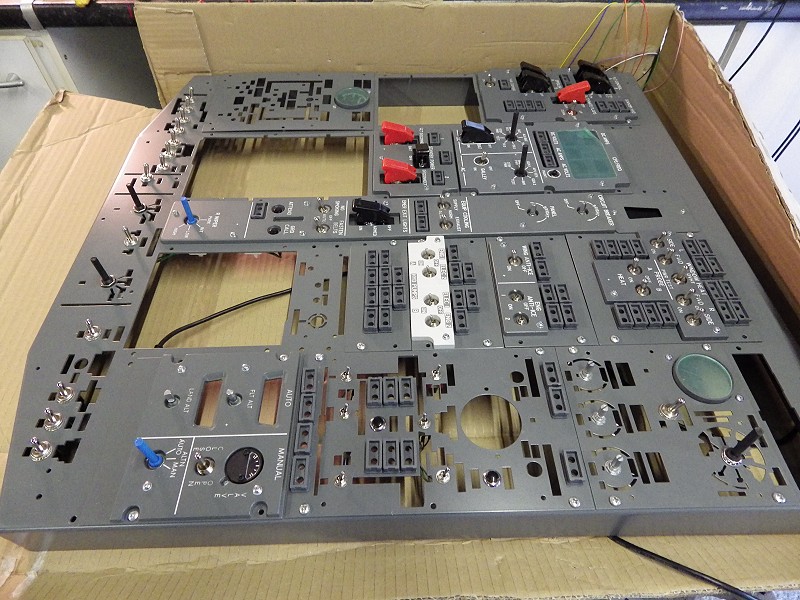
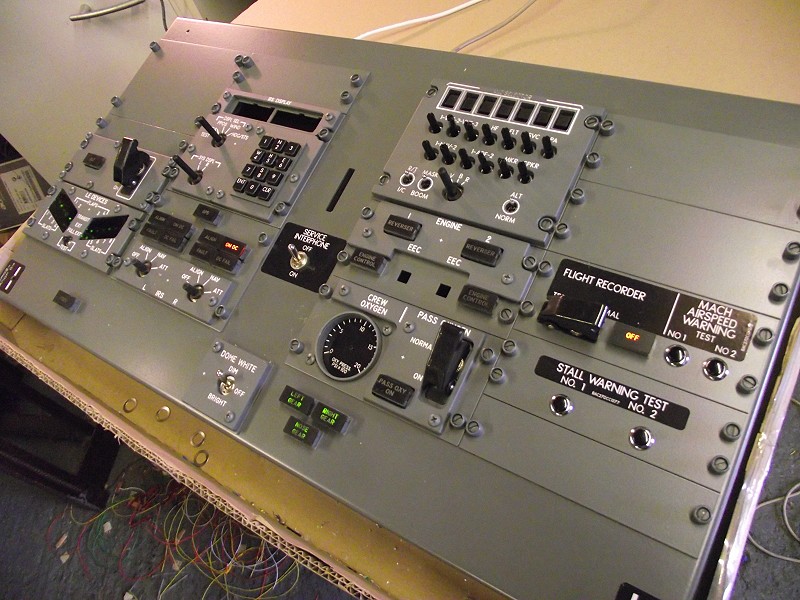
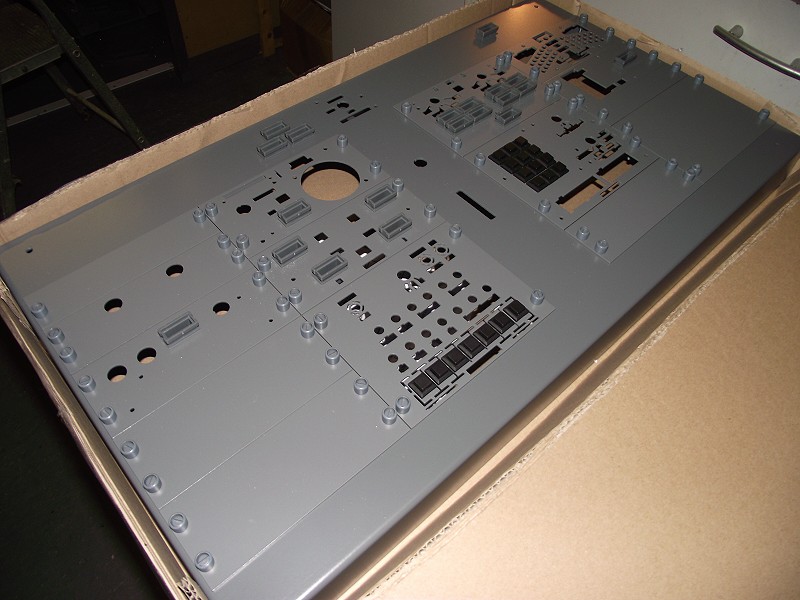
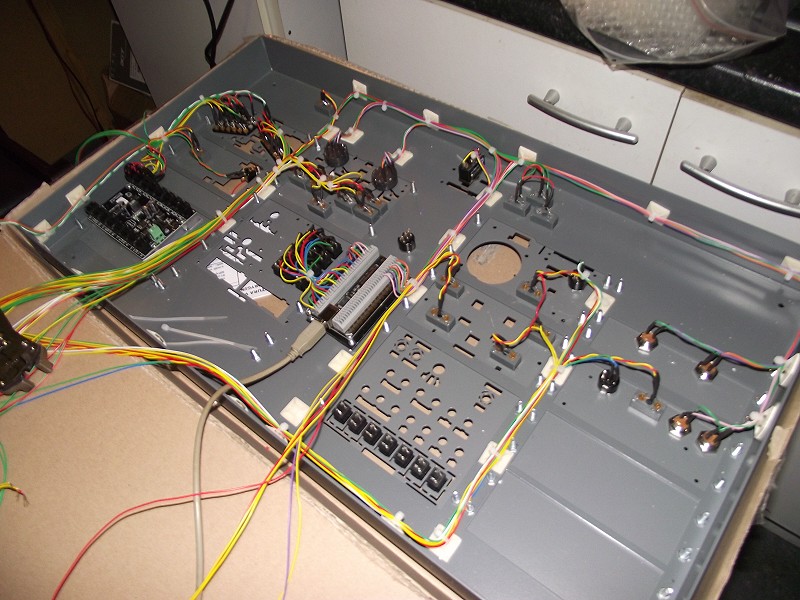
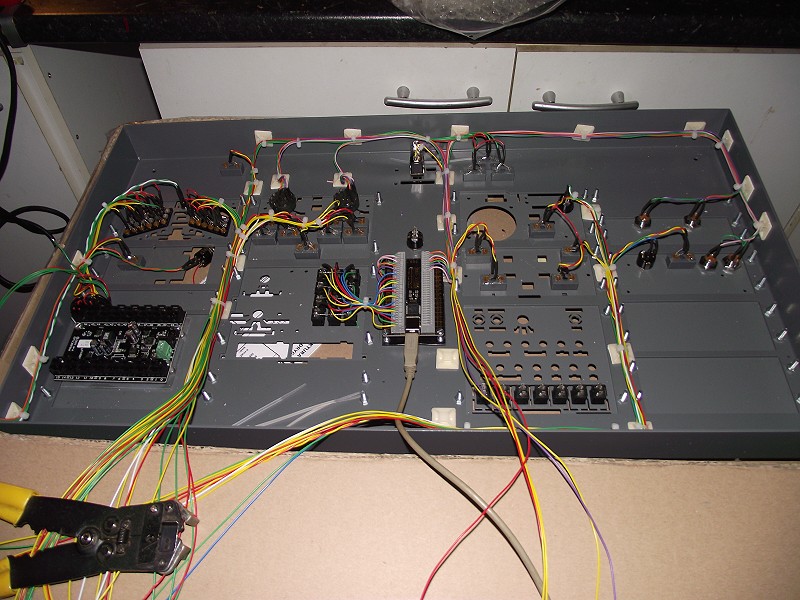
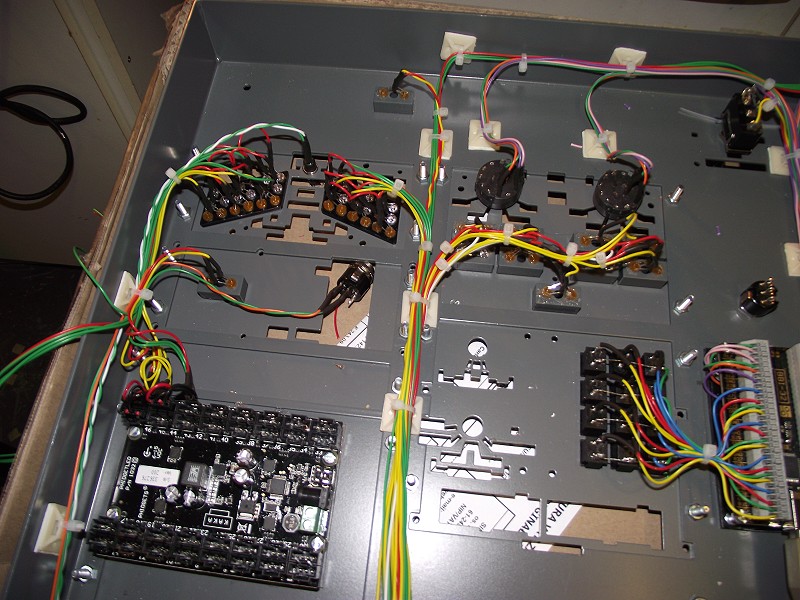
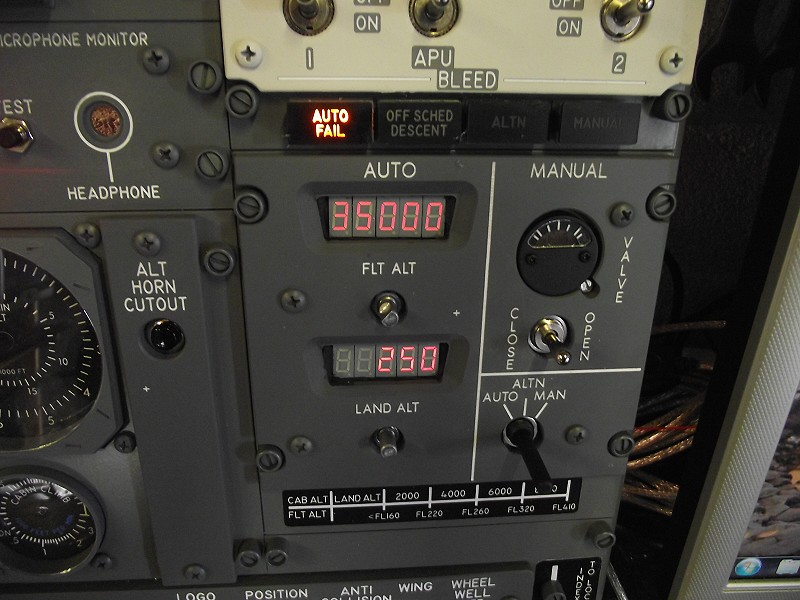
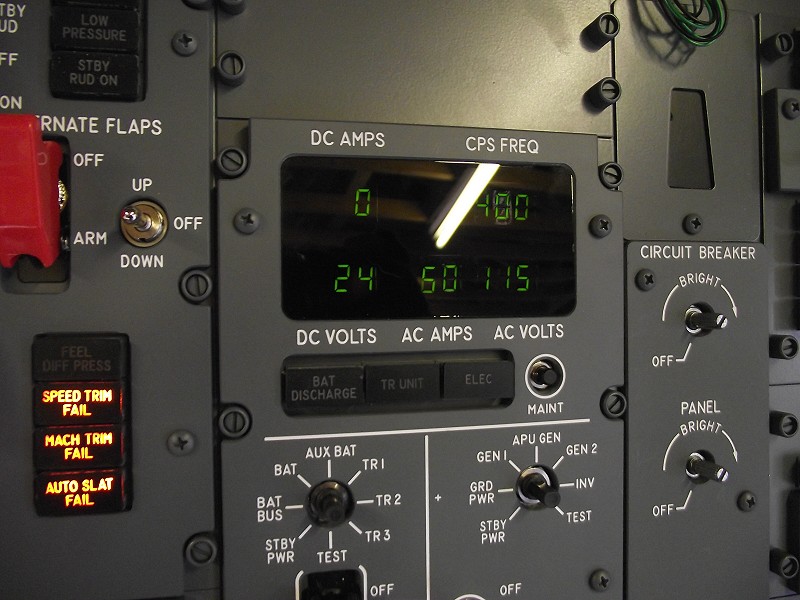
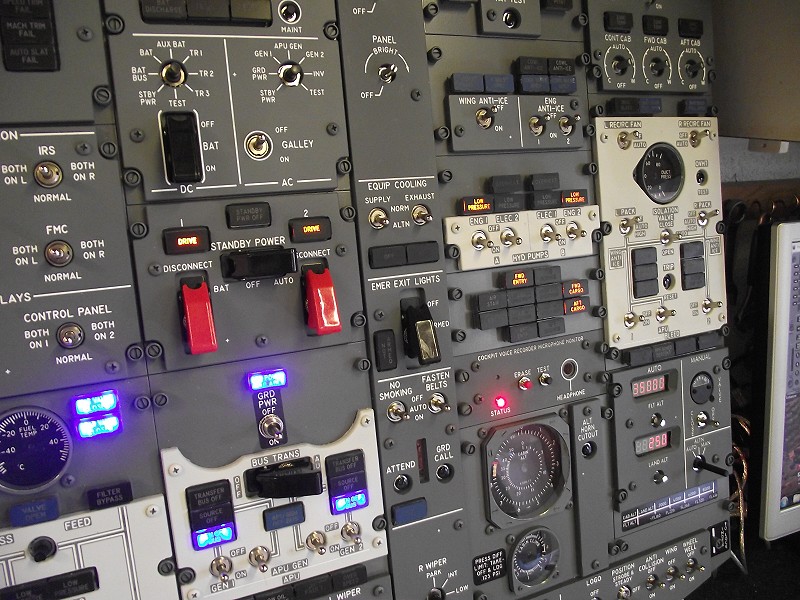
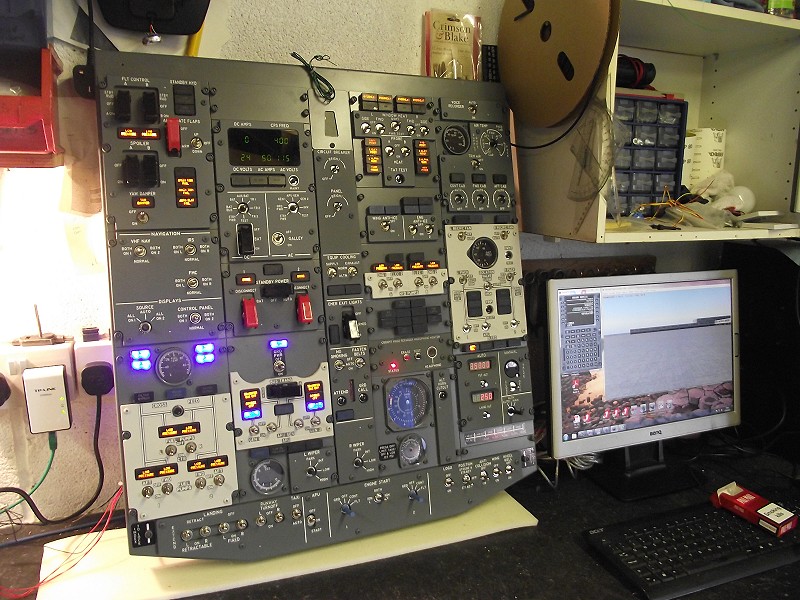
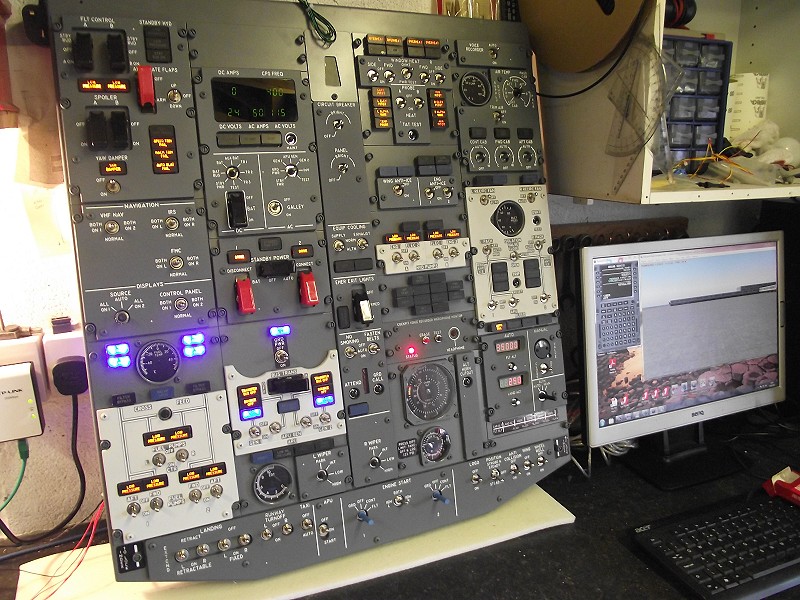
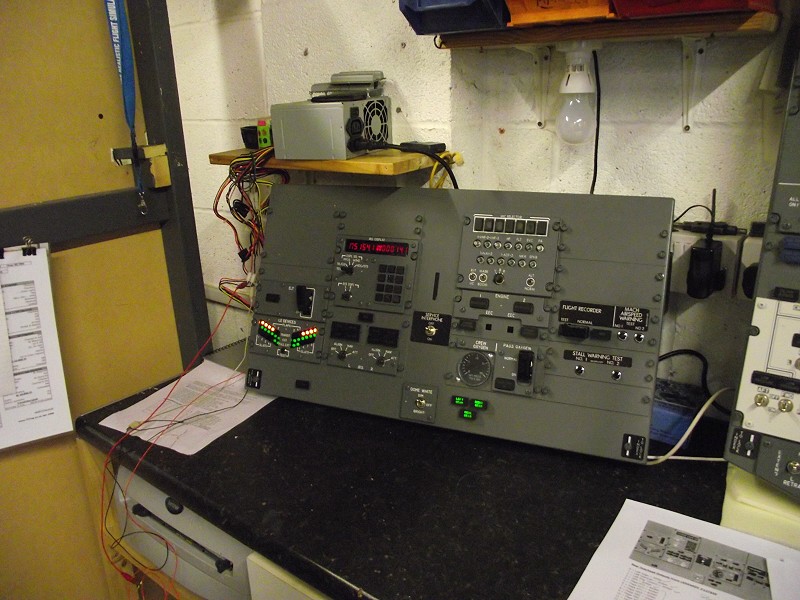
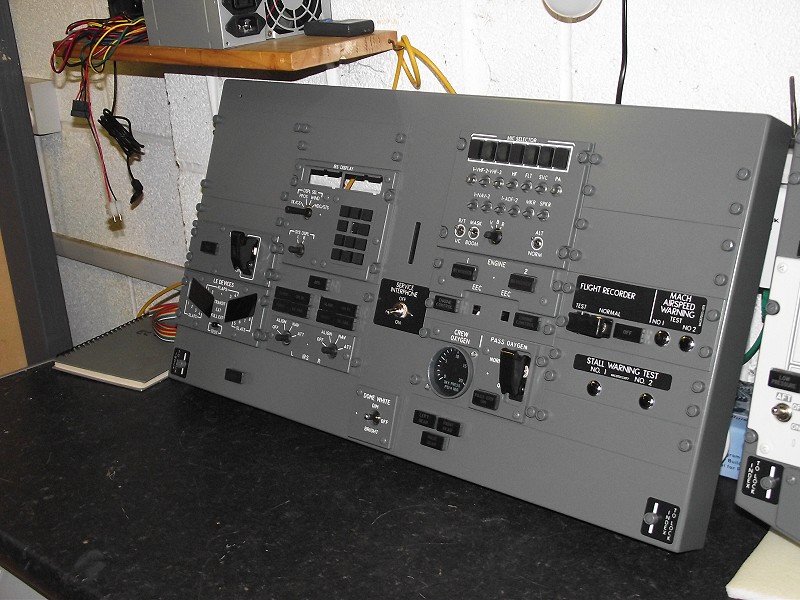
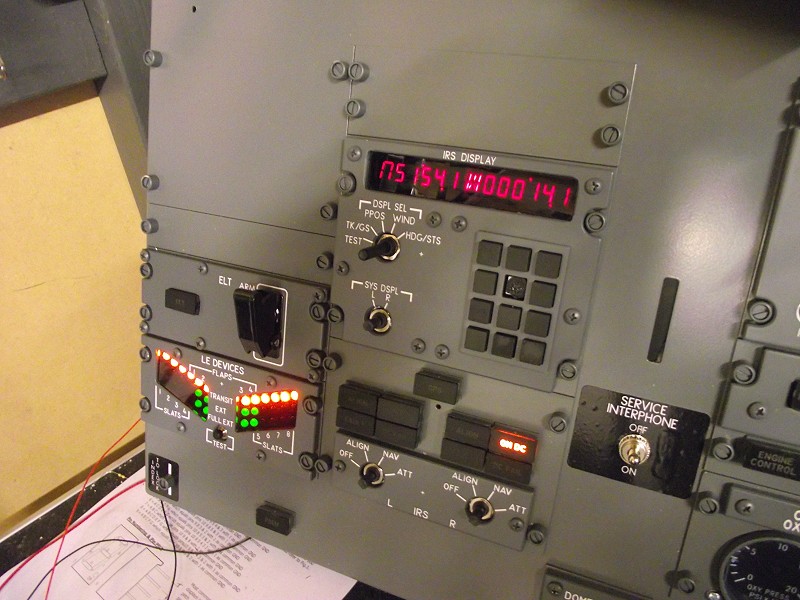
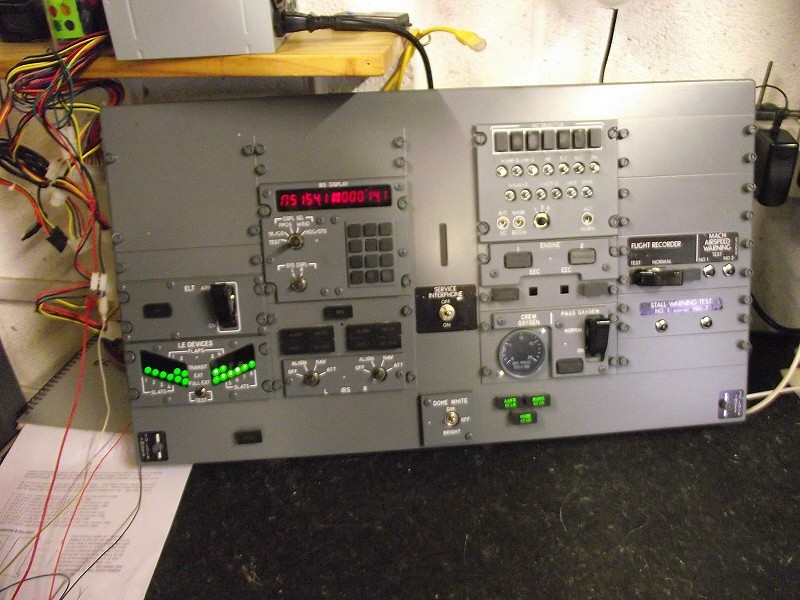
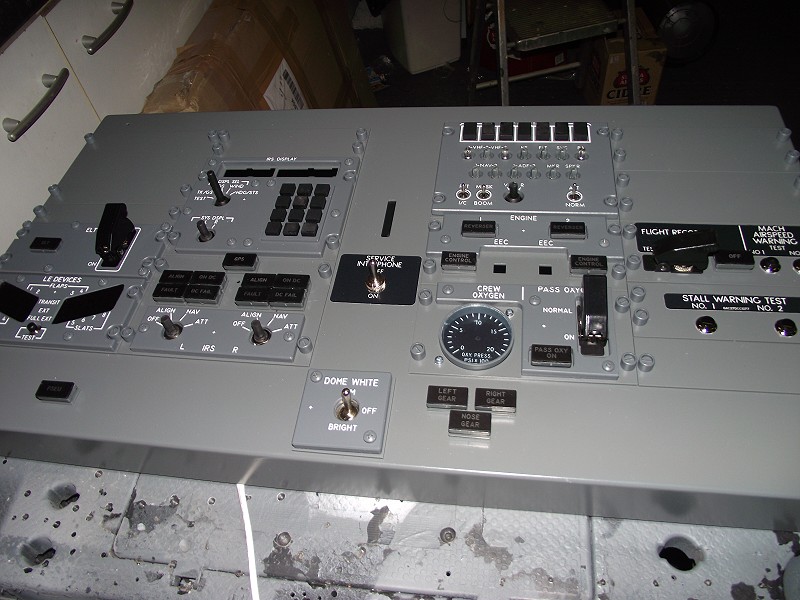
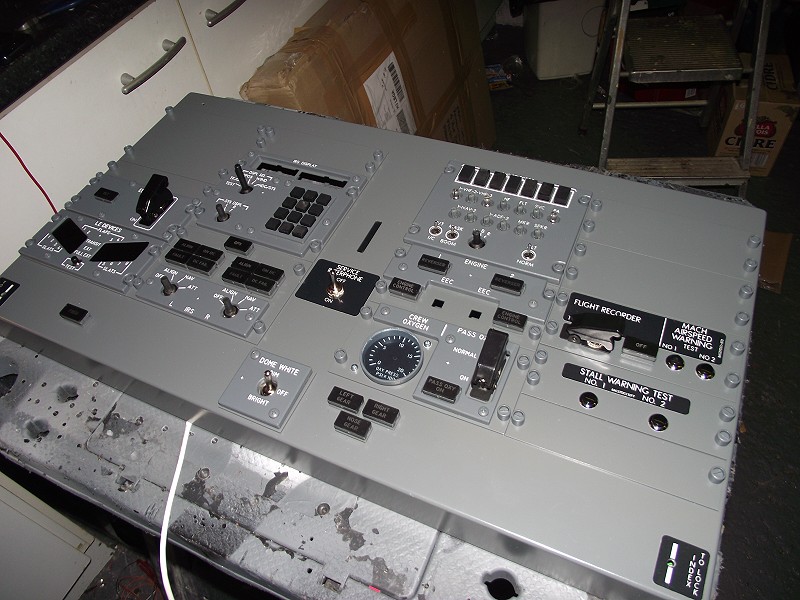
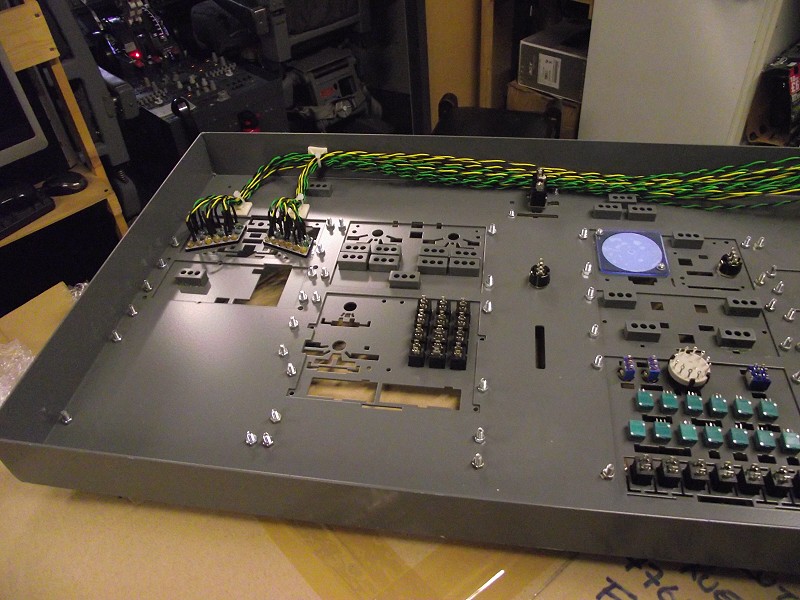
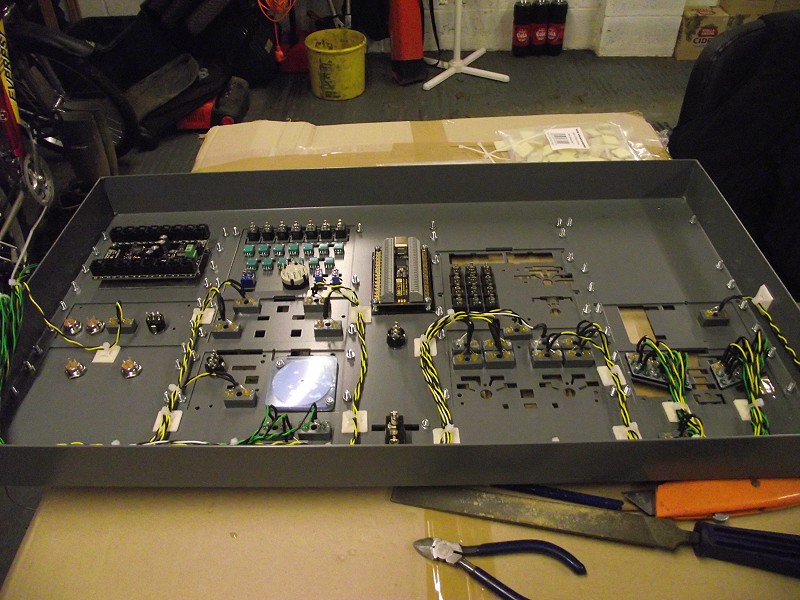
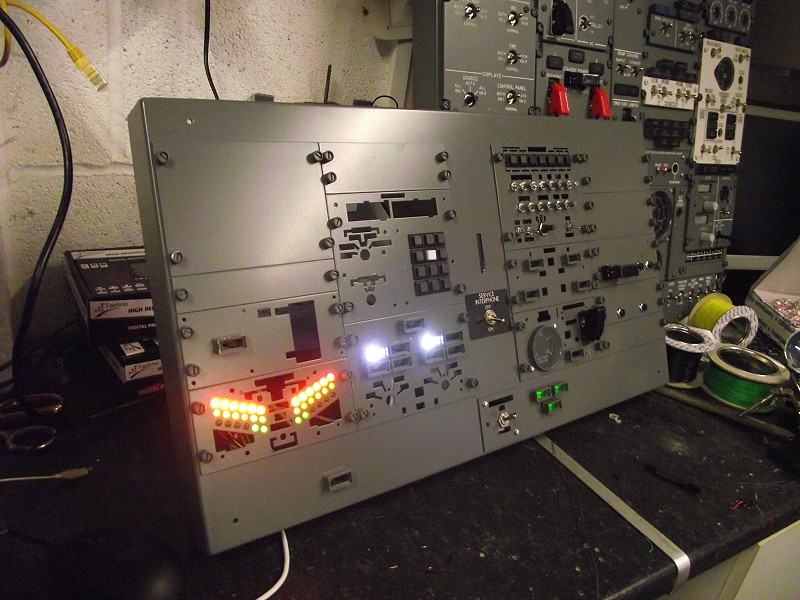
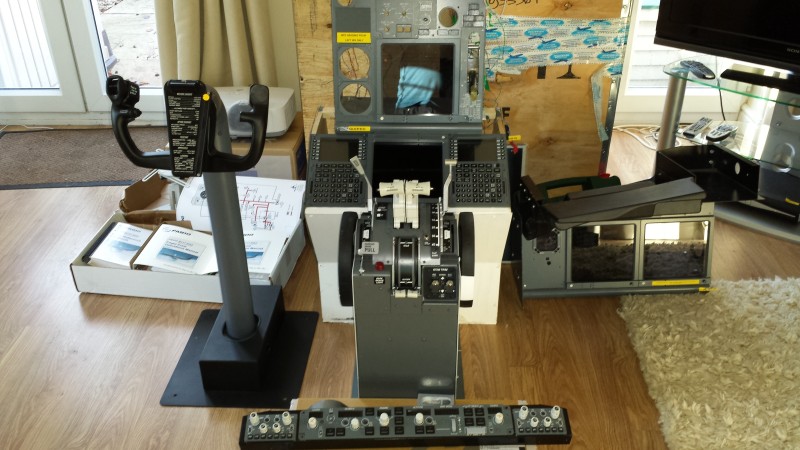
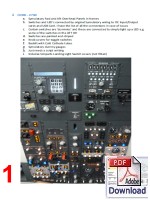
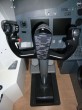
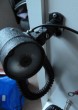
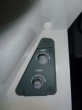
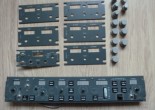
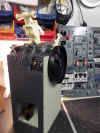
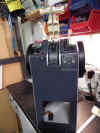
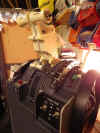
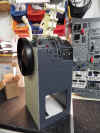
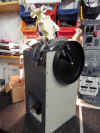
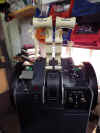
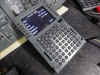
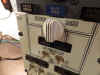
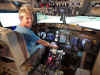
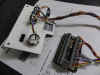
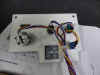
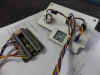
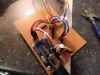
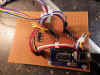
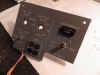
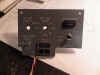
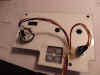
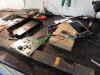
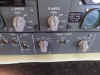
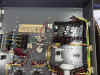
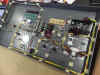
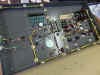
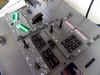
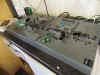
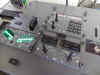
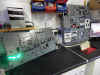
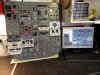
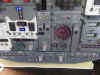
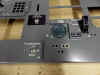
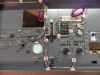
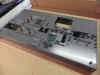
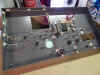
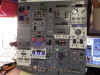
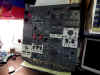
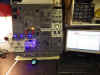
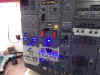
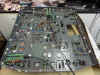
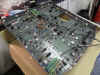
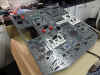
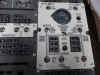
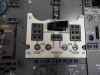
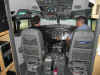
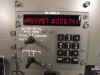
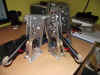
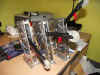
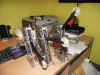
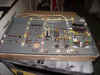
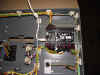
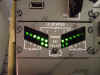
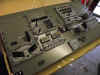
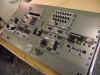
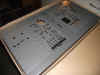
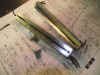
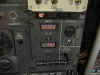
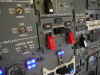
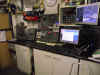
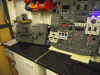
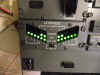
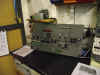
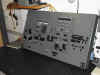
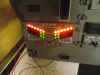
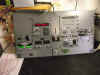
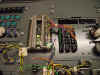
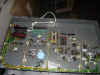
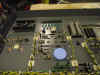
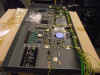
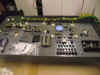
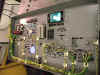
I also have here a Fully
Functioning 'Plug & Play' Simworld Forward Overhead which is wired
for Prosim. I built this for Andrew prior to his
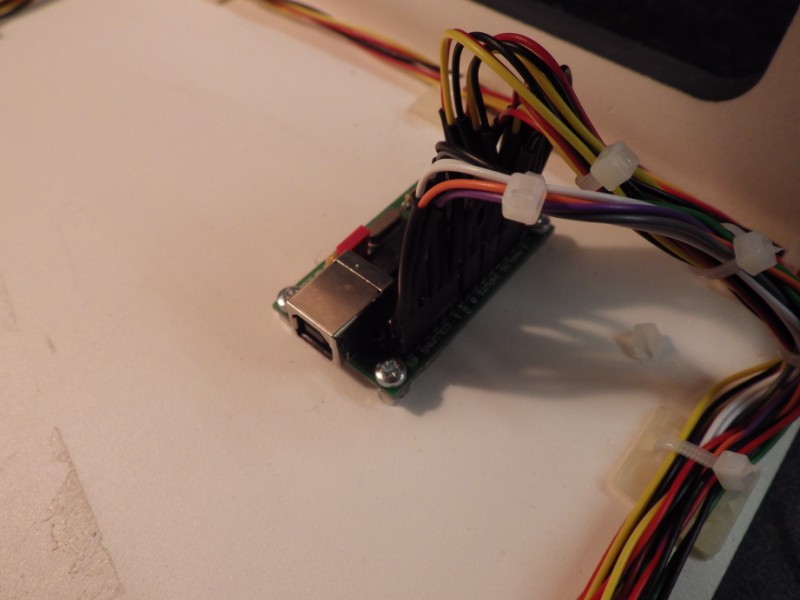
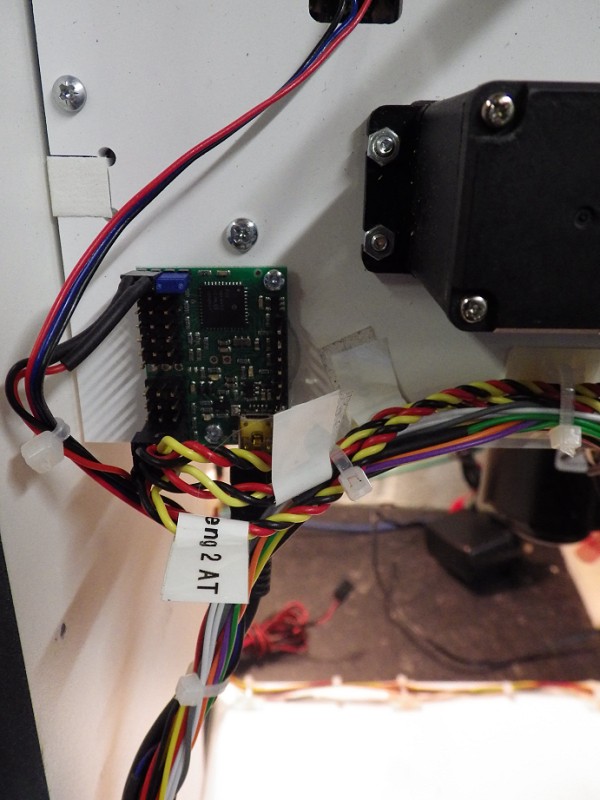
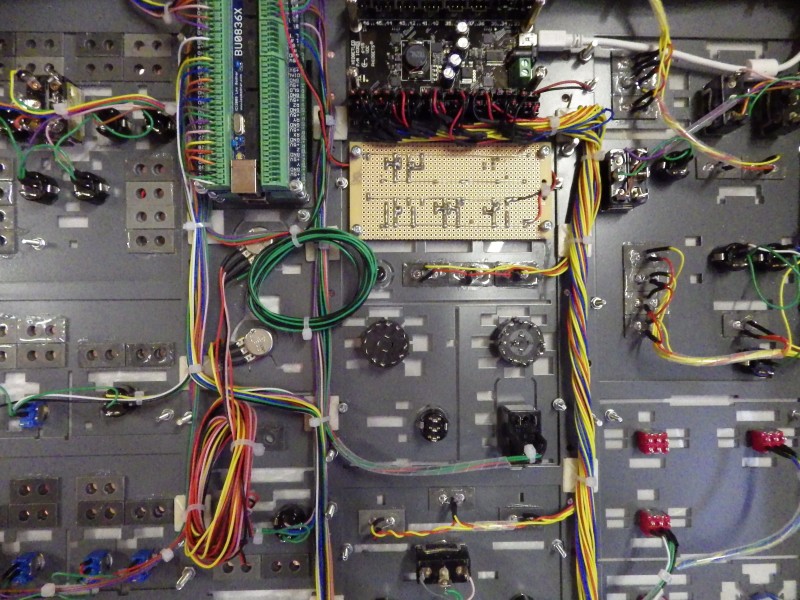
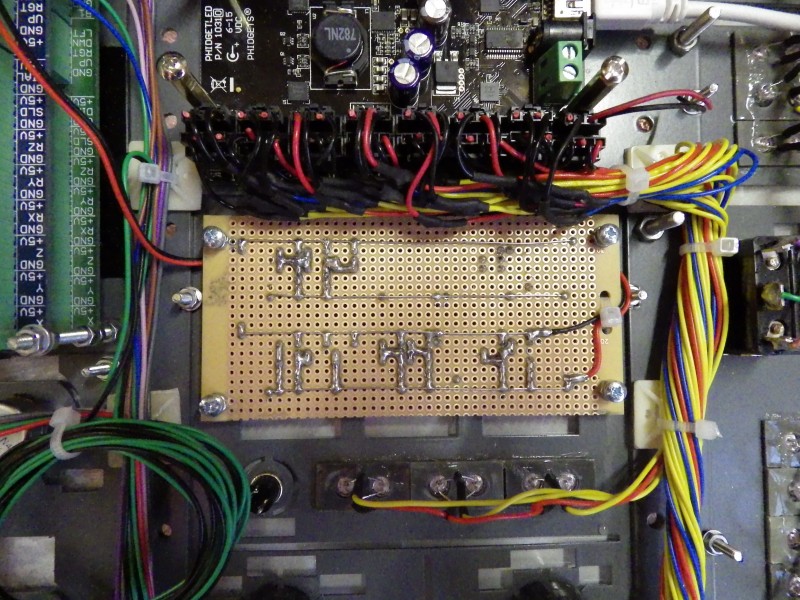
incapacitation. It is 99% connected using 3 x BBI-32 cards
and 2 x LED64's. It has a POLOLU 6 channel servo controller
onboard because Andrew wanted a working APU Gauge.
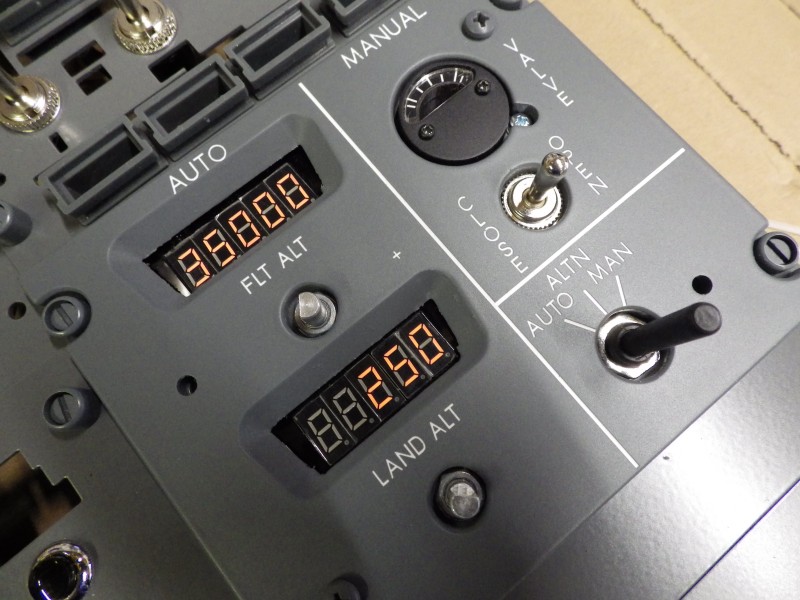
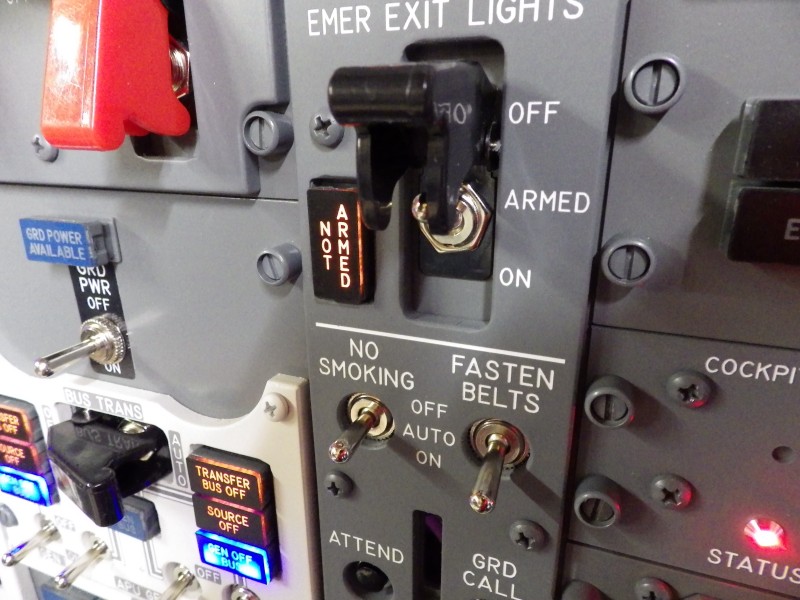
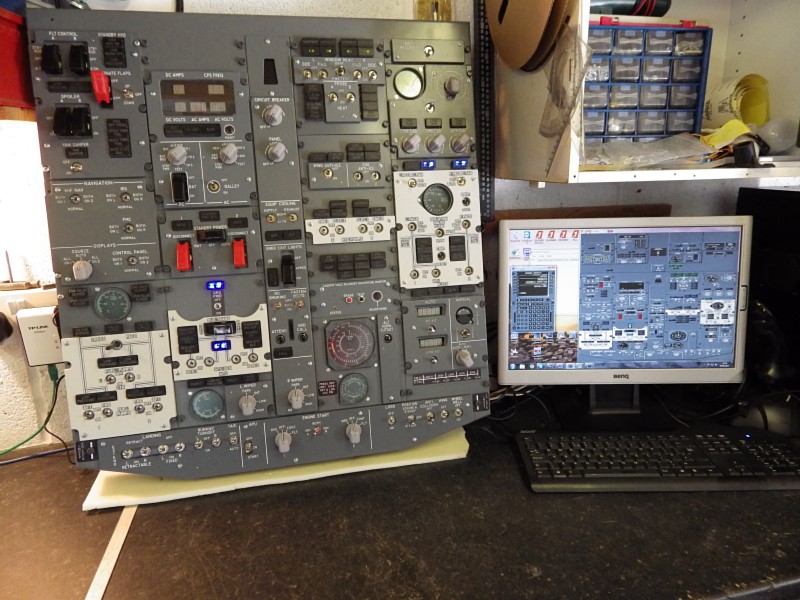
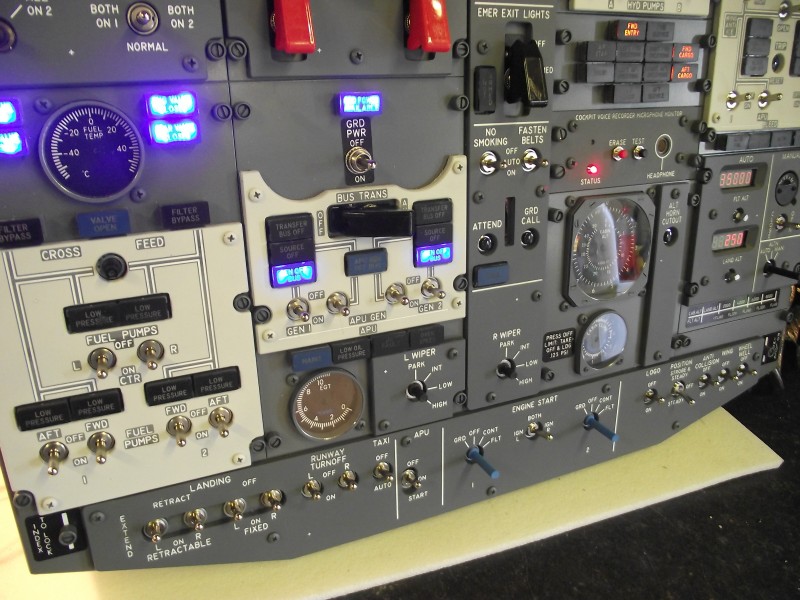
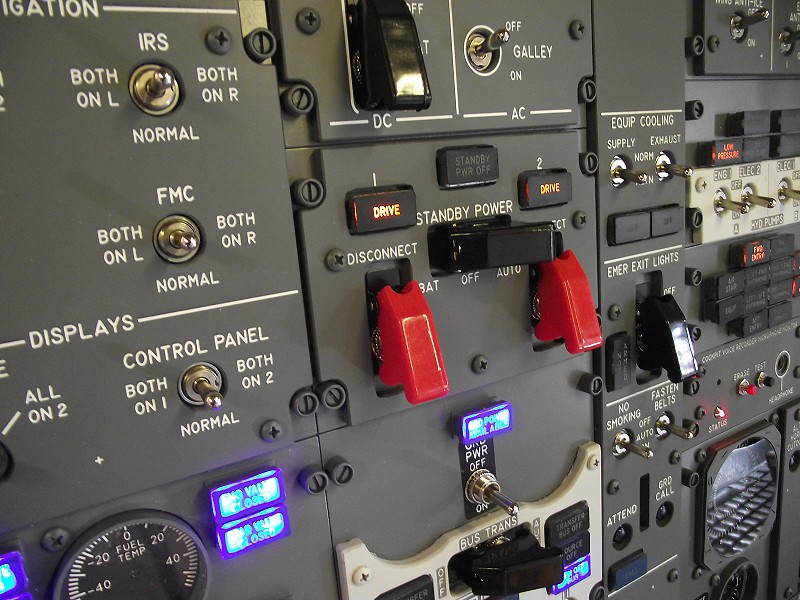
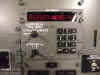
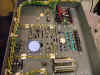
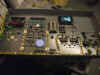
These are just some of the build pics. The panel has since been
completed with all knobs and there's white toggle caps for the
switches. Dummy Electric and Land/Flt Alt
Displays. This is hooked upto my test rig and can be seen
working contact Andrew if of interest HERE
30/11/2013
More
kit for sale. I have
another colleague who due to ill health is having to sell off his sim.
A lot of it never used at all. In fact a lot of it is brand new
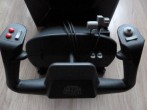
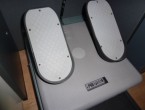
and boxed. ACE Yoke, FSC Throttle, Brand New Simworld
Fully functioning Forward Overhead, Engravity Panels, CPFlight MCP Pro
& EFIS. I have no details as of prices at this
time. More in a few days when I do.
    16/11/2013
Mike Latham has been on and as he is
changing job and having to move house, he has decided that with the
new job he has no time to spend on his cockpit. So he is selling
it. He's looking to part it out and he's got a lot of kit to
shift. There's
a MIP Complete with OC MCP, 2 x FMC's A TQ, an ACE Yoke, A
populated centre pedestal. Some of Dodiano's Control
Wheels. There's Grimes Lights, Some GENUINE Map Lights and
Some Very Sexy Cockpit Panels Like the Map Light Panels and Oxy Mask
Panels & Eyeball Vents. 16/11/2013
Mike Latham has been on and as he is
changing job and having to move house, he has decided that with the
new job he has no time to spend on his cockpit. So he is selling
it. He's looking to part it out and he's got a lot of kit to
shift. There's
a MIP Complete with OC MCP, 2 x FMC's A TQ, an ACE Yoke, A
populated centre pedestal. Some of Dodiano's Control
Wheels. There's Grimes Lights, Some GENUINE Map Lights and
Some Very Sexy Cockpit Panels Like the Map Light Panels and Oxy Mask
Panels & Eyeball Vents.
Just Click On An Image To Open The Respective .pdf File
EVERYTHING SOLD THANKS


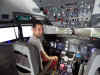
 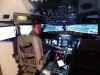  06/11/2013
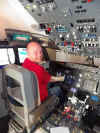
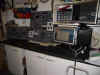
Where have I been for a
month? Well half of that was another 'man v food' trip!Then
I've had several visitors over like today Rhys (How Many Sectors Can I
get in Today) Betteridge for another Ryanair Day..... LIRF -
LGKR, LGKR - LMML and finally LMML - LFMN.
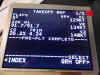
Technology advances, look the charts are on the iPad, I know you're
impressed. 06/11/2013
Where have I been for a
month? Well half of that was another 'man v food' trip!Then
I've had several visitors over like today Rhys (How Many Sectors Can I
get in Today) Betteridge for another Ryanair Day..... LIRF -
LGKR, LGKR - LMML and finally LMML - LFMN.
Technology advances, look the charts are on the iPad, I know you're
impressed.
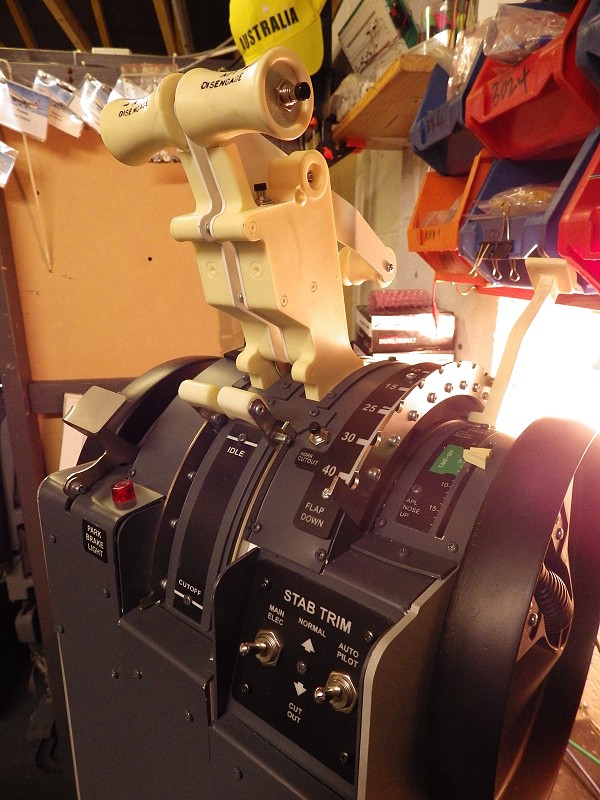
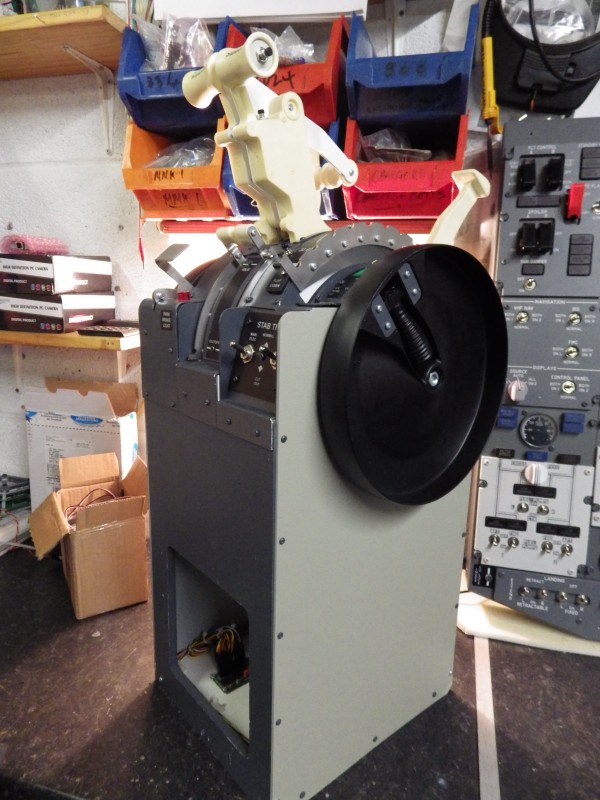
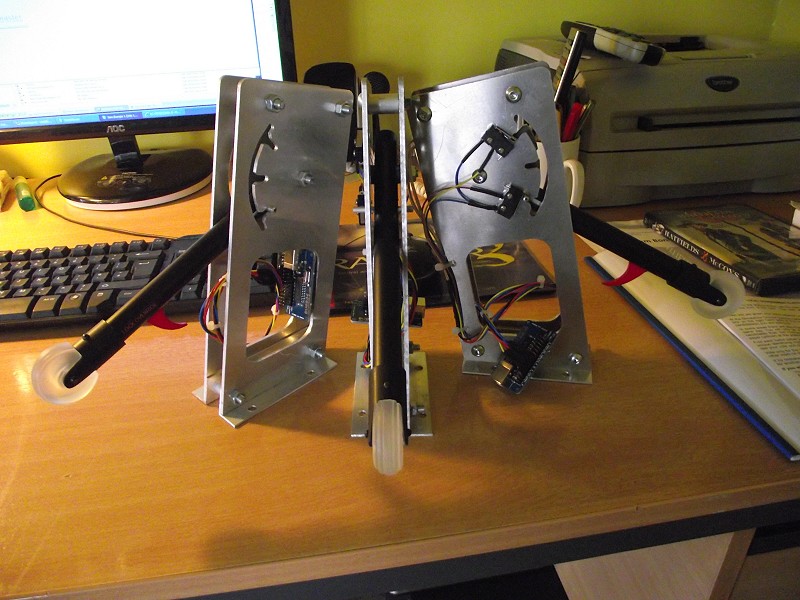
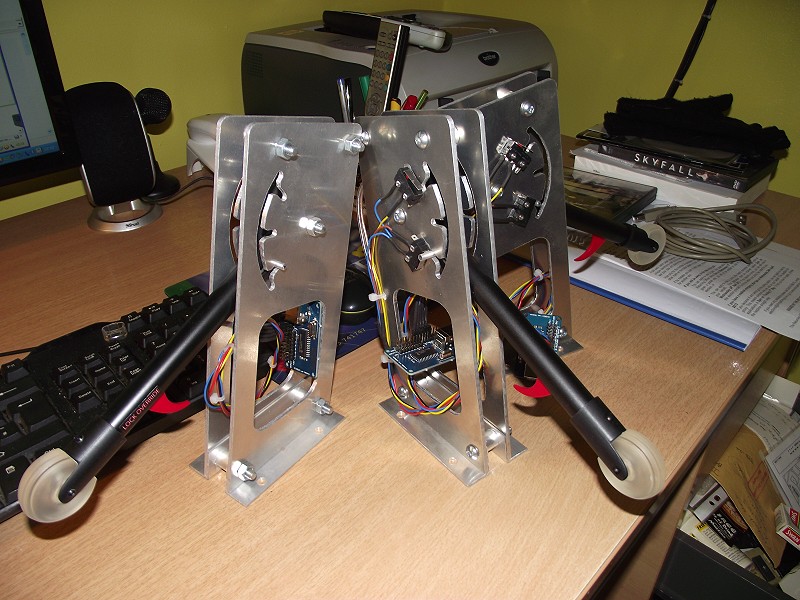
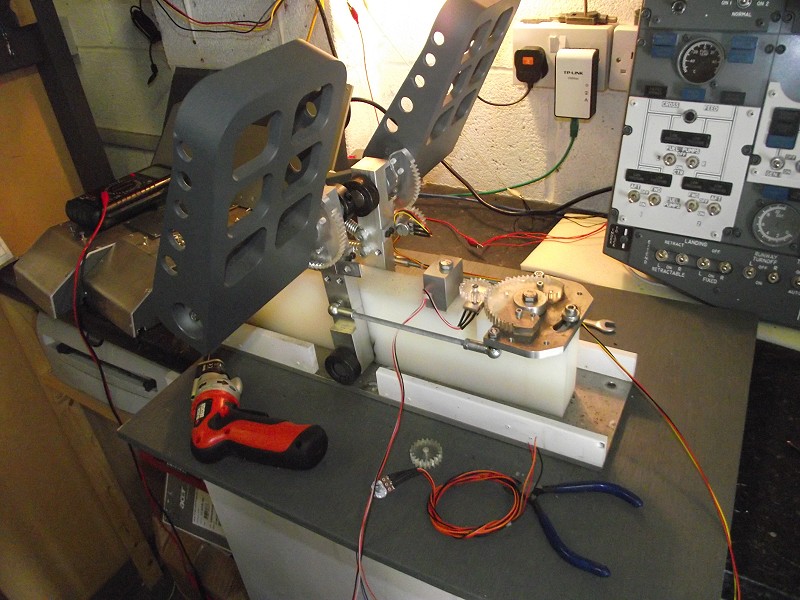
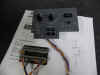
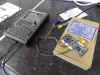
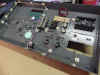
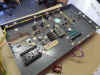
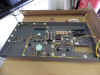
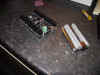
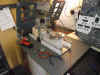
And talking of
Rhys B, he's acquired a Poldragonet TQ from the old FSBUS era.
So he asked me if it was possible to get the servo's working with the
POLOLU card. Dont know says I, lets have a look.
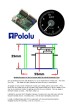
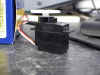
Well the TQ has 3 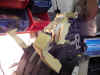 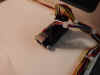 servo's
built in. I think the term for the servo's is ROBUST
:o) But it can be done. All the old
electronics stripped out, the servo's connected to a POLOLU Maestro 12
channel servo controller and setup in Prosim way to
go. All the normal axes and buttons have
been connected to a 'bog standard' BU0836 card. The axes
calibrated and assigned in FSUIPC and the buttons assigned in PROSIM. servo's
built in. I think the term for the servo's is ROBUST
:o) But it can be done. All the old
electronics stripped out, the servo's connected to a POLOLU Maestro 12
channel servo controller and setup in Prosim way to
go. All the normal axes and buttons have
been connected to a 'bog standard' BU0836 card. The axes
calibrated and assigned in FSUIPC and the buttons assigned in PROSIM.
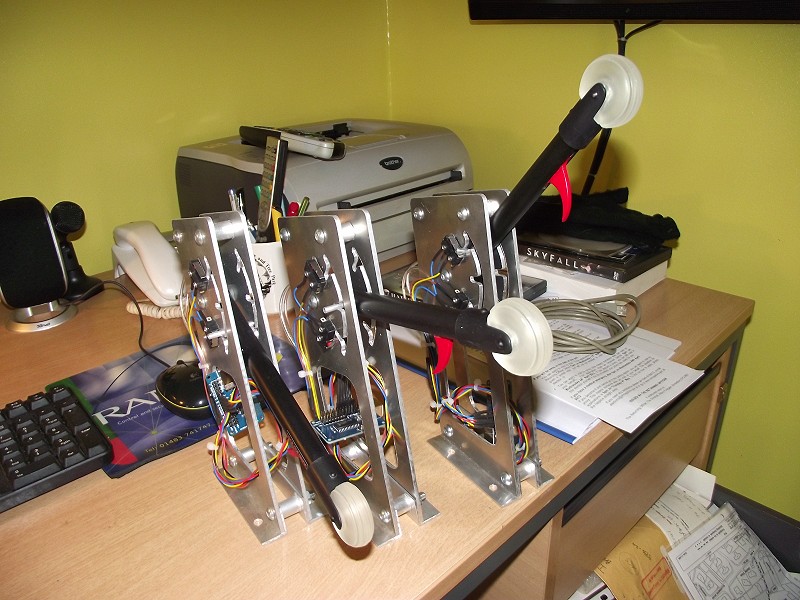
After some initial 'pissing about' with the settings in the POLOLU
Control Centre and Prosim, it does actually work.
The look on Rhys's face was priceless as 2 little boys stood there
watching the levers move. Level changes Up & Down and
also dropping the gear to see the power increase - MAGIC
:o) So, if you are having issues with your
Poldragonet/FSC Servo Controlled TQ, you can convert it to POLOLU and
your problems are over.
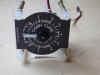
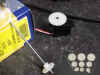
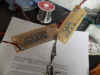
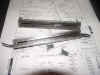
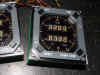
02/10/2013
Thanks
chaps everything sold
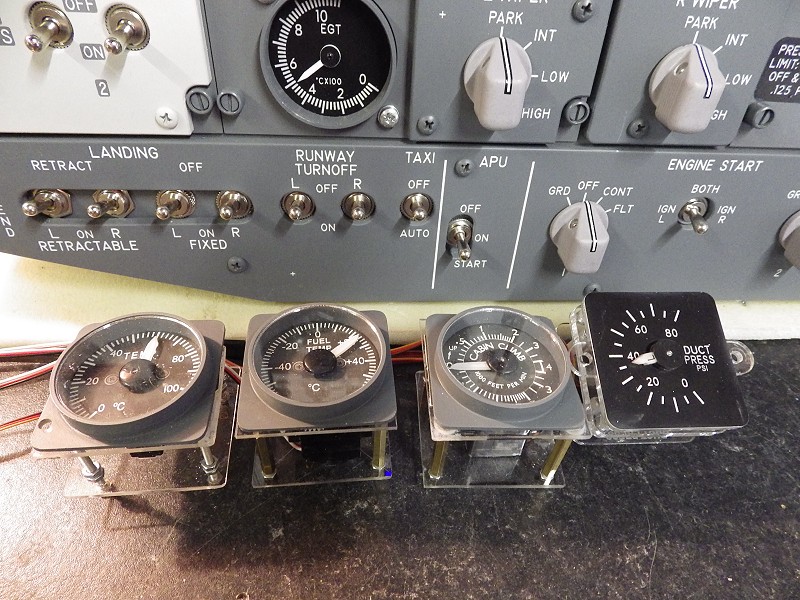
by the next day, can't believe it :o) Right managed
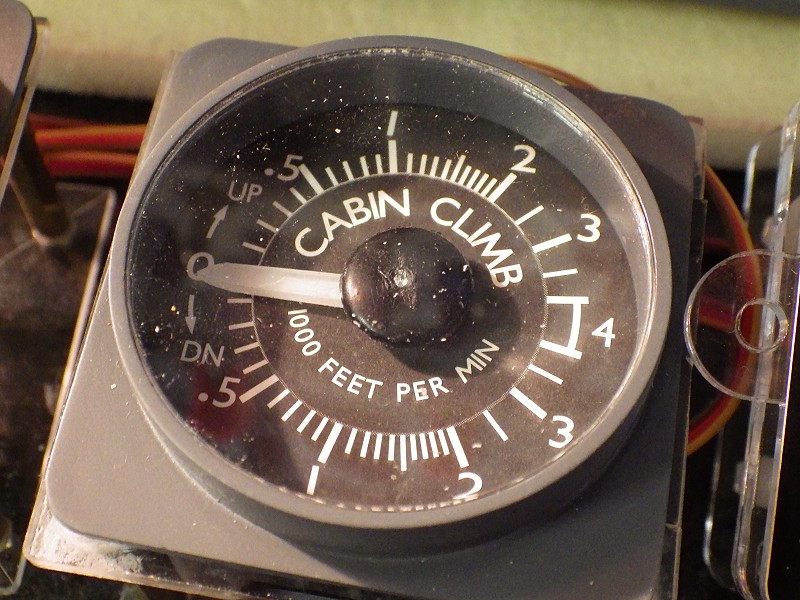
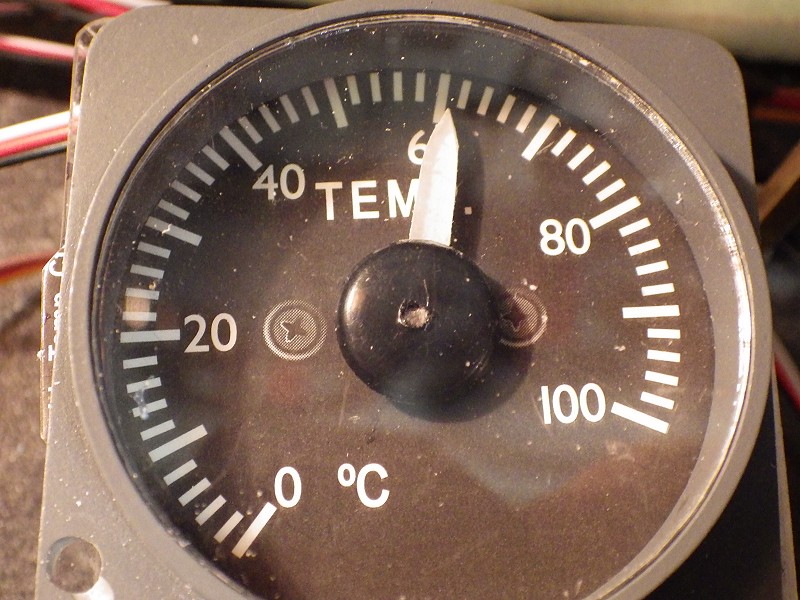
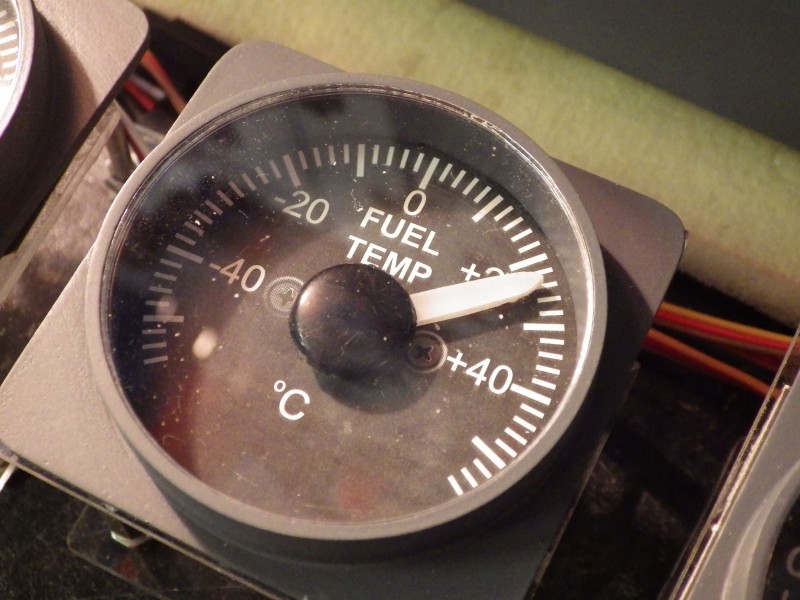
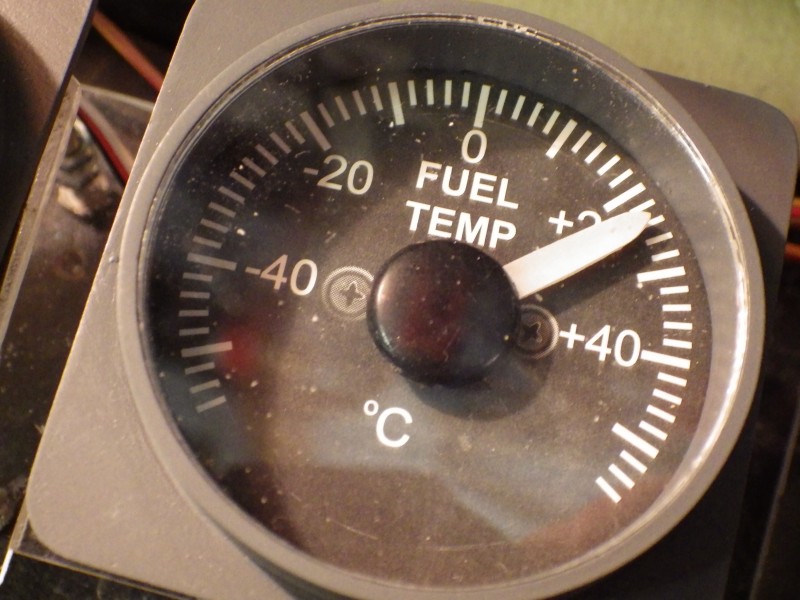
to finish all the gauges and get them working in Prosim. Just
some minor 'finishing' to do. I want to change the black needle
hubs as i'm not 100% happy with drilling them to fit the
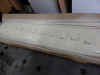
shaft. And, the gauge glass position is dependant on where
the faceplate is attached. So I've been filing the perspex so it
fits tidy on the back plate, hence the white dust. Overall I am
very pleased with the end result. The pictures dont really do
them justice. Cabin Temp & Fuel Temp are resistance gauges
and zoom into life when the battery is turned on.


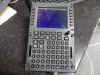
OK, the
box from Canada contained 2 x FDS CDU's. I know, I'm nothing but
a 'Sim-Slut'. They are F*****g Awesome. I've fitted them
and got them working. No pics yet as I've been too busy playing with
them. I'll take some pics over the weekend.
24/09/2013
I've been having a clearout and I've
got some kit For Sale. Click HERE
or on the FOR SALE Image to check it out. Engravity
CDU, Dummy CDU, Chart/Map Light Panels & Knobs.

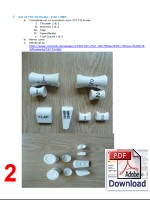
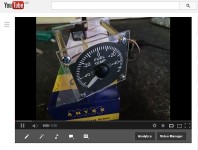
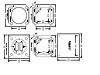
  21/09/2013
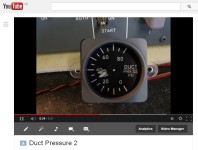
I
decided against going down the road
of building my own dual needle gauge because the prototype was just
too bulky. You have to bury the servos inside the gauge to make
it compact and when I balanced the time and effort against the cost,
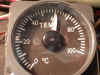
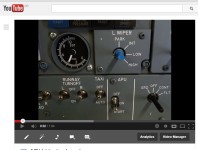
it was cheaper to buy them from Filip at Simworld. Here's
the results from the first test with the Duct Pressure
Gauge. Just click on the image and go to Youtube to watch
the action. Just by turning Bleeds & Packs On/Off, you get
the desired result - oh yes you do :o) 21/09/2013
I
decided against going down the road
of building my own dual needle gauge because the prototype was just
too bulky. You have to bury the servos inside the gauge to make
it compact and when I balanced the time and effort against the cost,
it was cheaper to buy them from Filip at Simworld. Here's
the results from the first test with the Duct Pressure
Gauge. Just click on the image and go to Youtube to watch
the action. Just by turning Bleeds & Packs On/Off, you get
the desired result - oh yes you do :o)
More on the box from Canada next time, just so busy......
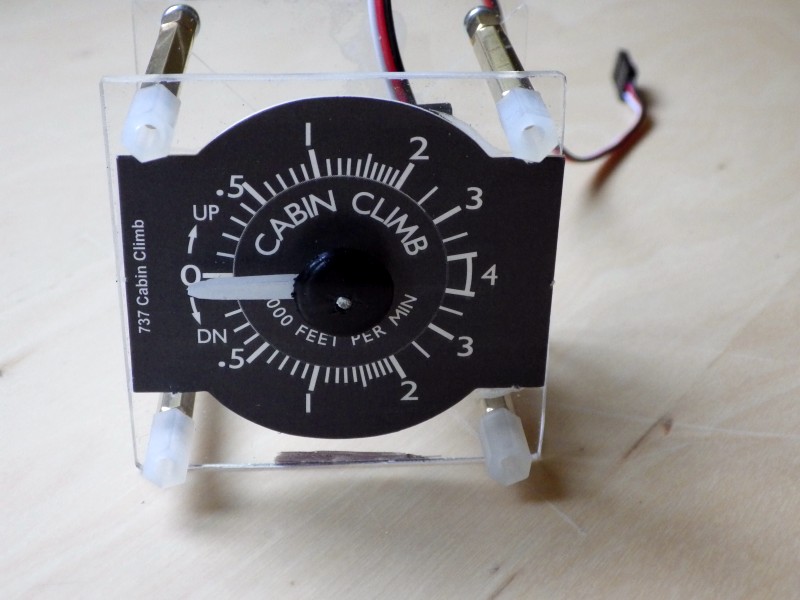
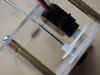
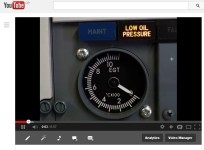
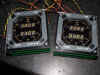
 16/09/2013
Busy few days with people
here Thurs, Friday and Saturday, but I've managed to finish the APU
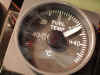
EGT, Fuel Temp, Cabin Temp and Cabin Climb Gauges. Plans are
afoot for the dual needle gauges as well, but i need to get more
servos and the right size standoffs. More on that at a
later date. Click on the Image on the left and i'll tell
you how to make the gauges in the .pdf.
I'm using the POLOLU
12 channel Maestro card to control them. And
today, i'm expecting a courier here with a parcel from Canada
:o) It's a suprise - watch this space 16/09/2013
Busy few days with people
here Thurs, Friday and Saturday, but I've managed to finish the APU
EGT, Fuel Temp, Cabin Temp and Cabin Climb Gauges. Plans are
afoot for the dual needle gauges as well, but i need to get more
servos and the right size standoffs. More on that at a
later date. Click on the Image on the left and i'll tell
you how to make the gauges in the .pdf.
I'm using the POLOLU
12 channel Maestro card to control them. And
today, i'm expecting a courier here with a parcel from Canada
:o) It's a suprise - watch this space

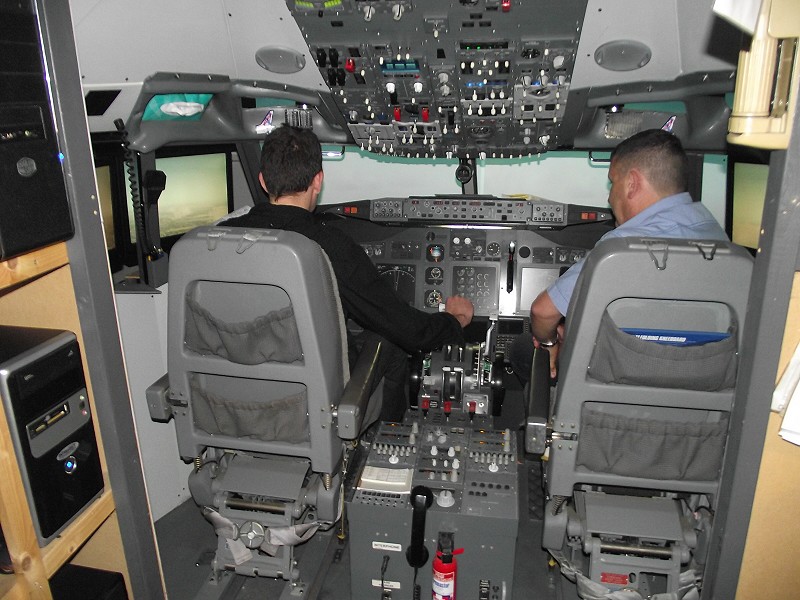
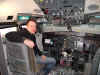
  14/09/2013
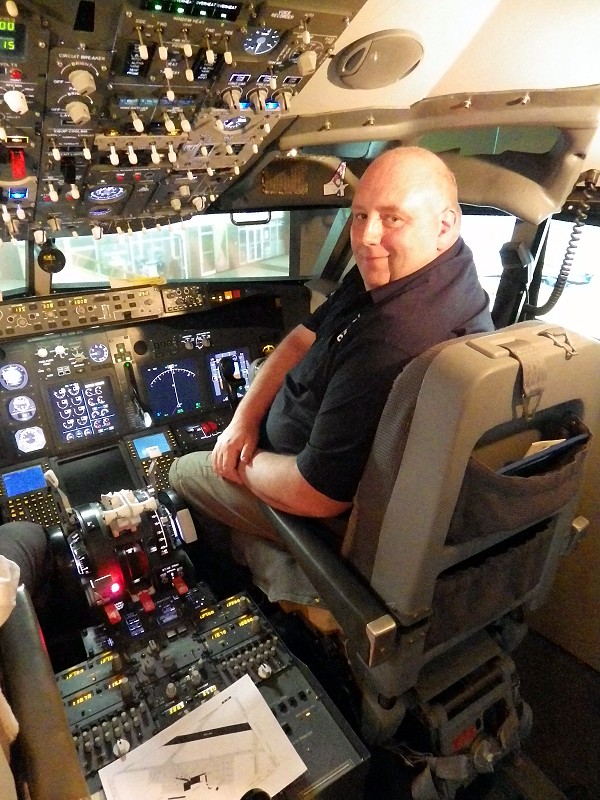
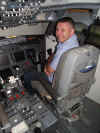
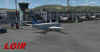
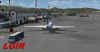
Well Friday, Rhys B was
in for another RYANAIR Day. 3 sectors EDDH to LOWI, LOWI
to LYTV and finally LYTV to LGAV. 5 hours 35 minutes on
duty. I just love it when somebody comes over who really
knows how to fly. He did let me taxi to the gate at
Athens. A good time and Fish and Chips had by all.
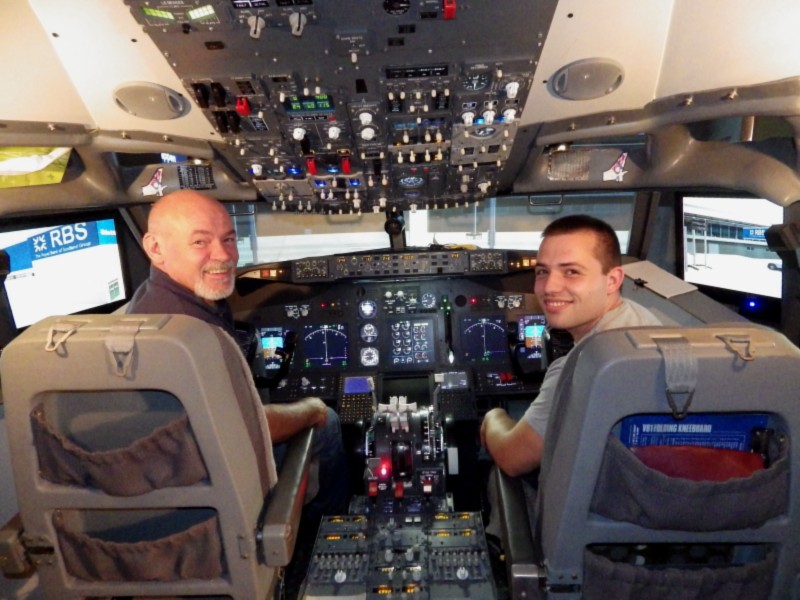
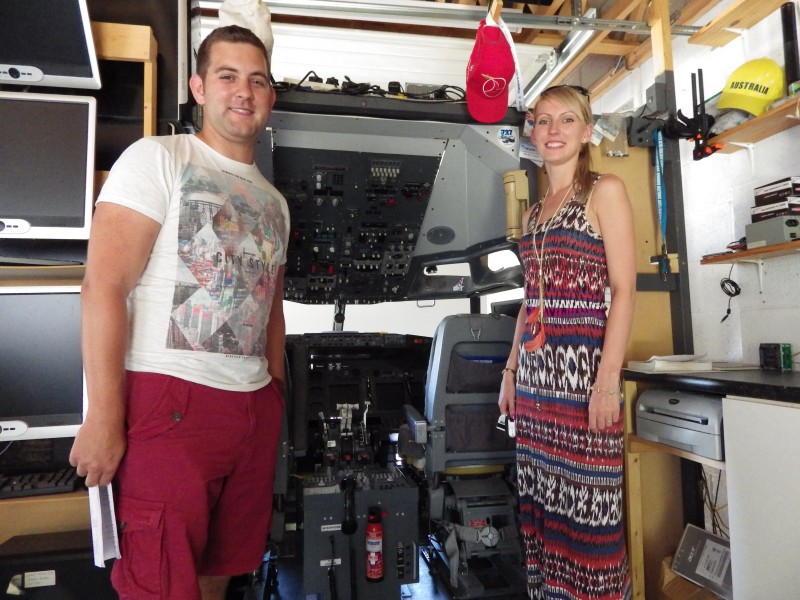
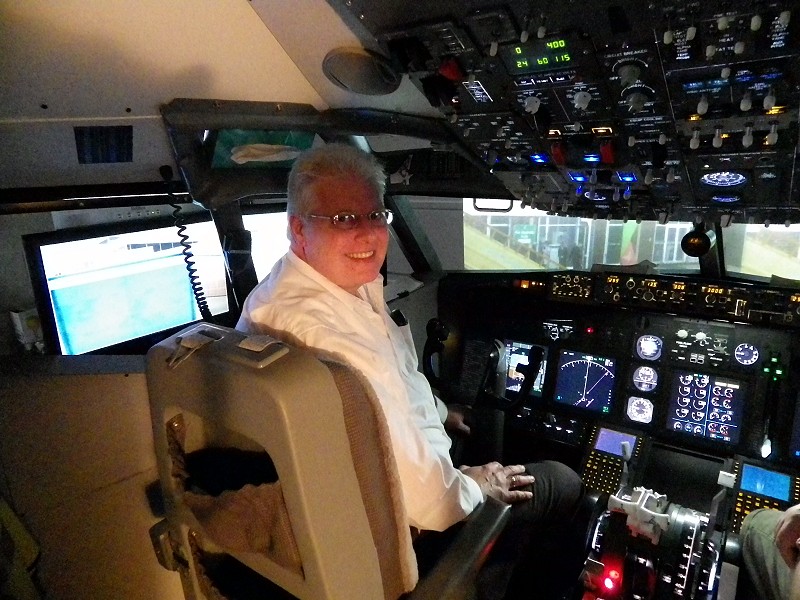
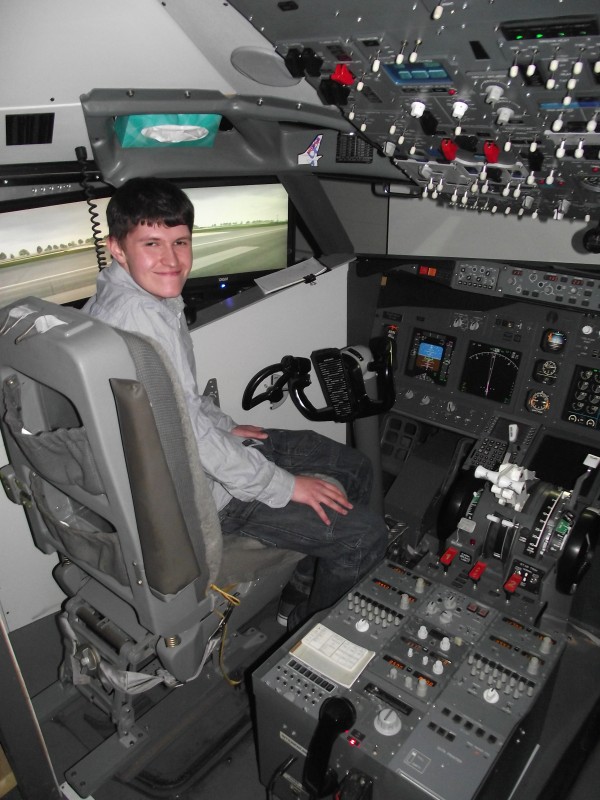
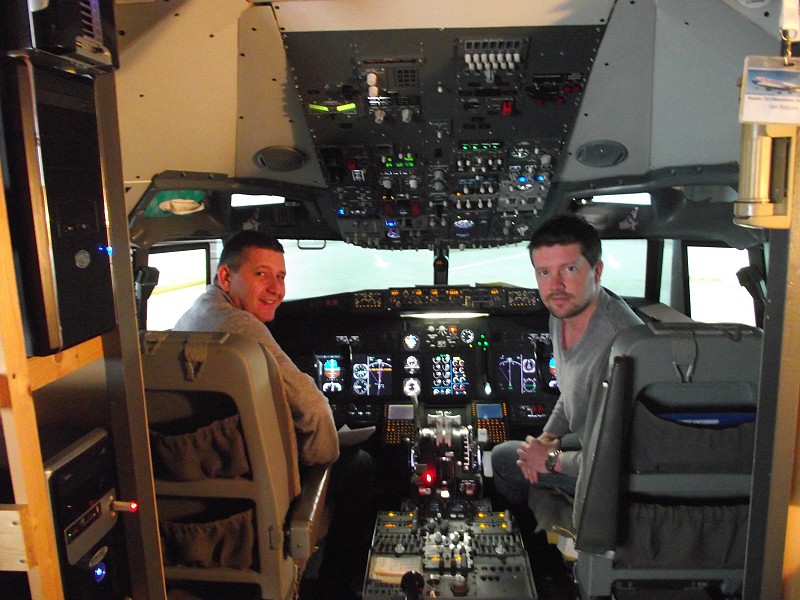
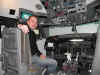
Thursday, Father & Son Team Chris (left) & Lewis Collins were
in from Coventry. These guys are building a Beech Twin and came
to see if they could pick up a few tips and to have a bash at flying
the sim..... I have to be honest they were both very good having
an hour each actually hands on flying doing Climbs, Descents and
Turns. Chris actually did a Hands On Landing at Edinburgh
:o) 14/09/2013
Well Friday, Rhys B was
in for another RYANAIR Day. 3 sectors EDDH to LOWI, LOWI
to LYTV and finally LYTV to LGAV. 5 hours 35 minutes on
duty. I just love it when somebody comes over who really
knows how to fly. He did let me taxi to the gate at
Athens. A good time and Fish and Chips had by all.
Thursday, Father & Son Team Chris (left) & Lewis Collins were
in from Coventry. These guys are building a Beech Twin and came
to see if they could pick up a few tips and to have a bash at flying
the sim..... I have to be honest they were both very good having
an hour each actually hands on flying doing Climbs, Descents and
Turns. Chris actually did a Hands On Landing at Edinburgh
:o)
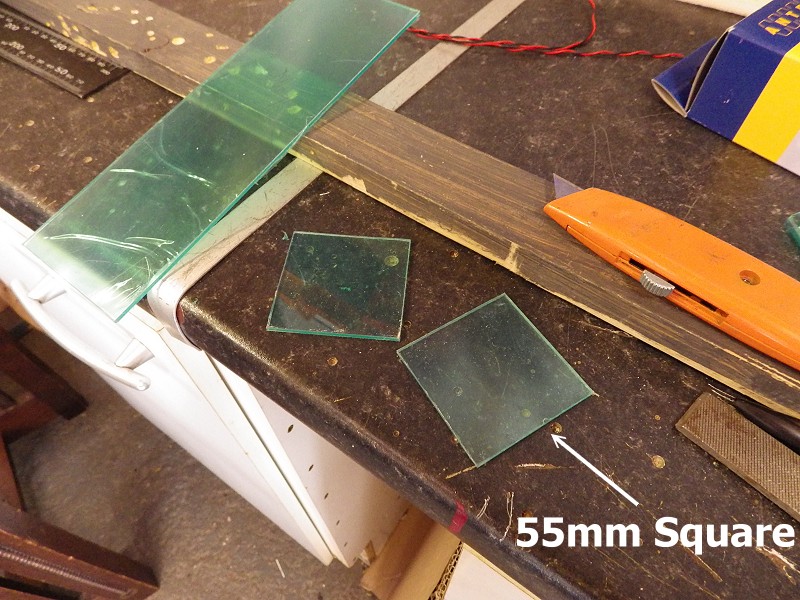
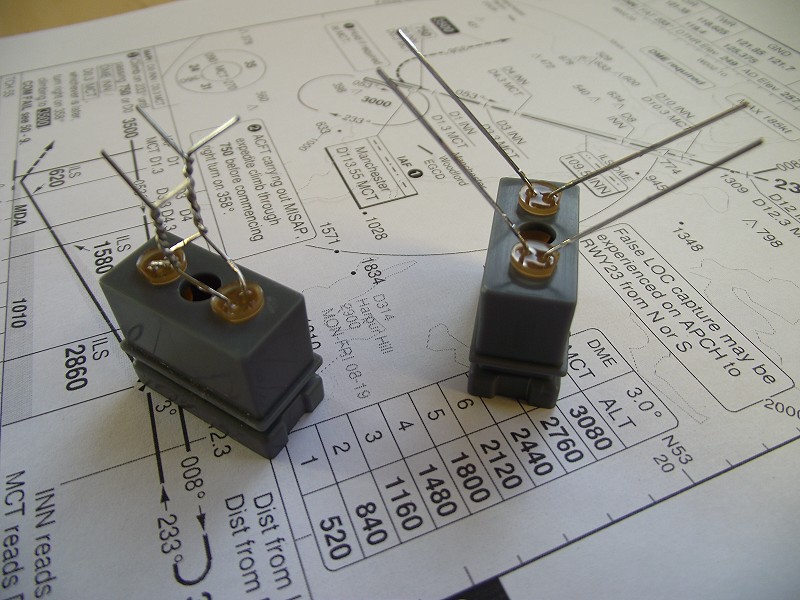
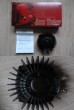
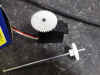
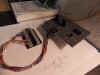
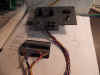
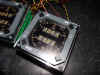
 10/09/2013
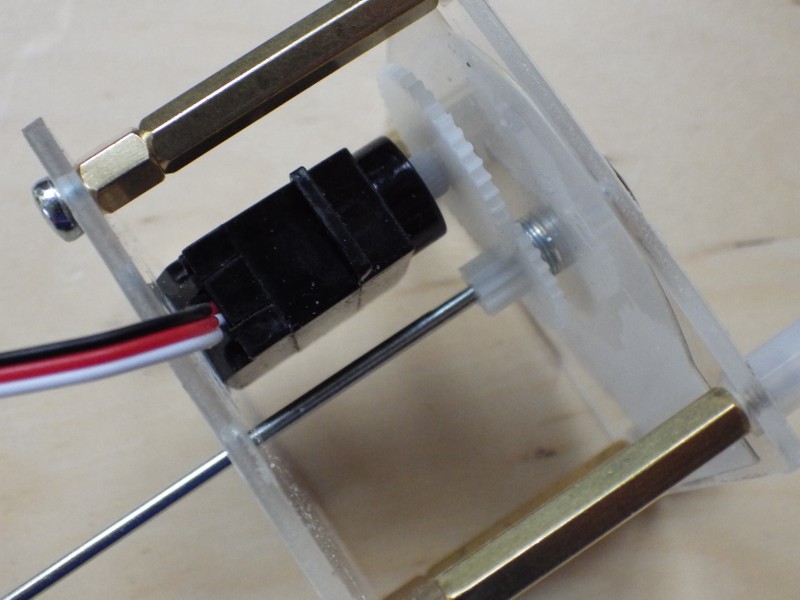
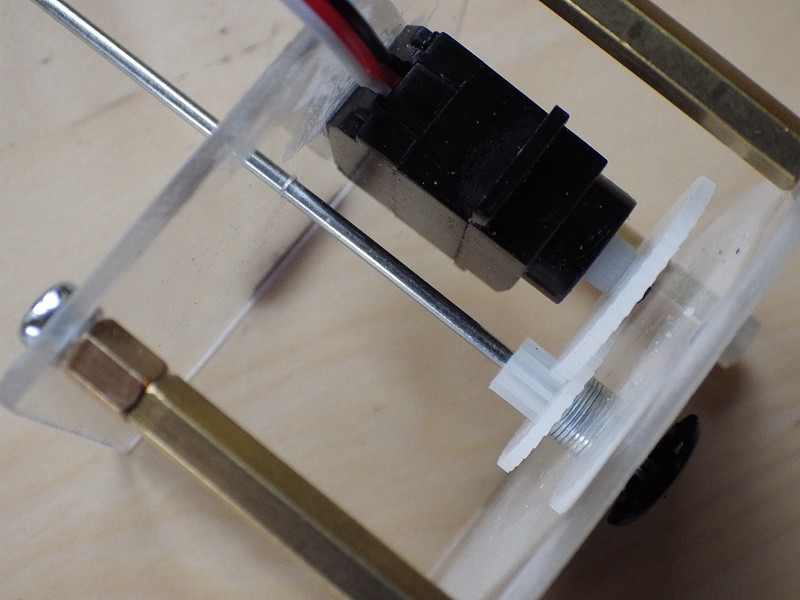
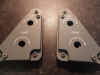
Another 'hair-brained'
scheme. Making Gauges, I mean 'How Hard Can It Be' ?
10/09/2013
Another 'hair-brained'
scheme. Making Gauges, I mean 'How Hard Can It Be' ?
Gauges are servo driven and I know the POLOLU Maestro card works fine
with Prosim in controlling servos, so I thought to myself all i've got
to do is make the gauge itself.
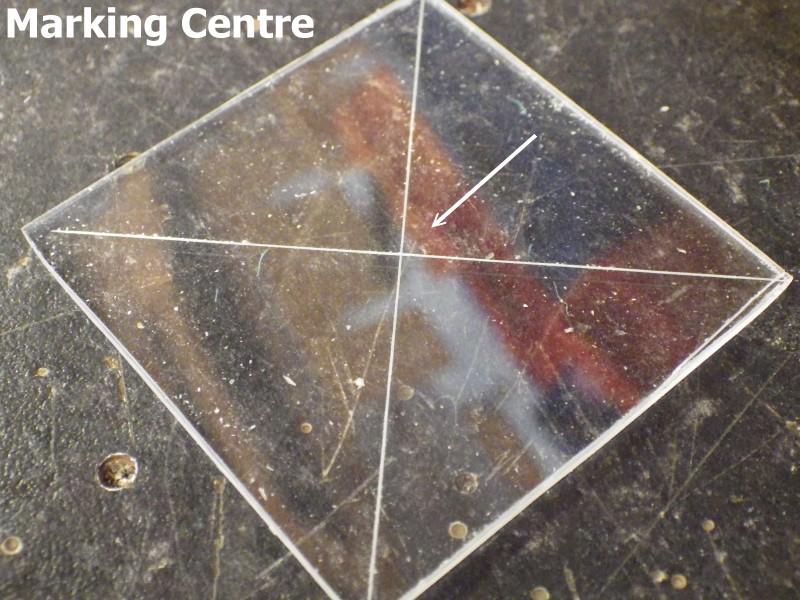
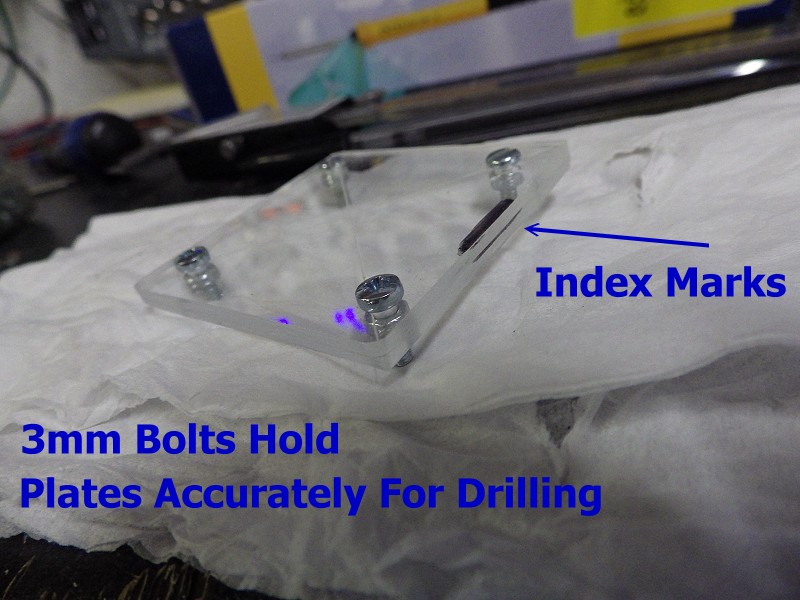
Now most servos will give you an 'out of the box' arc of travel that
does not cover the arc I need for these gauges. Initial
experiments with the POLOLU Control centre showed me i could tweak the
arc to about 120-140 degrees, still not enough. So
some sort of gearing was needed.
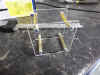
Onto good old ebay and found some Model Gears with a 2mm shaft that
'did the biz'.
Now it's onto the design (i say that as though I know how i'm going to
do it).
There will be more on this later, just got so many jobs on the go and
people here tomorrow and Friday and Saturday, so sort of 'pushed for
time' at the moment :o)

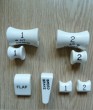
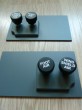
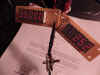
  01/09/2013 Well
another one bites the dust :o) Andrew Pringle's Overhead is
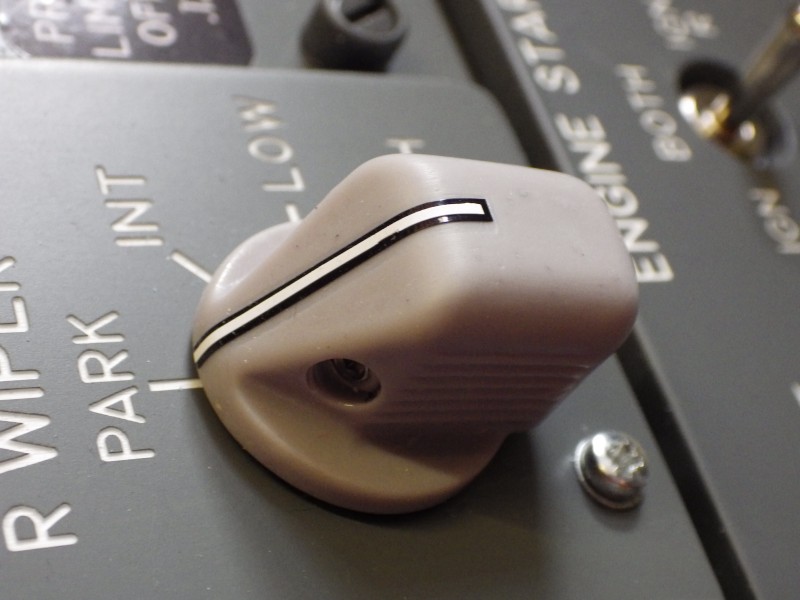
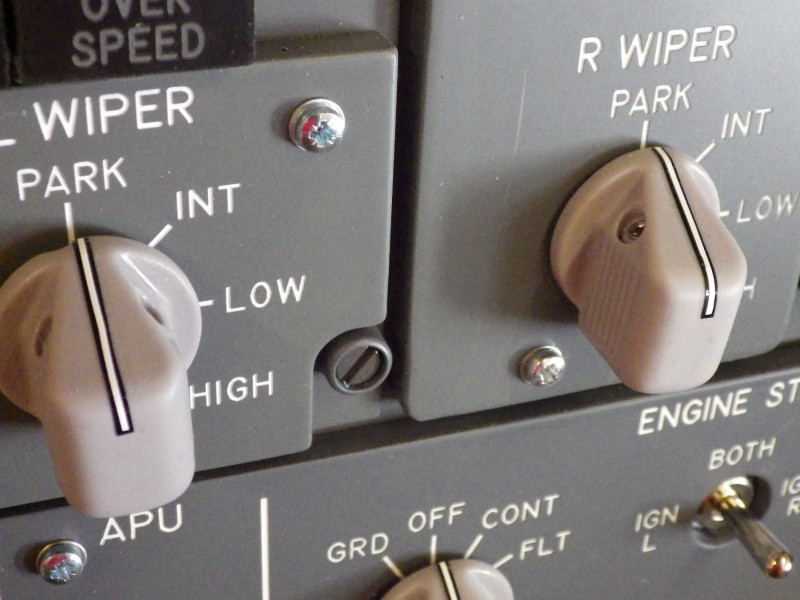
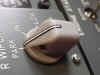
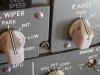
ready to go to him. This got me wondering about the
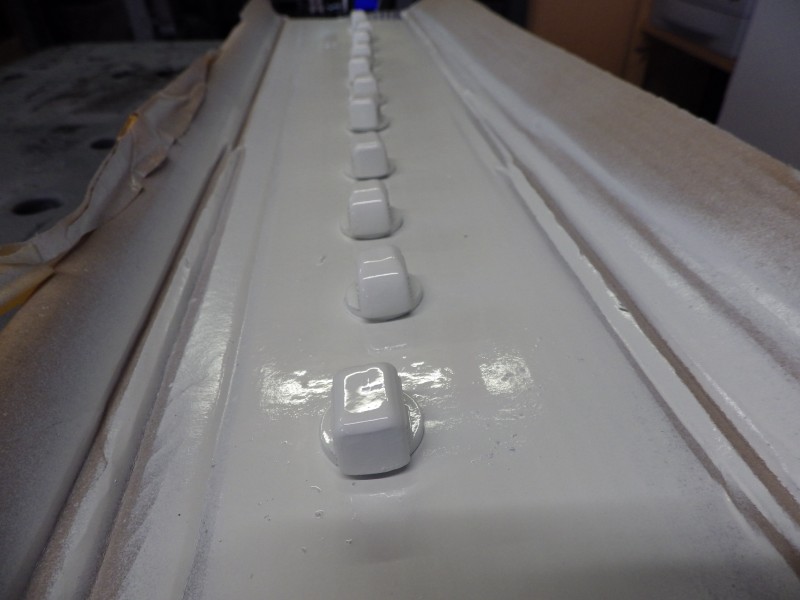
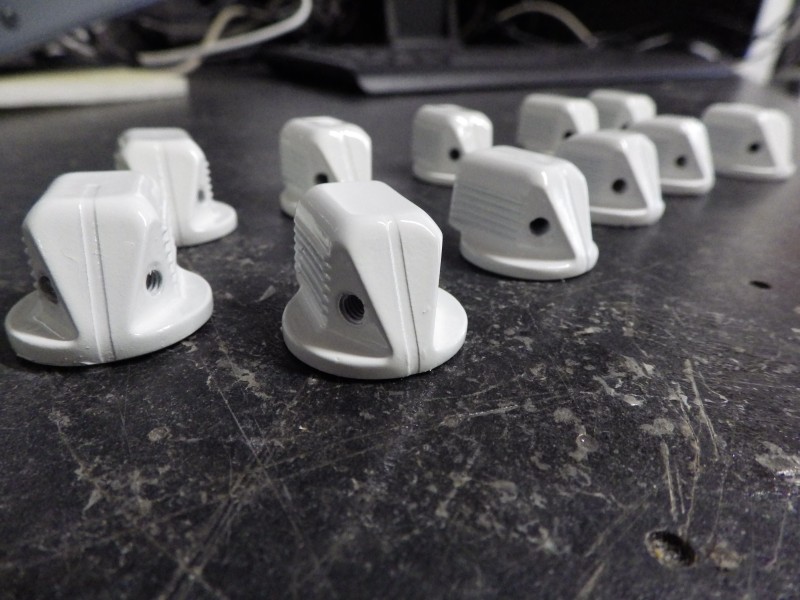
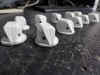
knobs and the backlighting. I have to do my own knobs
because they are getting a little 'distressed' with all the use they
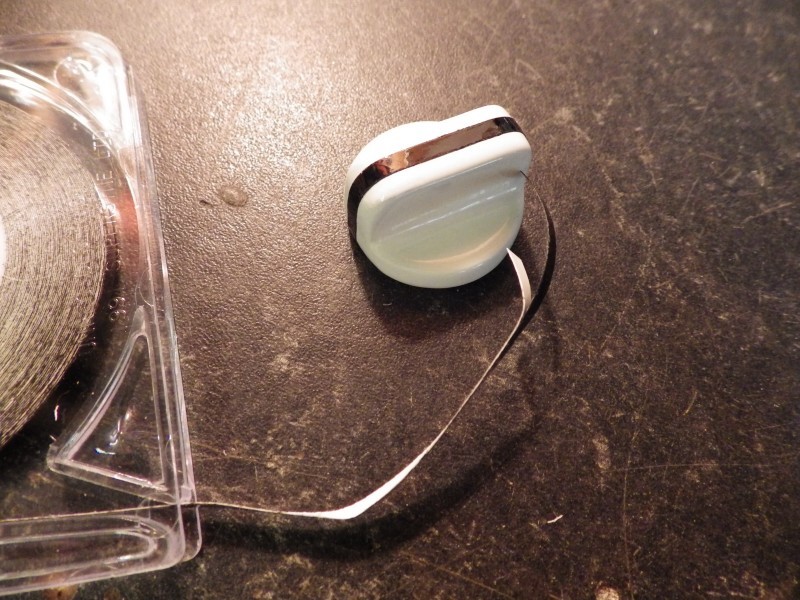
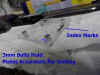
get. So, i found some stripe on ebay 3mm black
and a dual white stripe which has a 1.5mm pin stripe in it.
01/09/2013 Well
another one bites the dust :o) Andrew Pringle's Overhead is
ready to go to him. This got me wondering about the
knobs and the backlighting. I have to do my own knobs
because they are getting a little 'distressed' with all the use they
get. So, i found some stripe on ebay 3mm black
and a dual white stripe which has a 1.5mm pin stripe in it.
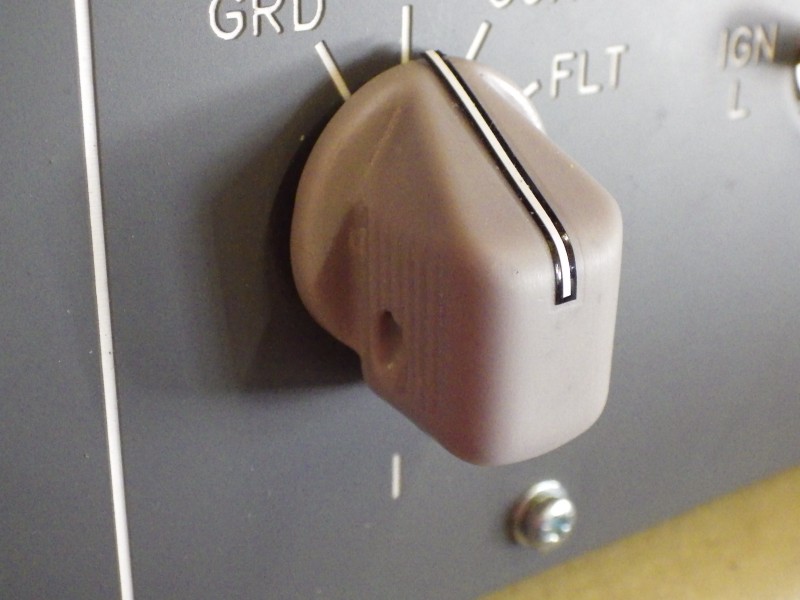
Knobs off, rubbed lightly with some fine 'wet & dry' paper, in the
dishwasher to get the crap off them and onto the production line for
painting :o) ................
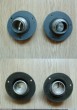
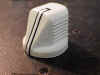
    I
have a mixture of FDS & old ROUTECH Knobs. Both moulded in resin,
so a light dusting of primer to show up any blemishes, sort those then
onto the top coat. I found it better to give them several
light coats of the gloss to build up a
good cover. Let them dry off for a couple of hours and
then your ready to apply the under black stripe. I like to
do this as soon as the paint has hardened to the touch because as
there is still spirit in the paint, it helps the adhesive bond to the
paint to prevent the stripe coming off. I
have a mixture of FDS & old ROUTECH Knobs. Both moulded in resin,
so a light dusting of primer to show up any blemishes, sort those then
onto the top coat. I found it better to give them several
light coats of the gloss to build up a
good cover. Let them dry off for a couple of hours and
then your ready to apply the under black stripe. I like to
do this as soon as the paint has hardened to the touch because as
there is still spirit in the paint, it helps the adhesive bond to the
paint to prevent the stripe coming off.
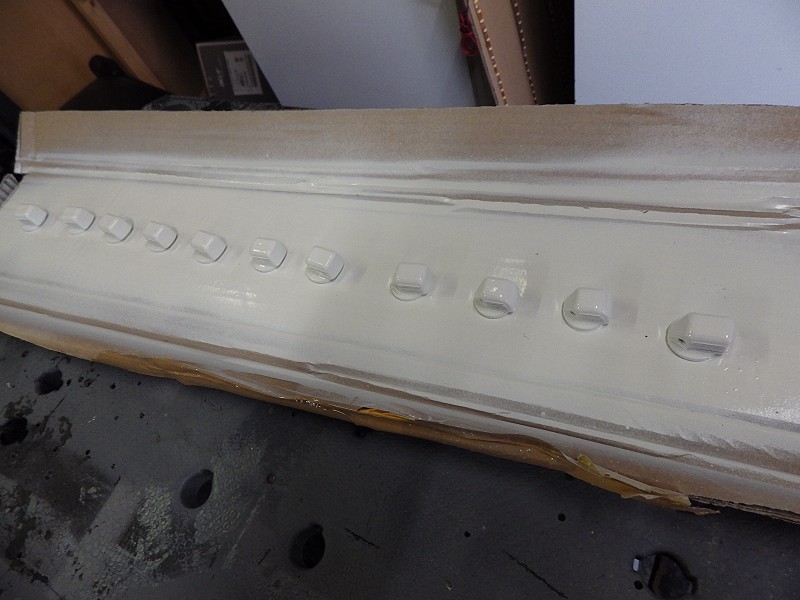
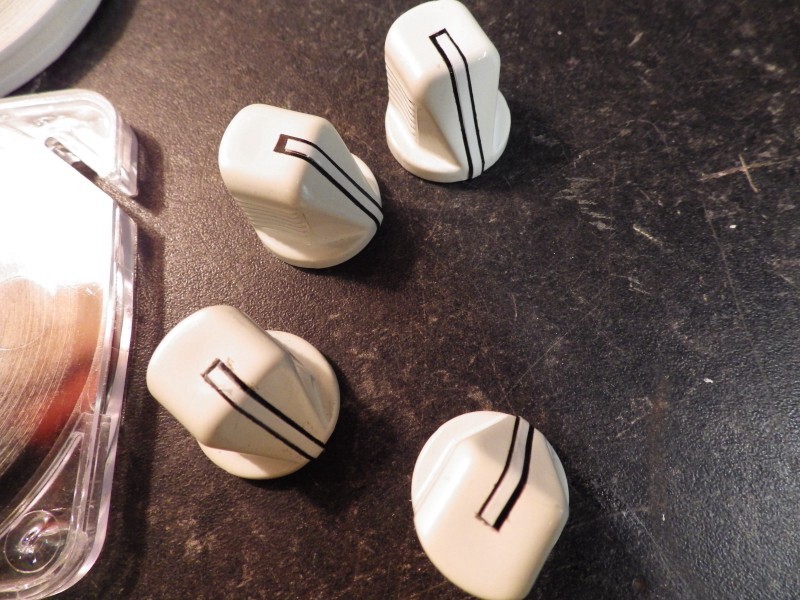
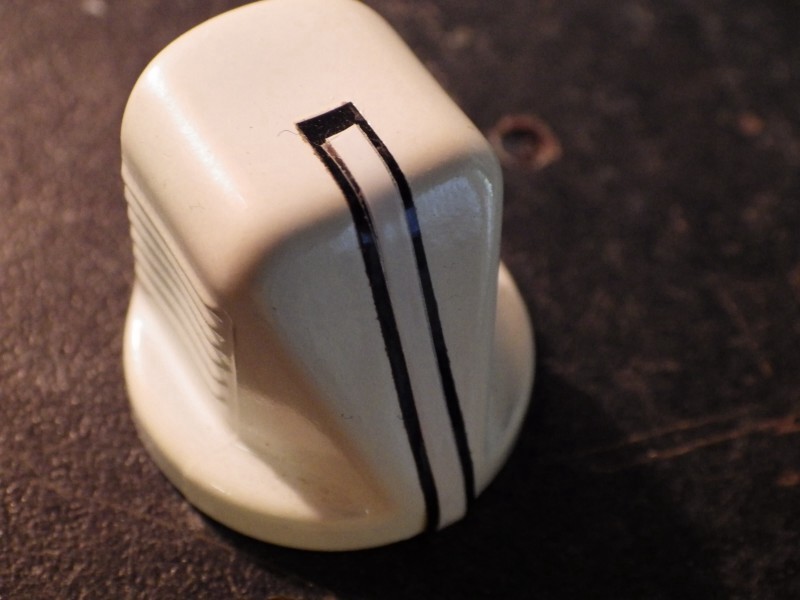
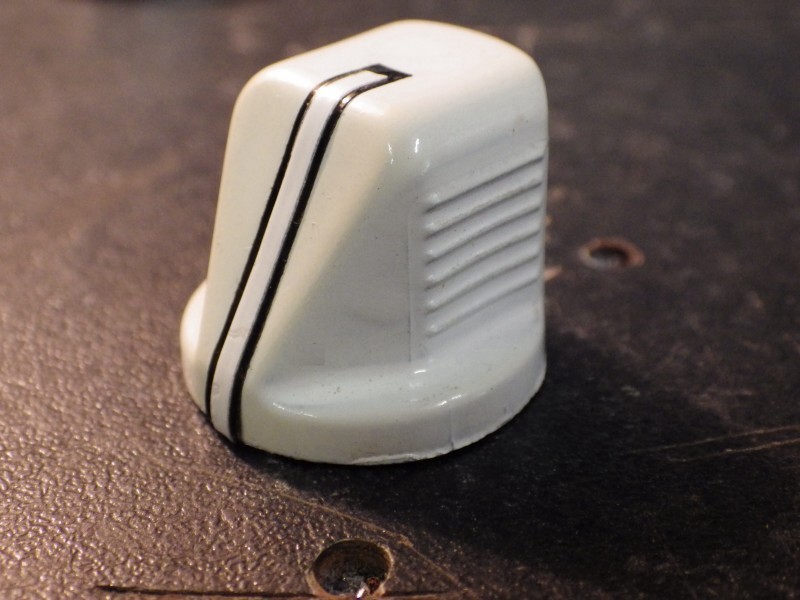
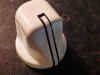
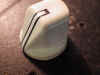
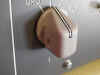
Now the difficult part. The 1.5mm white strip I found was
part of a two stripe tape. So, I had to carefully cut up
the side of the narrow strip to separate it from the wide part. Then,
carefully using a tweezers, you have to place the narrow white stripe
centrally over the black stripe. Not easy, you've only got
.75mm each side to play with. But i'm happy with the
results. I did try it out on a Cross Feed Knob for
Andrew. It's OK, but i'm not 100% happy with it. I need to
get some wider Black Stripe.


  25/08/2013 Been
quite a week here. Had a lot of fun getting servo gauges working
with the POLOLU Maestro card. Actually, it's relatively
straightforward once you get the servo's set in the Maestro Control
Manager and PROSIM.
25/08/2013 Been
quite a week here. Had a lot of fun getting servo gauges working
with the POLOLU Maestro card. Actually, it's relatively
straightforward once you get the servo's set in the Maestro Control
Manager and PROSIM.
Check out the POLOLU Maestro Servo control card HERE.
Read the Manual and watch the video for a good understanding
of how it all happens and then just set the parameters of your gauge
in PROSIM Configuration Gauges Page. I've uploaded a
couple of videos to Youtube of the gauges in action. SEXY :o)
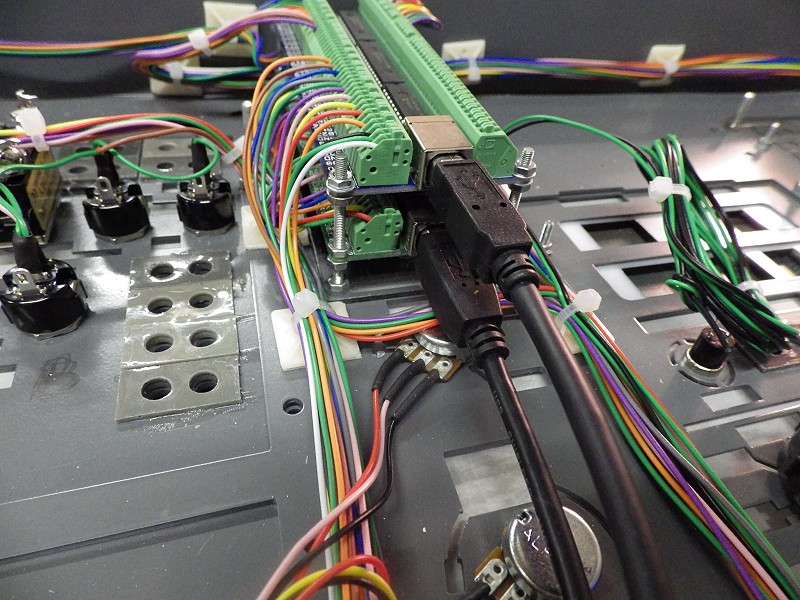
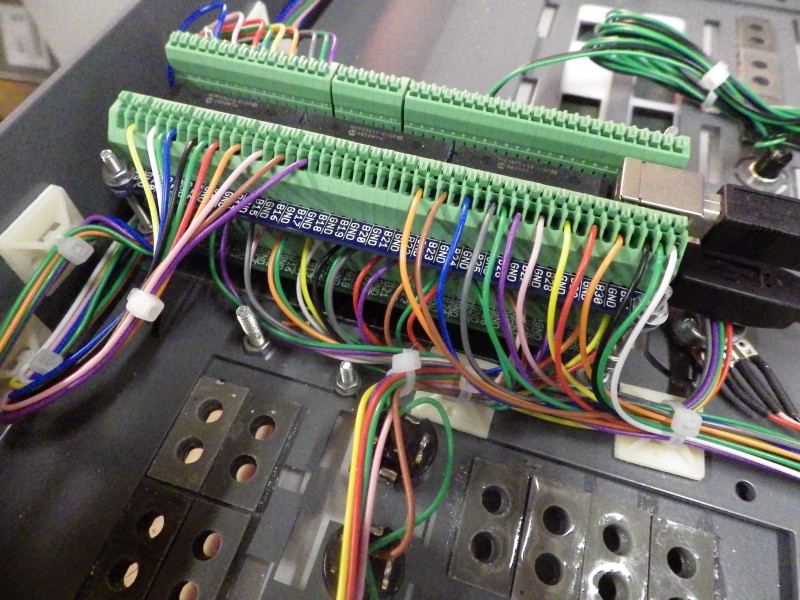
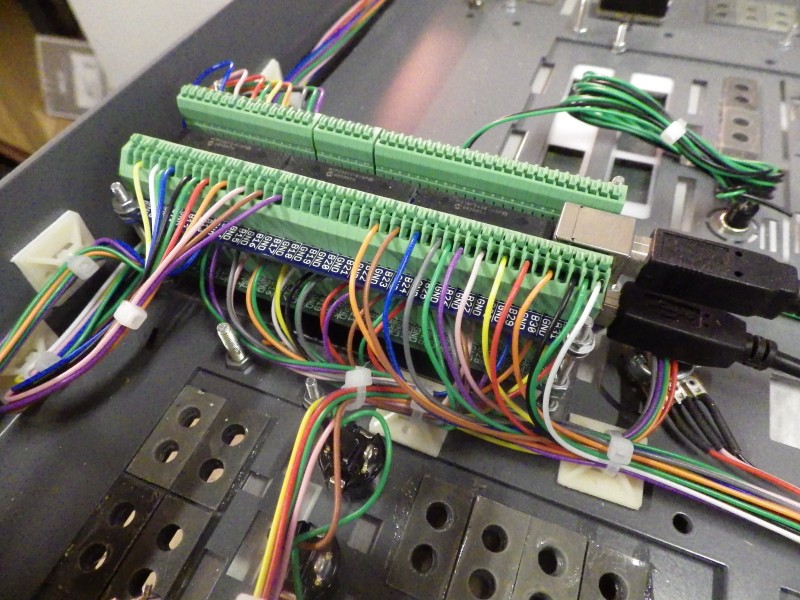
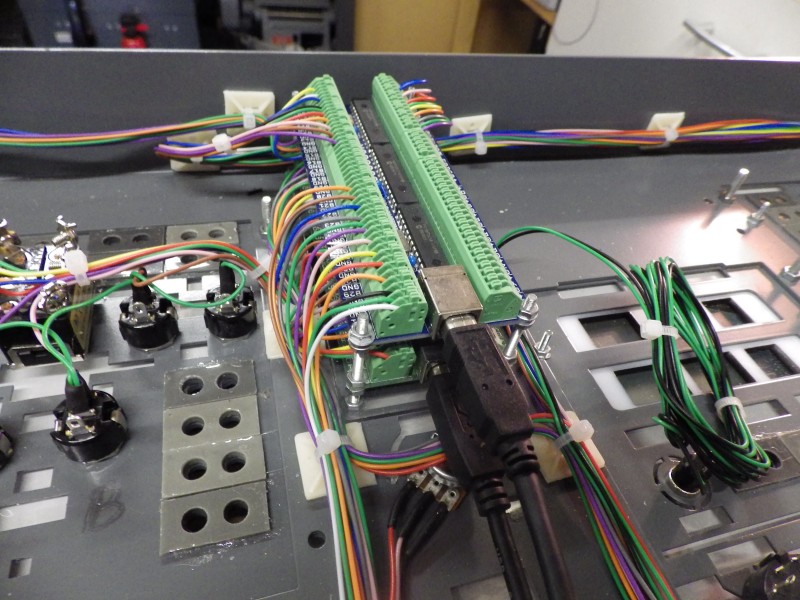
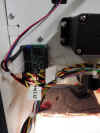
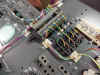
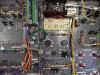
 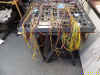 19/08/2013
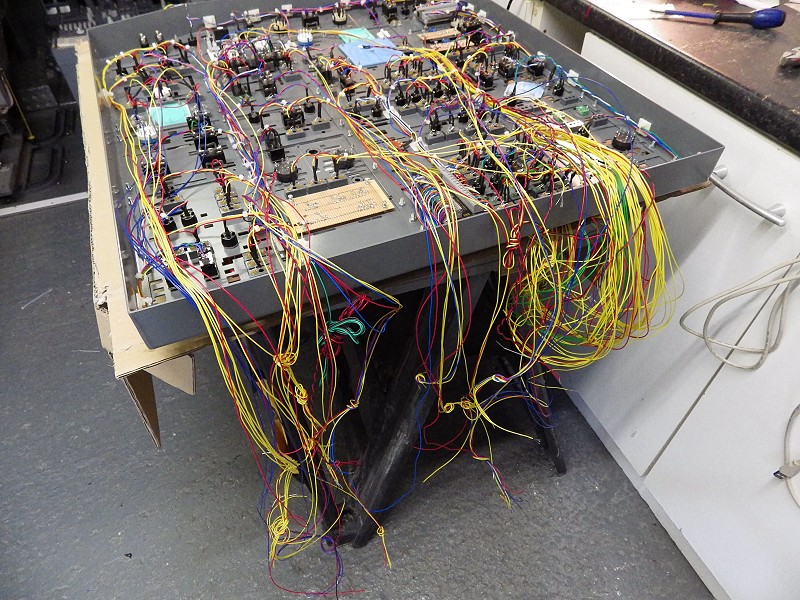
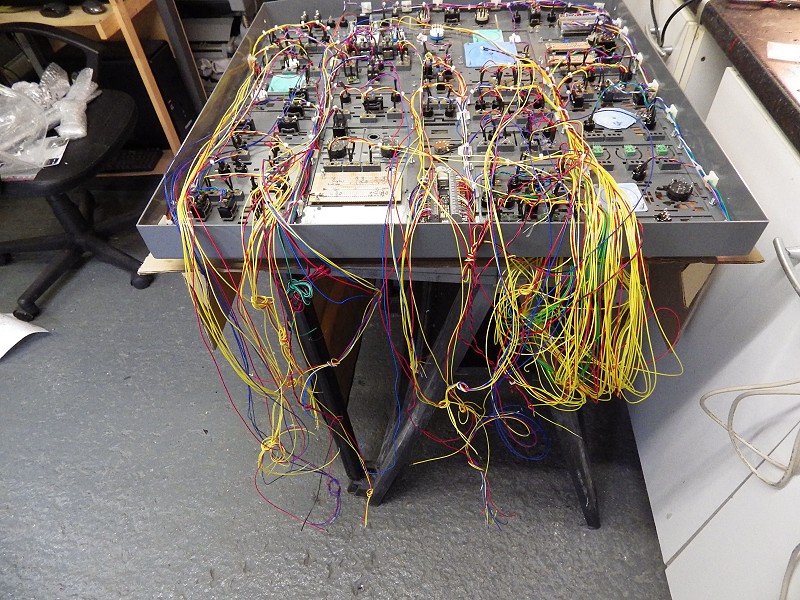
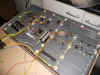
This is the
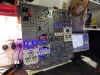
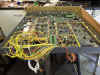
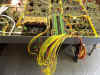
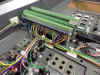
mess I am in :o) Wires everywhere. All
Inputs done and now just wiring the LED arrays for the
annunciators. Even though the LED64ADV shares a common anode and
i'm making the annunciators in groups to share the Anode, still seems
like i'm wiring a telephone exchange. 2 x LED64ADV Cards
should be here tomorrow so then I can start the connection to these
cards which is 'mind numbing' work :o(
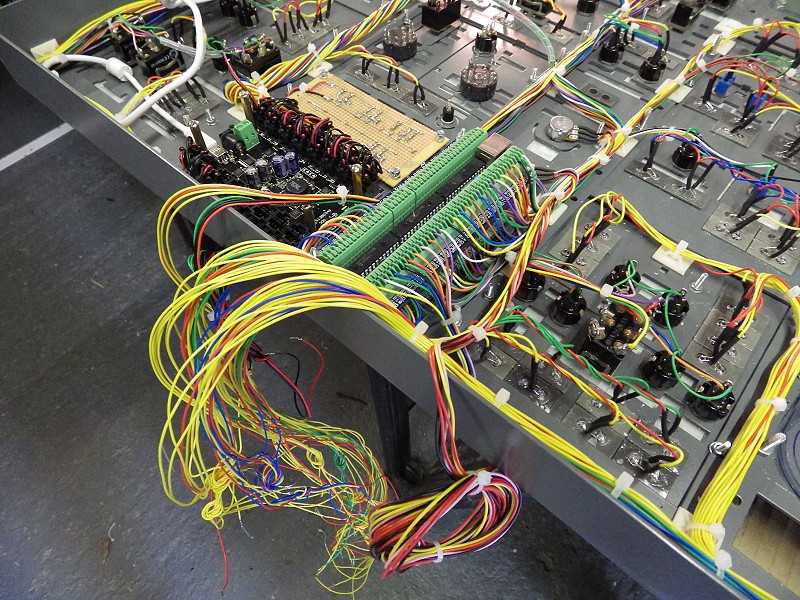
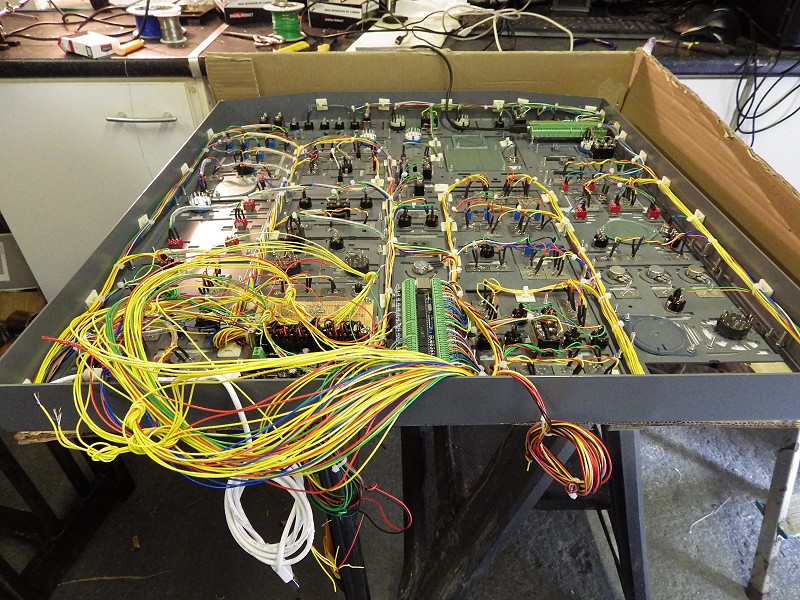
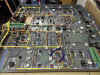
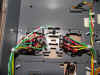
19/08/2013
This is the
mess I am in :o) Wires everywhere. All
Inputs done and now just wiring the LED arrays for the
annunciators. Even though the LED64ADV shares a common anode and
i'm making the annunciators in groups to share the Anode, still seems
like i'm wiring a telephone exchange. 2 x LED64ADV Cards
should be here tomorrow so then I can start the connection to these
cards which is 'mind numbing' work :o(
You know I really enjoy making the displays and I'm getting good at
it. What used to take me a day and a half is now down to one day
and the job is getting tidier into the bargain.
Hardest part is making them fit the cutout plates that Simworld
send. They make them to such an exact tolerance that you usually
have to clean out the holes with a Craft (Stanley) Knife to get the 7
segment displays to fit in them. But the end result is
excellent. More about the Servo Gauges next
update, I've worked it out.
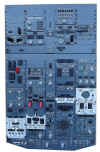
 09/08/2013
Oh No !
Not another one :o) Yup! Andrew Pringles Overhead is
here. This is a 'Full' version which means about four
weeks work for me. So if i'm 'absent without leave' then this is
where I am :o)
09/08/2013
Oh No !
Not another one :o) Yup! Andrew Pringles Overhead is
here. This is a 'Full' version which means about four
weeks work for me. So if i'm 'absent without leave' then this is
where I am :o)
Simworld Packaging is excellent, I'm sure half the shipping cost goes
on Pallet Wrap & Clingfilm.
Not going to bore you with build pics because if you've seen one
Simworld Overhead being built, you've seen them all haven't
you. But this one has something special, servo gauges.
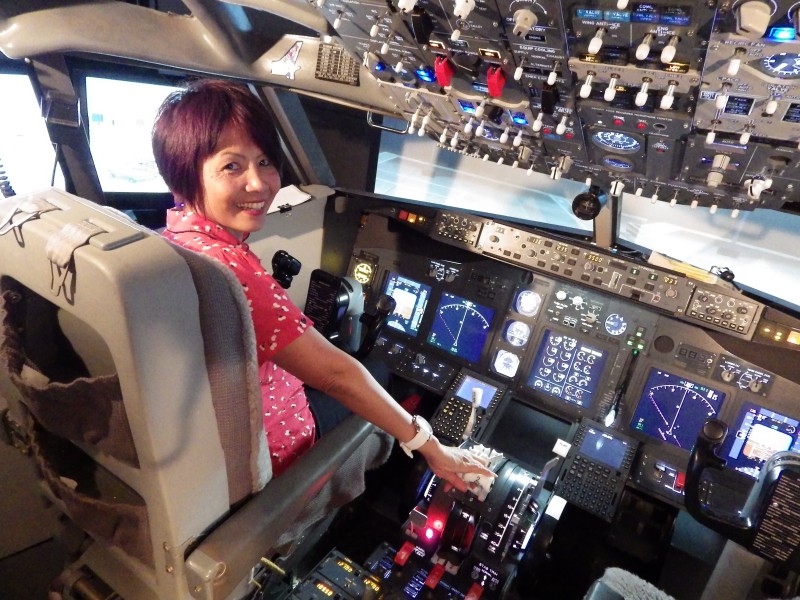
  06/08/2013
Well
here's a turnup for the book. Over the weekend, I had two
'Sheila's' here from Adelaide, South Australia flying the
sim. Jane Oakes & Ann Mah.
After a little practise, they actually got the hang of it.
Jane was 'overly excited' and Ann was 'adrenalin
charged'. But they both had a great time and
actually both of them actually landed the aircraft
:o) Got a visitor in today Jack Major, so the
Autobrake Panel is going to have to wait until tomorrow.
But another Simworld Panel is due to arrive as well . Phew it's
all go :o)
06/08/2013
Well
here's a turnup for the book. Over the weekend, I had two
'Sheila's' here from Adelaide, South Australia flying the
sim. Jane Oakes & Ann Mah.
After a little practise, they actually got the hang of it.
Jane was 'overly excited' and Ann was 'adrenalin
charged'. But they both had a great time and
actually both of them actually landed the aircraft
:o) Got a visitor in today Jack Major, so the
Autobrake Panel is going to have to wait until tomorrow.
But another Simworld Panel is due to arrive as well . Phew it's
all go :o)
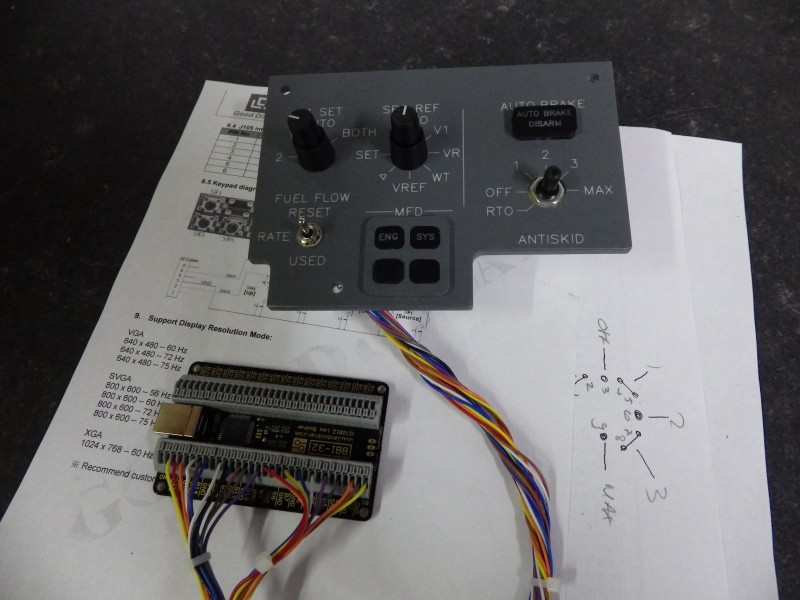
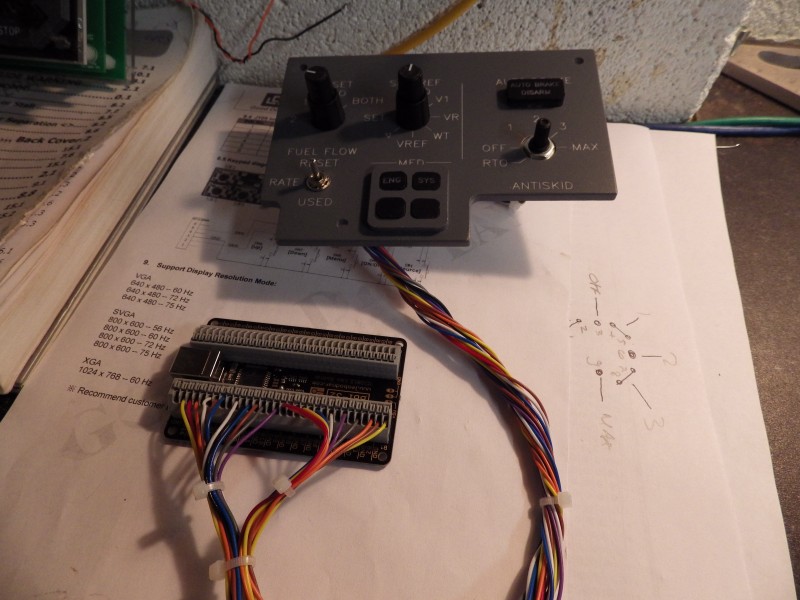
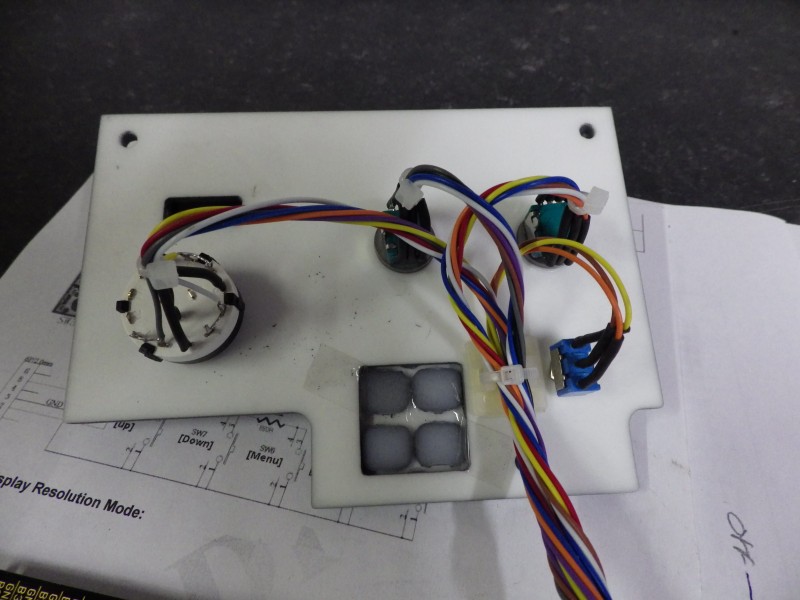
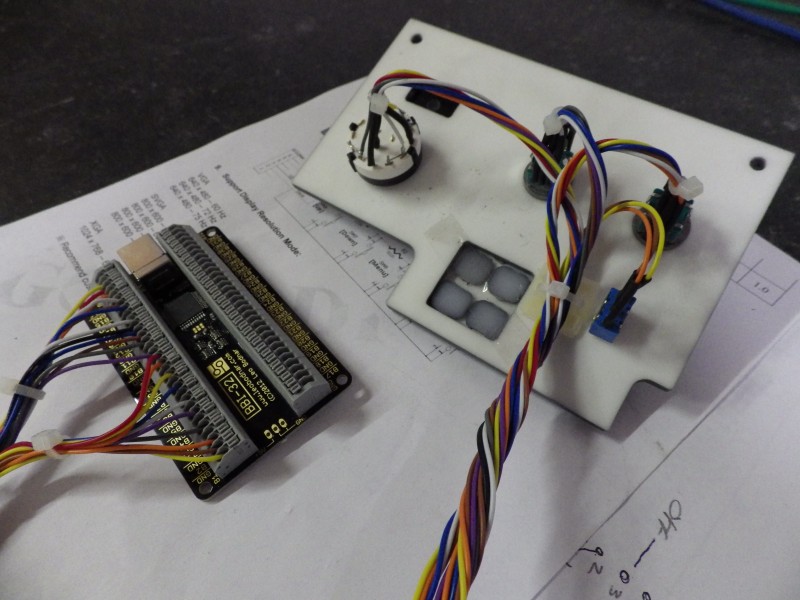
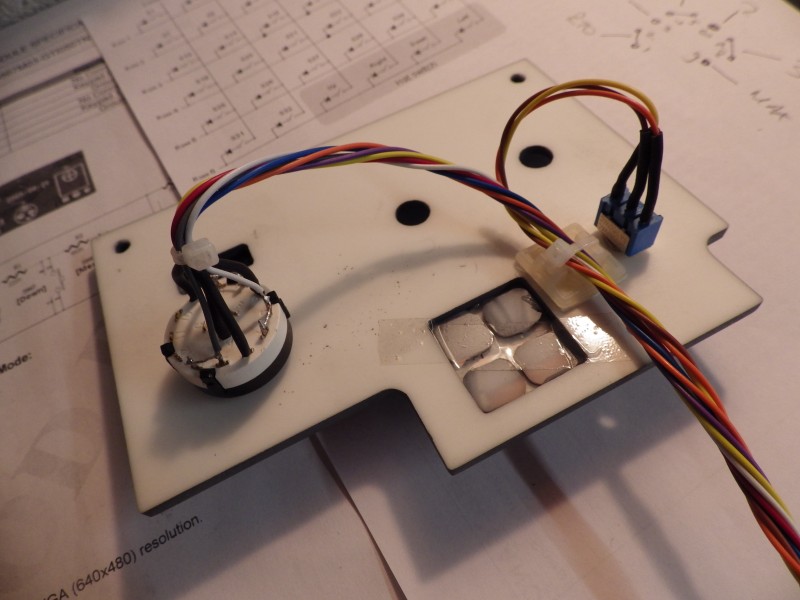
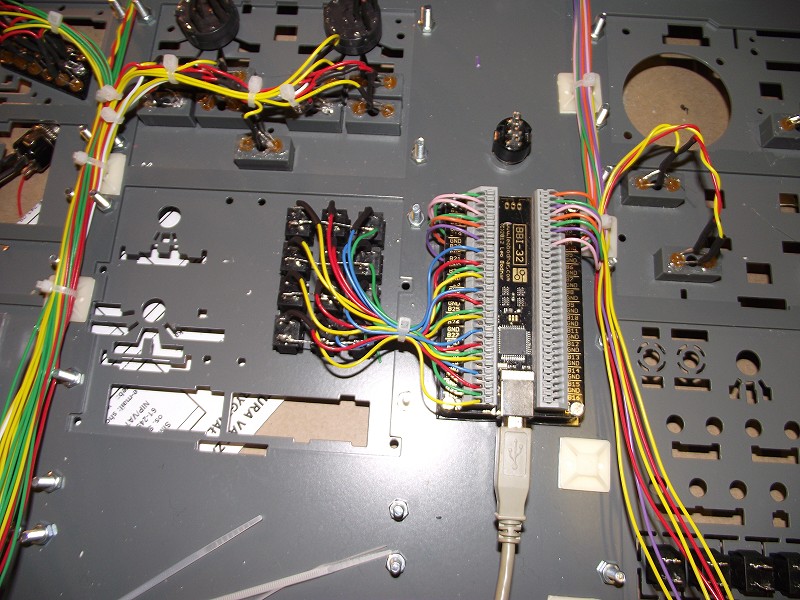
05/08/2013
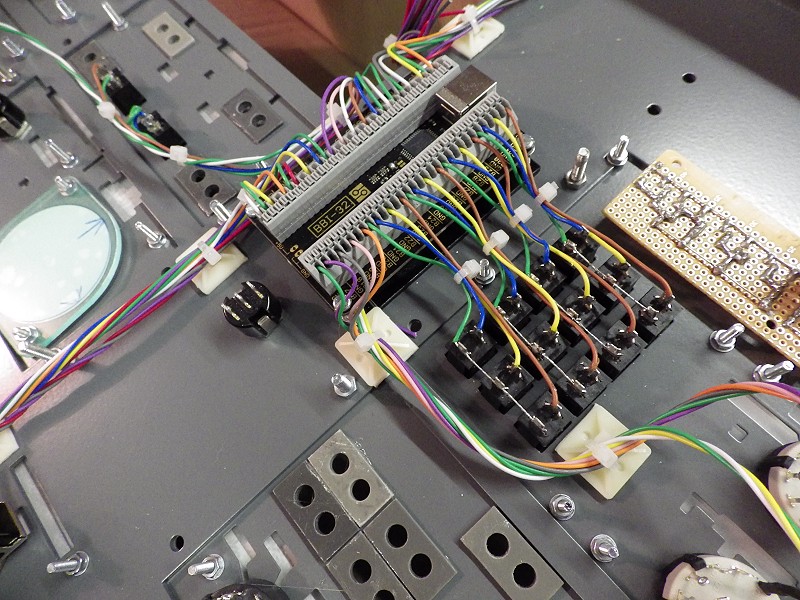
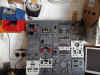
I was
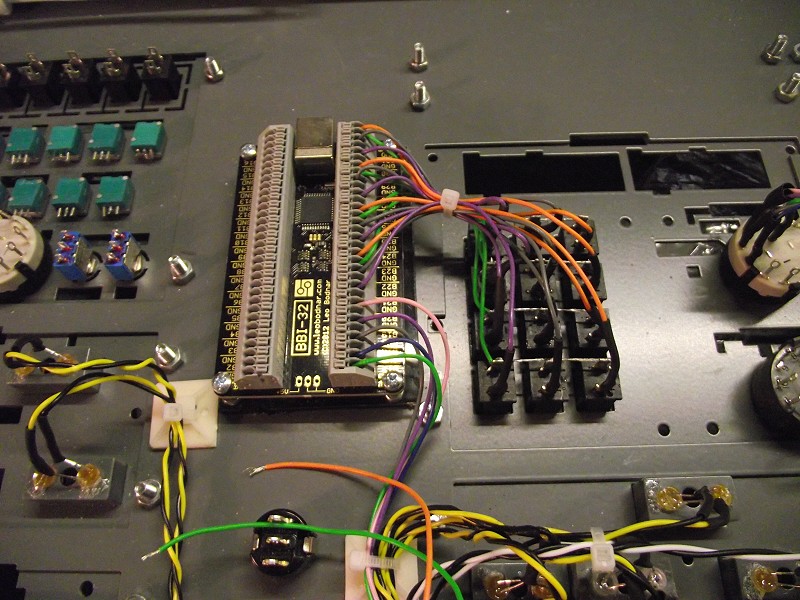
right about the BBI-32. The Matrix Board was just too
bulky and untidy, so I've hooked the panel up to a
BBI-32. A much tidier and compact solution, go on
spend the extra tenner :o) Also I was supplied with Alps
EC11 dual encoders. Problem is they are designed for circuit
board mounting, so no threaded neck to fix thru the lightplate.
This is where you get creative with the Superglue and some washers.
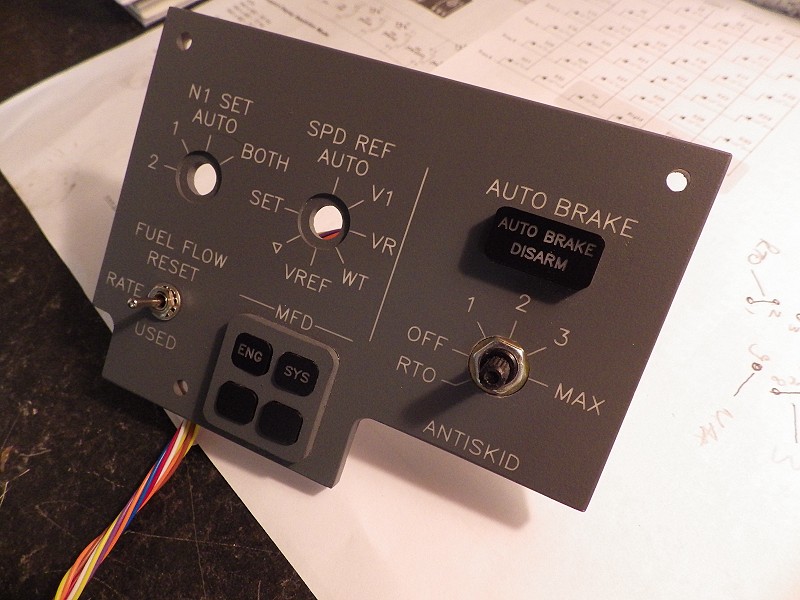
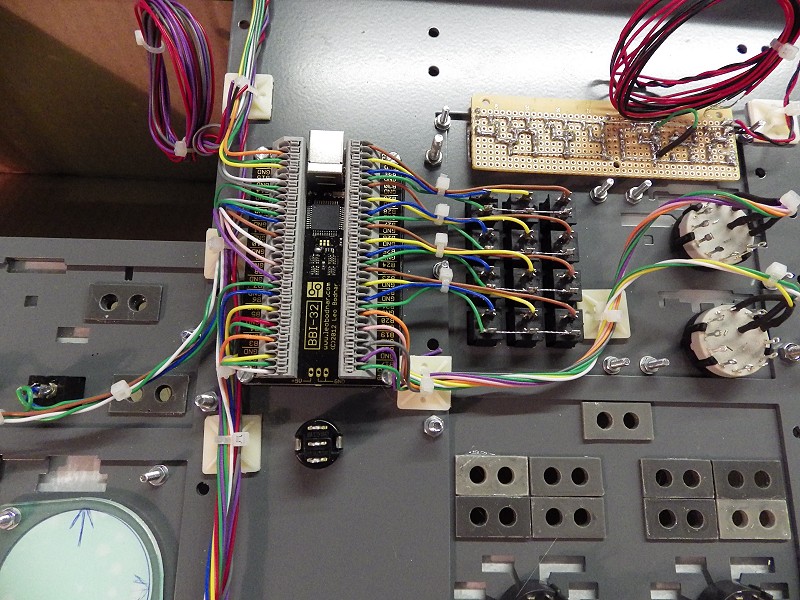
04/08/2013
Another little job raised it's head :o)
Knocking up an Autobrake Panel for a colleague. Been
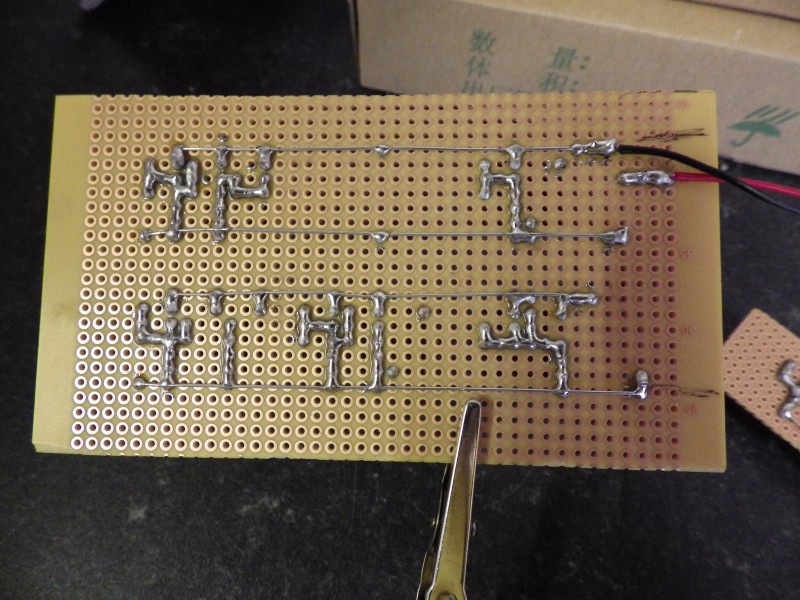
supplied with a BU0836 card, so the Matrix board has been resurrected
:o) Making a Matrix board is a ballache especially
when you have a 'loopback' issue and you've got to go find where you
didn't put a diode :o( For the extra £10, buy
the BBI-32 if you only want button inputs like on this
panel. It'll save you a lot of grief and time.

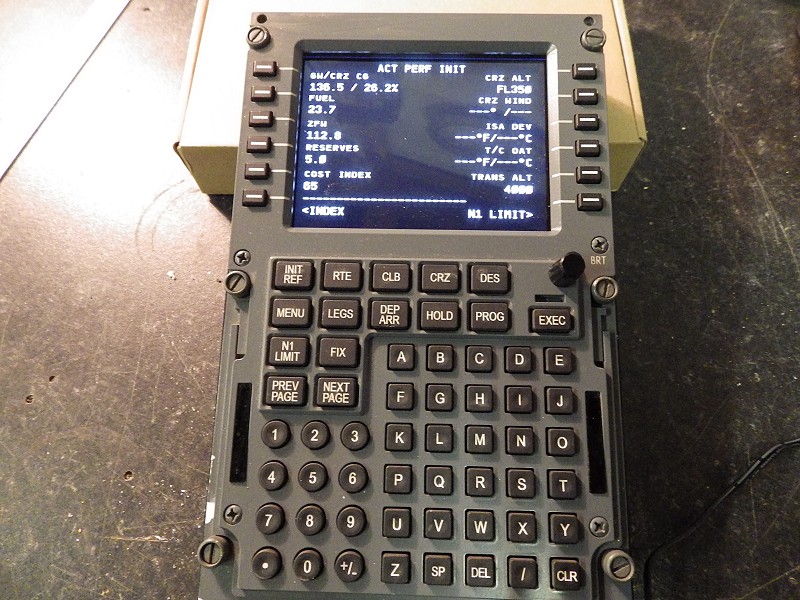
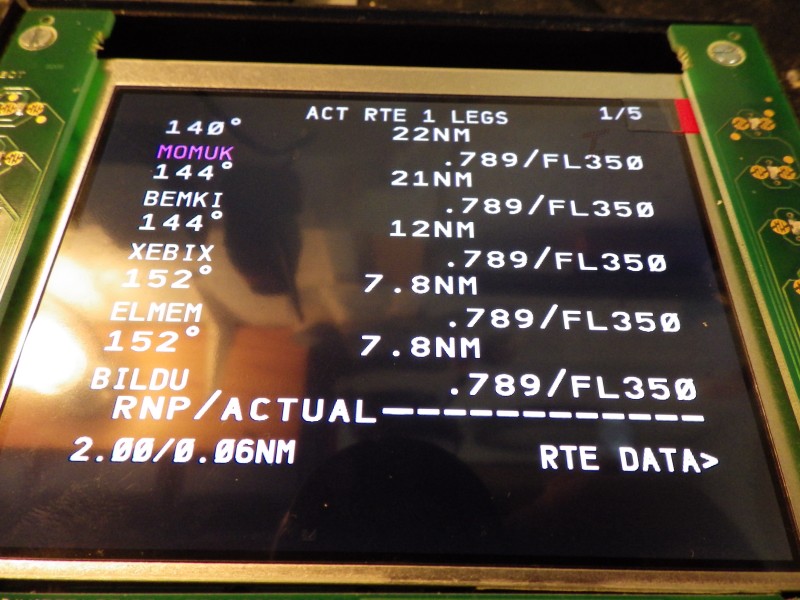
29/07/2013
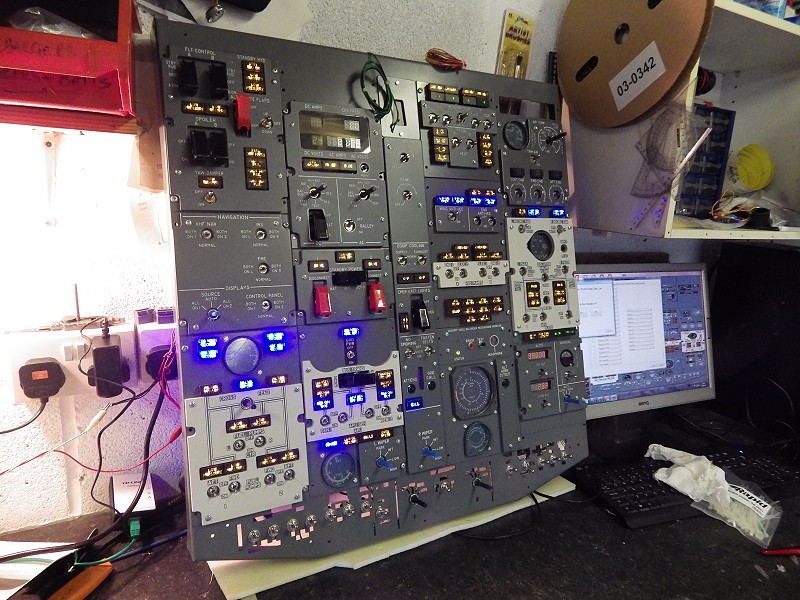
Well I
couldn't help myself. I was so close to finishing this
that even though I was knackered, I had to do the business and see how
it worked :o) Well it does. I'm sold on
colour! I definitely wont have time to fit this in the
cockpit this week, but I just had to set it all up and get it
working. Using the Line Setup functions and re-sizing the
fonts, I have got it all setup pretty damn well. Everything
matches the LSK Keys and looks real good.


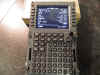


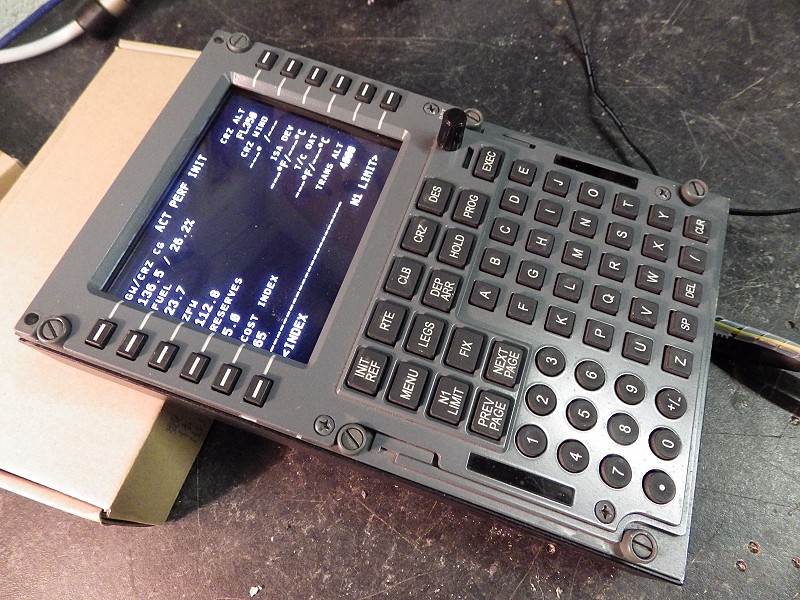
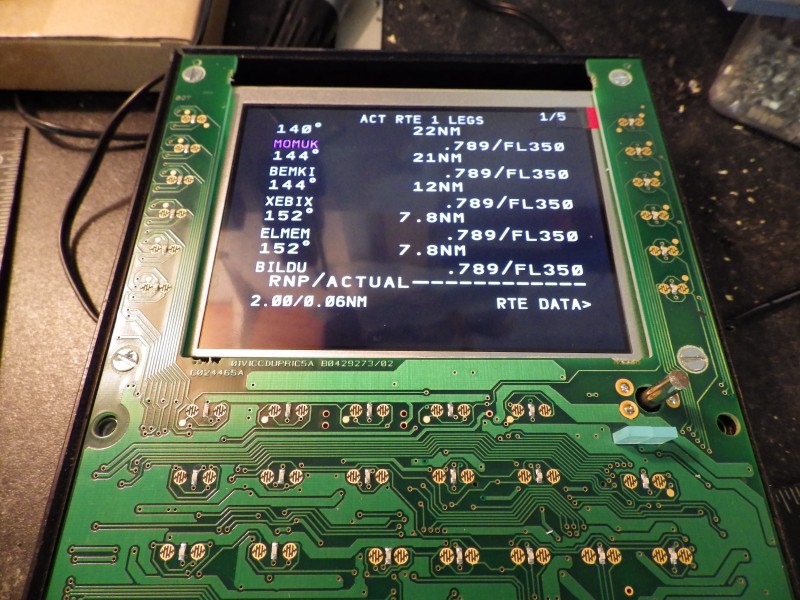
   28/07/2013
My oldest Engravity CDU has been playing up lately, the screen was
getting very pale and almost unreadable. I cant complain, it is
7 years old and has never skipped a beat. Apparently it's a
common problem with older CDU's. So, I'm
looking at my options here. Do I go with an FDS CDU or wait
until Engravity release their new Colour CDU later in the
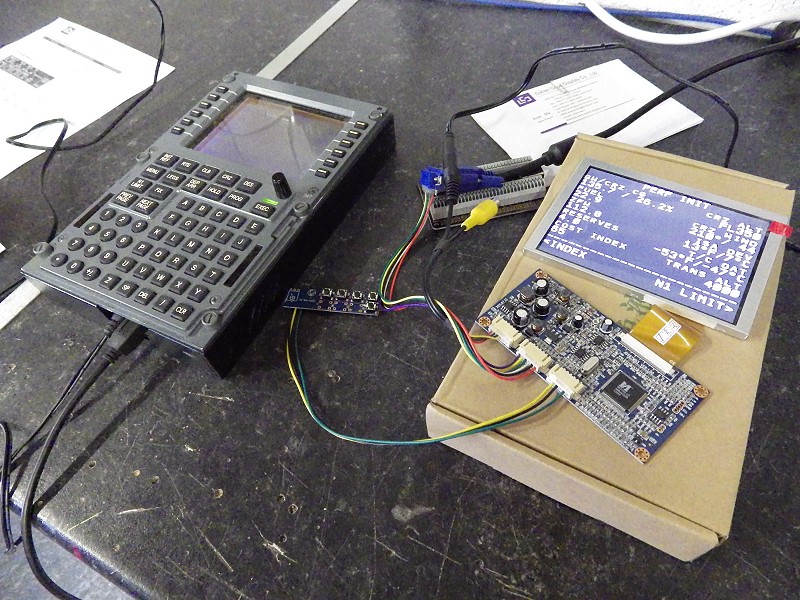
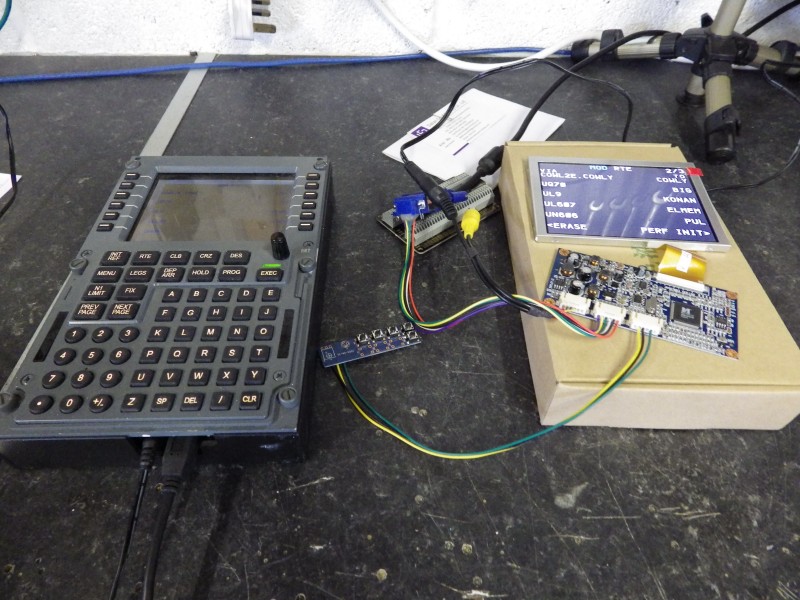
year? Then I spotted this
post on the Prosim Forum about exchanging the Engravity screen
with a colour display. I'm still going to replace the CDU,
but as a 'stop gap' measure, I thought I'd give it a
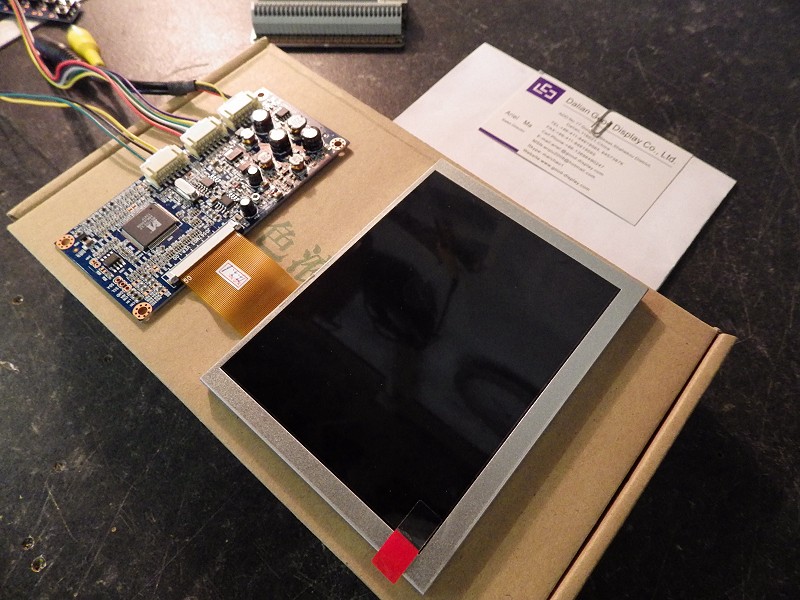
go. So, off I go Paypal password in hand
and order this screen from Good
Display in China. 3 days later it's
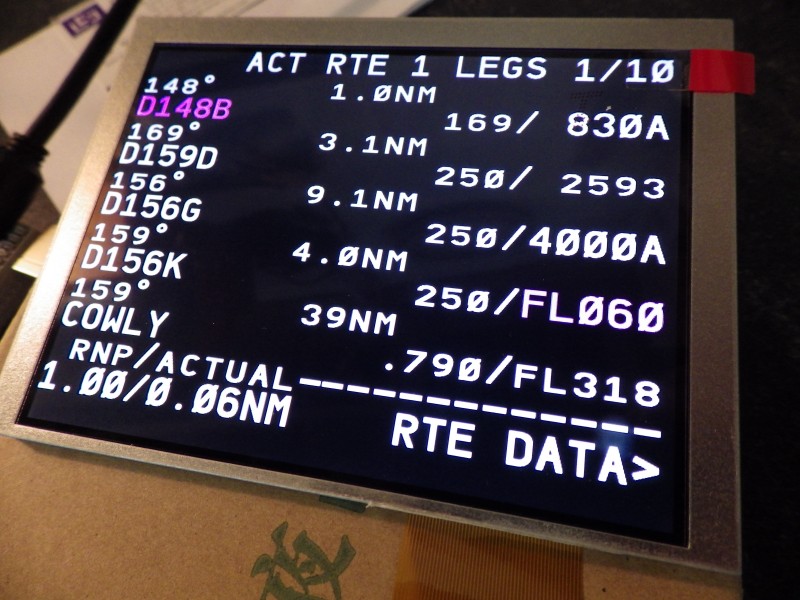
here. Little bit of setting up, but I'm really
happy with the quality of the display. The only gripe i've
got is where
the display ribbon cable joins the board, it's so delicate, you only
have to breath on it and it becomes detached (yes of course mine came
out). But some gentle repairs and it's back
in. I'm going to put some resin
28/07/2013
My oldest Engravity CDU has been playing up lately, the screen was
getting very pale and almost unreadable. I cant complain, it is
7 years old and has never skipped a beat. Apparently it's a
common problem with older CDU's. So, I'm
looking at my options here. Do I go with an FDS CDU or wait
until Engravity release their new Colour CDU later in the
year? Then I spotted this
post on the Prosim Forum about exchanging the Engravity screen
with a colour display. I'm still going to replace the CDU,
but as a 'stop gap' measure, I thought I'd give it a
go. So, off I go Paypal password in hand
and order this screen from Good
Display in China. 3 days later it's
here. Little bit of setting up, but I'm really
happy with the quality of the display. The only gripe i've
got is where
the display ribbon cable joins the board, it's so delicate, you only
have to breath on it and it becomes detached (yes of course mine came
out). But some gentle repairs and it's back
in. I'm going to put some resin 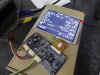 on it to hold it in place before
i do the final assembly.
on it to hold it in place before
i do the final assembly.
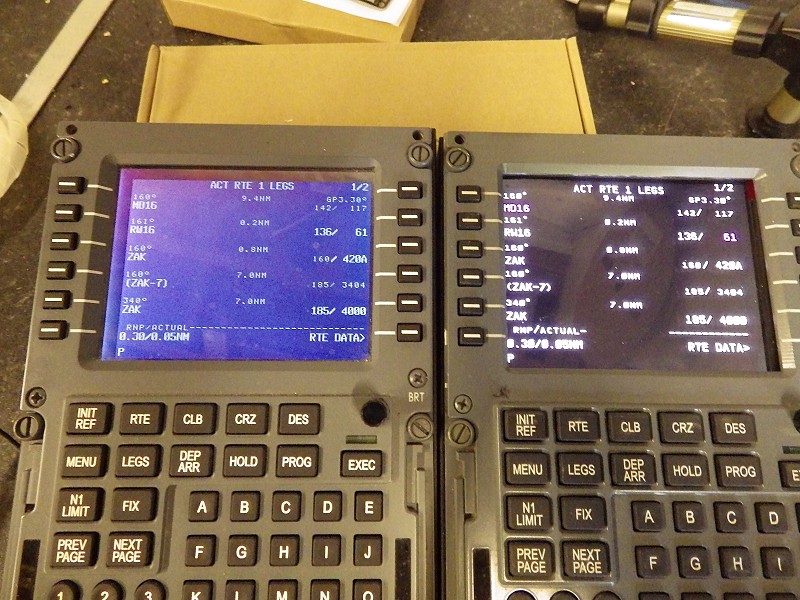
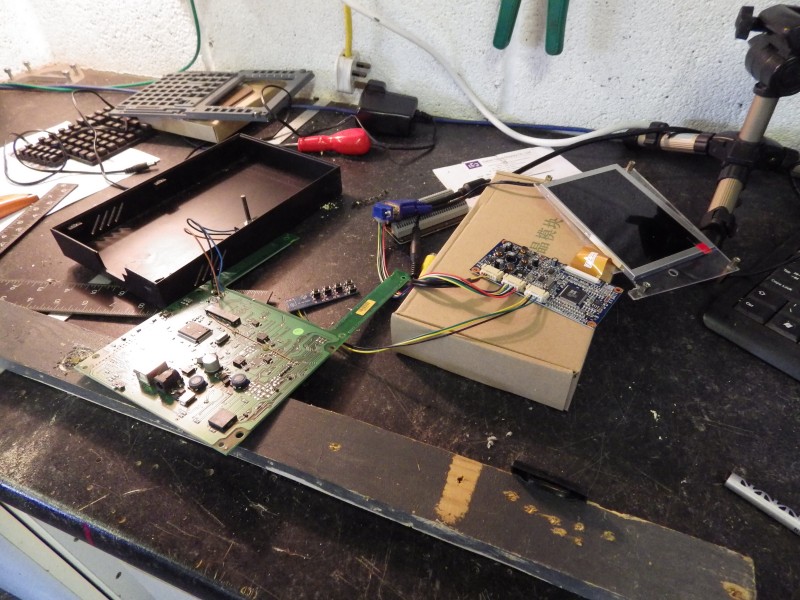
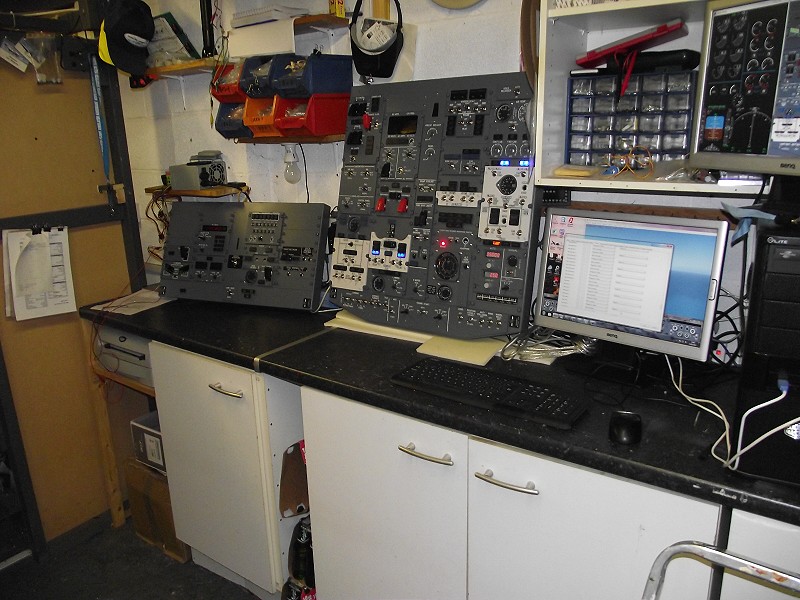
First I set it up on the test rig to run in tandem with the Engravity
CDU so i could get it running right and do a 'test
flight'. No worries performed beautifully. So
now it's time to dis-assemble the CDU and look at how i'm going to fit
it in there. I've made a backing plate the same size as
the original screen circuit board from perspex which will hold the
screen in place. I've got it sited and all i have to do is
make some minor adjustments to square it up and match the lines to the
LSK's and then we're ready for the final assembly. I wont
have time to do this this week because I've got a busy week and then
an old friend is coming from Australia and I'm going to be tied up
with them for a few days. But next week I'll sort it :o)
Oh! I've started sorting out the site. 2012 News items are
now on their own page HERE. Just
need to sort the links.

    26/07/2013
Well
another busy week 19th July Liam McNally was here with his wife
Kelly all the way from Whitehaven Cumbria. Kelly contacted me on
a bit of a 'covert' operation and organized a visit for Liam's
birthday. Was he excited or what :o) 26/07/2013
Well
another busy week 19th July Liam McNally was here with his wife
Kelly all the way from Whitehaven Cumbria. Kelly contacted me on
a bit of a 'covert' operation and organized a visit for Liam's
birthday. Was he excited or what :o)
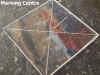
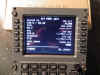
Then Monday 22nd, Steve Mitchell and Barry Roberts were in.
Barry lives on the end of 23R at Manchester. Barry flew a
route so he could get the feel of the controls and then they wanted
something challenging, so I set up a position in the Prosim Instructor
Station for some approaches into Innsbruck (hence the RED terrain
impression on the ND). Fair play, both of them nailed it
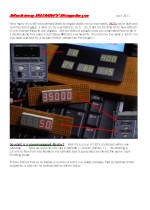
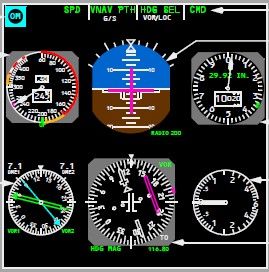
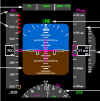
The issue with the Compact EFIS display has been resolved.
It was a carrier option introduced by Southwest Airlines because they
had a mixed fleet and was then taken up by other carriers, so not all
NG's had it. Rhys Betteridge called in Wednesday and put
me right. So
thats why it only appears in some POH and FCTM documents.
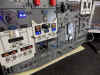
   21/07/2013
Another
one bites the dust :o) The Simworld Overhead panel set I have
been building has gone, so got a clear workbench until Andrew
Pringle's arrives in August. So this has given me
some time to look at what I am doing in my own pit. Going to
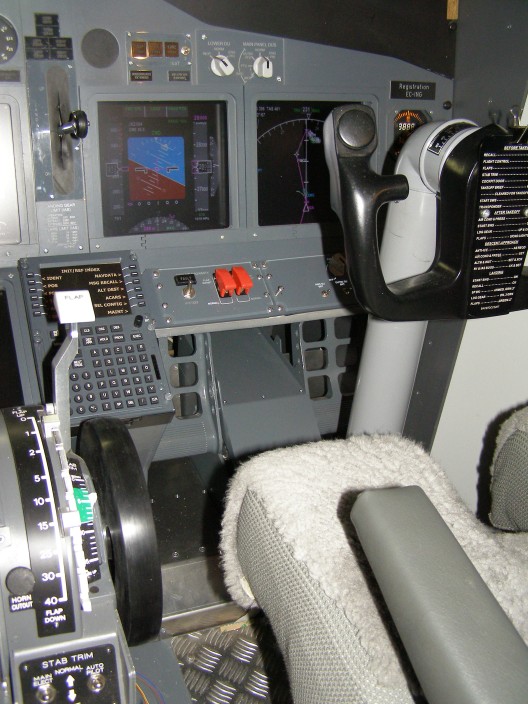
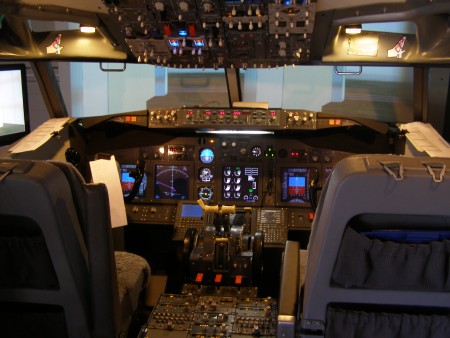
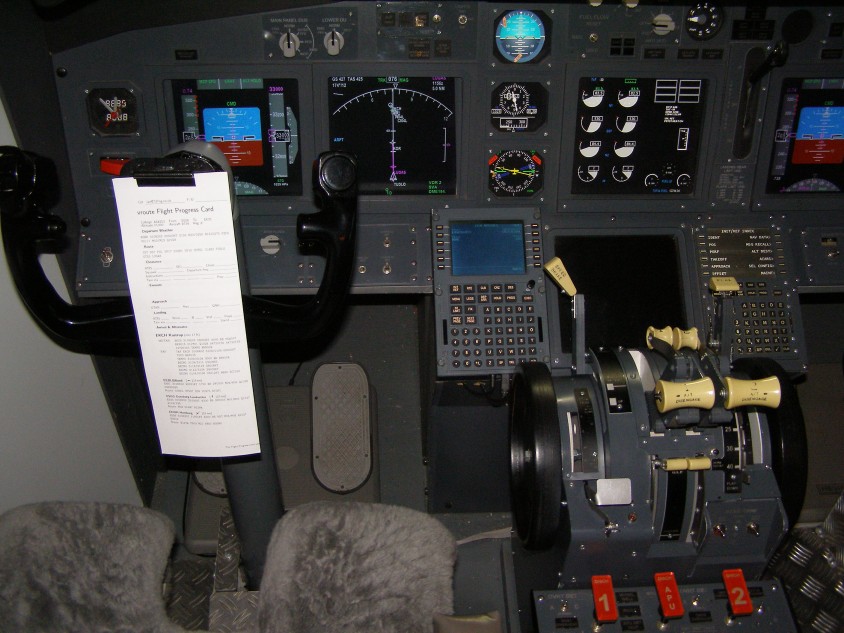
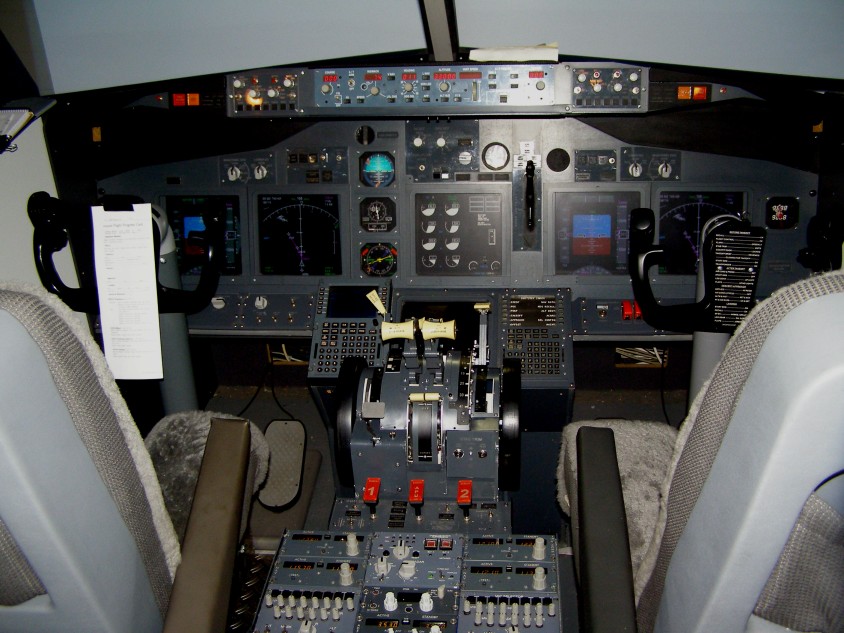
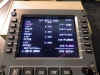
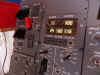
Fully Integrate the MIP Switches into Prosim, so i've started with the
display unit switches. Got the displays working and
positioning on the correct screen, but when positioning the PFD
(left), it doesn't change to the Compact EFIS Display
(right). The consensus of opinion is that its a carrier
option, so i'll do a bit more research on it and see where we go from
there. Light Test switch and Fuel Flow both working
soooperb :o) I've got to do some work on this website,
it's becoming cluttered and untidy ! 21/07/2013
Another
one bites the dust :o) The Simworld Overhead panel set I have
been building has gone, so got a clear workbench until Andrew
Pringle's arrives in August. So this has given me
some time to look at what I am doing in my own pit. Going to
Fully Integrate the MIP Switches into Prosim, so i've started with the
display unit switches. Got the displays working and
positioning on the correct screen, but when positioning the PFD
(left), it doesn't change to the Compact EFIS Display
(right). The consensus of opinion is that its a carrier
option, so i'll do a bit more research on it and see where we go from
there. Light Test switch and Fuel Flow both working
soooperb :o) I've got to do some work on this website,
it's becoming cluttered and untidy !
  18/07/2013
Geremy of GLB Flight
Products fame was here Wednesday. On his way from Reading he
called in to bring me some of his knobs to complete the Overhead
panel. So he reckoned as he was here, it would be rude to turn
down my offer of a spin in the sim :o) 18/07/2013
Geremy of GLB Flight
Products fame was here Wednesday. On his way from Reading he
called in to bring me some of his knobs to complete the Overhead
panel. So he reckoned as he was here, it would be rude to turn
down my offer of a spin in the sim :o)
Well impressed with these knobs. Moulded in light grey and 100%
accurate with 2 grub screws. Not backlightable, but the quality
is superb. These are real nice knobs.


14/07/2013
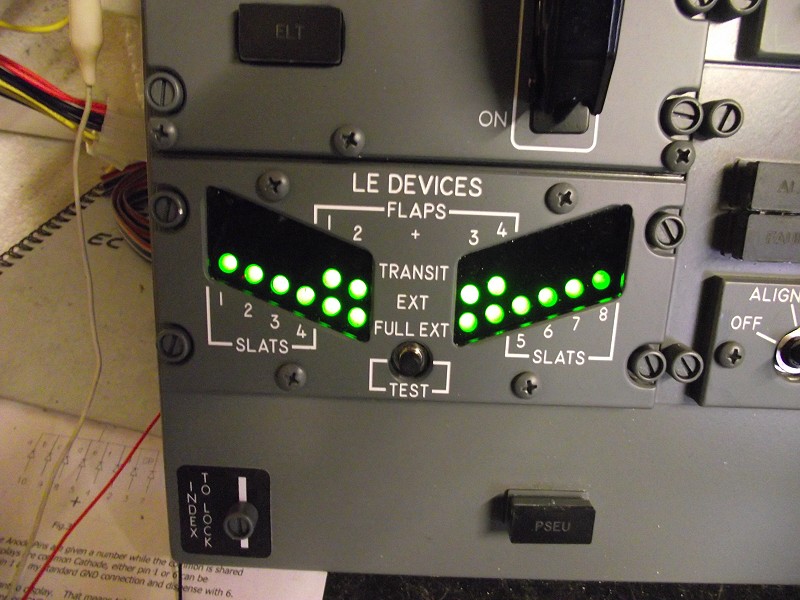
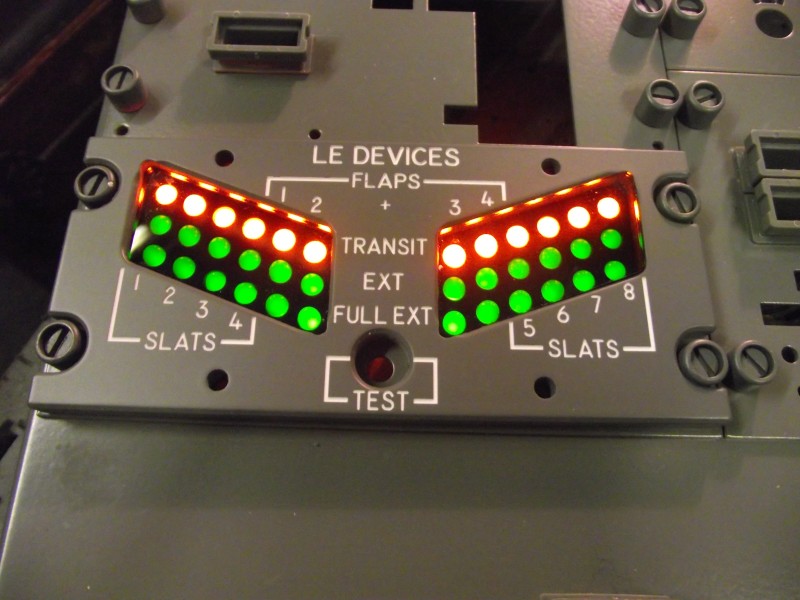
LE
Device gauge panel and the DZUS Cups arrived from Simworld (at last, 2 weeks to get
here). It's in, all wiring done and tested and it works
:o) Glued on the Annunciator Legends, that's a real messy
job and you have to be so careful.

So, I
spent a couple of hours assigning and configuring the setup in Prosim
and giving it a real beating to test out all the switches and
Led's. Only 1 issue and that was me having assigned one of
the LED's incorrectly. Took me 2 minutes to sort.

  I'll do
all the little 'odds & sods' on Monday and then these can go out
on Wednesday. Next set for Andrew Pringle are due in Early
August, so I just may get some time to fly now.
I'll do
all the little 'odds & sods' on Monday and then these can go out
on Wednesday. Next set for Andrew Pringle are due in Early
August, so I just may get some time to fly now.
Also
had four visitors in to fly the sim over the past couple of weeks. 6th
June saw Terry Jones (left) from Ellesmere Port here along with his
buddy Antony Garner out of Newton Le Willows. To quote Terry
"That was an amazing experience and can I come back
again". Also in were Aden Murcott and his
brother-in law Andrew. Here for two days on the 10th & 11th
for some 'in depth' experience with the 737. Can you believe I
forgot to take their pictures - DUH!
 09/07/2013
Back on
the Panels Monday. I'm waiting for some bits to arrive from Simworld,
i'm short of some DZUS cups and one of the back plates for the rear
panel is missing. Hoping they are going to be here this week so
I can get these done and dusted. They arrived in the UK today,
so here's hoping. 09/07/2013
Back on
the Panels Monday. I'm waiting for some bits to arrive from Simworld,
i'm short of some DZUS cups and one of the back plates for the rear
panel is missing. Hoping they are going to be here this week so
I can get these done and dusted. They arrived in the UK today,
so here's hoping.
So, while I'm waiting I fitted the knobs to the forward overhead,
Fitted the LED64 to the rear panel and wired up the LED's ready for
when my panel arrives from Poland so I can connect to the LED64.

07/07/2013
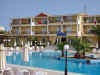
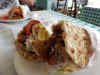
Just back from (yet another) holiday in Zakynthos. It wasn't so much
a holiday as a 'Man versus Food' Trip. What's happening in
Greece given the financial situation is there is now so much
competition that you can eat (and eat well) relatively
cheaply. I know its got nothing to do with cockpit
building, but I had to pass these on. Gyro's for 4.50 euro,
Double Cheeseburgers for 4.50 euro and the best breakfast I've had in
ages for 4 bucks. Now all i've got to do is get rid of the 3 kilos i
brought back :o)


26/06/2013
I've
come to a stop on the Forward Overhead because I'm waiting for the
DZUS Cups from Simworld. So, I guess it was smart to make a start on
the rear panel. Here's how it has come together so far.
This set is going to Australia so the Dummy IRS Display is one of the
Gates at Sydney. I'm hoping the bits to
complete the set will be here when I get back from Greece 5th July.
23/06/2013
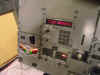
Both
LED64ADV Cards in, Tested and configured in Prosim.
Everything works which is always a plus. As this is a 100%
connected panel, there is an awful lot of wiring in there and it's not
easy to get it where it's supposed to go without interfering with the
backlight cutouts and the DZUS Bolts. But I'm pretty happy with
the end result. Cant finish it yet because I'm waiting for
some DZUS Cups to arrive from Simworld which I hope will be here when
I get back from Holidays.


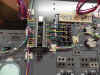
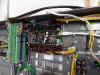
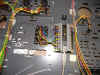
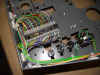
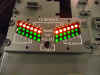
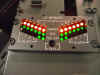
  21/06/2013
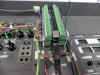
Finally
got the first LED64ADV fully connected up, tested and working, so it
was onto the second card. As previously mentioned, given
that there ain't a lot of room in which to work, I decided to stack
the cards, putting one on top of the other. This approach
lets me use the available space to bring almost 200 wires together in
one place. And that's a lot of wire - trust me. So
it's onto connecting the LED's to the card. To save
connections, as the LED64AV shares a common Anode (+) across the
board, i've made the LED arrays in groups which share a common
Anode. Cuts down on making connections and having two trailing
wires per LED. But still a lot of cabling to hook
up. But at least everything actually works and that's unusual
because usually you get one or two LED's that won't play ball (usually
because rushing, i may have connected the + & - the wrong way round
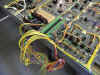
(well we are all human). 21/06/2013
Finally
got the first LED64ADV fully connected up, tested and working, so it
was onto the second card. As previously mentioned, given
that there ain't a lot of room in which to work, I decided to stack
the cards, putting one on top of the other. This approach
lets me use the available space to bring almost 200 wires together in
one place. And that's a lot of wire - trust me. So
it's onto connecting the LED's to the card. To save
connections, as the LED64AV shares a common Anode (+) across the
board, i've made the LED arrays in groups which share a common
Anode. Cuts down on making connections and having two trailing
wires per LED. But still a lot of cabling to hook
up. But at least everything actually works and that's unusual
because usually you get one or two LED's that won't play ball (usually
because rushing, i may have connected the + & - the wrong way round
(well we are all human).
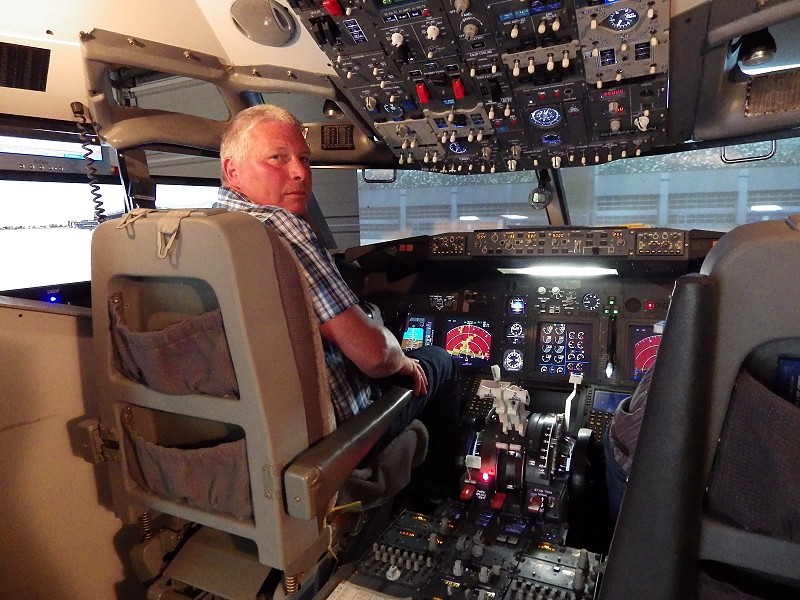
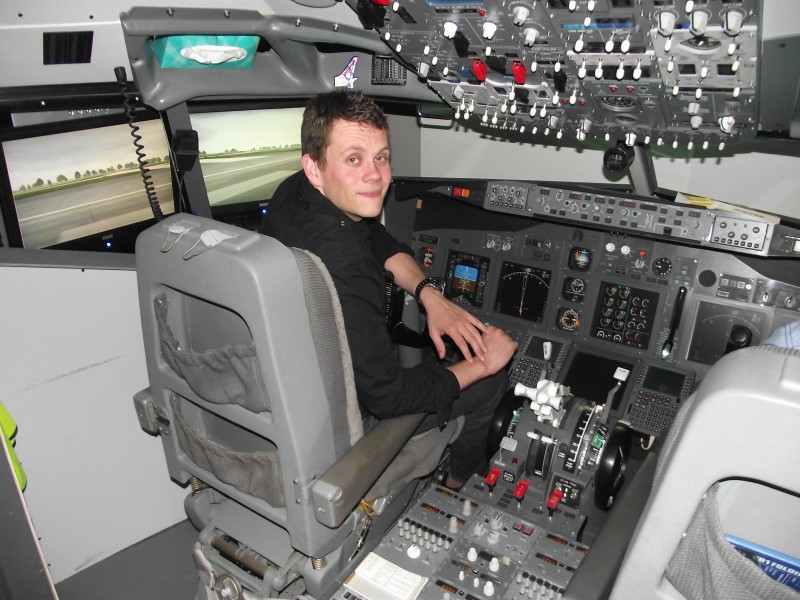
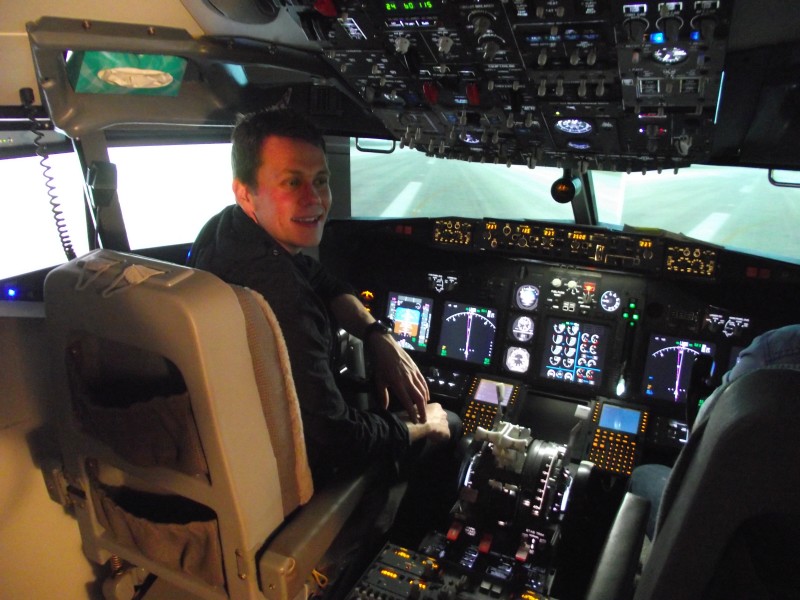
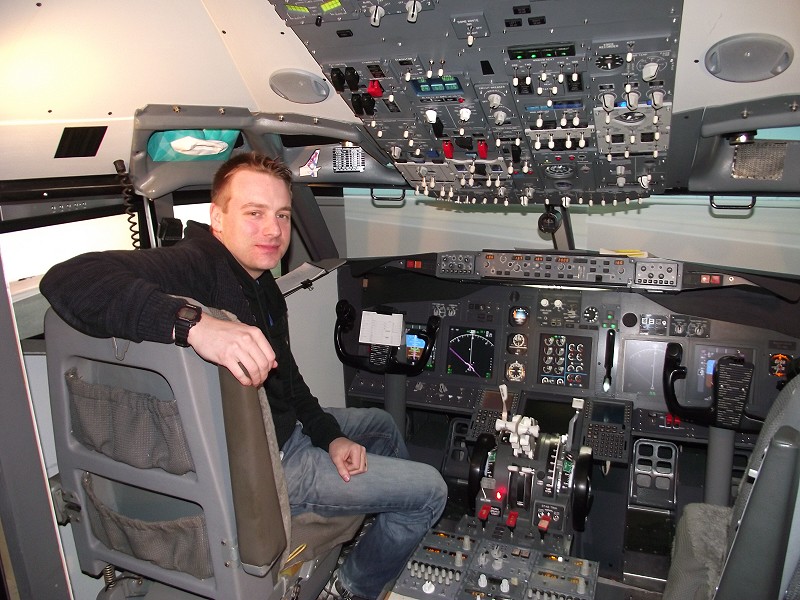
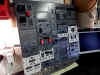
  19/06/2013
Well I
had a day off Monday because I had two chaps here all day flying the
sim. Left is Phil Savage from Swansea and on my right that's
Chris Smetham in from Gloucester. Well it seems we did the biz
because they were well impressed :o) 19/06/2013
Well I
had a day off Monday because I had two chaps here all day flying the
sim. Left is Phil Savage from Swansea and on my right that's
Chris Smetham in from Gloucester. Well it seems we did the biz
because they were well impressed :o)
To quote Phil " Your sim setup was really beyond our wildest
expectations and is of such a superior high quality standard. We
do appreciate all the hard work, time and effort you have put into the
project. I guess that means they liked it
:o) These two chaps are Train Drivers. Phil drives
High Speed Trains at faster than the speed of sound (actually about
125mph) and Chris does the heavy lifting, pulling 2000 tons !!!
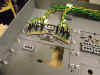
 I've
just spent nearly two days, joining LED's in parallel, soldering the
wires to the array and then running the leads to the point where I
will eventually join them to the LED64ADV cards. My
God, this is 'mind numbing' work. Sometimes I wonder why I
do this to myself :o) But, it's all done now and the
next step tomorrow is to start hooking them up. This part
of the job can only be termed as 'self abuse', i'm sure you know what
I mean. But, it's got to be done and this being a 'FULL'
panel, there's 2 LED64ADV cards to connect to and trust me, i know
where every single wire goes. No, I do really :o) I've
just spent nearly two days, joining LED's in parallel, soldering the
wires to the array and then running the leads to the point where I
will eventually join them to the LED64ADV cards. My
God, this is 'mind numbing' work. Sometimes I wonder why I
do this to myself :o) But, it's all done now and the
next step tomorrow is to start hooking them up. This part
of the job can only be termed as 'self abuse', i'm sure you know what
I mean. But, it's got to be done and this being a 'FULL'
panel, there's 2 LED64ADV cards to connect to and trust me, i know
where every single wire goes. No, I do really :o)

16/06/2013
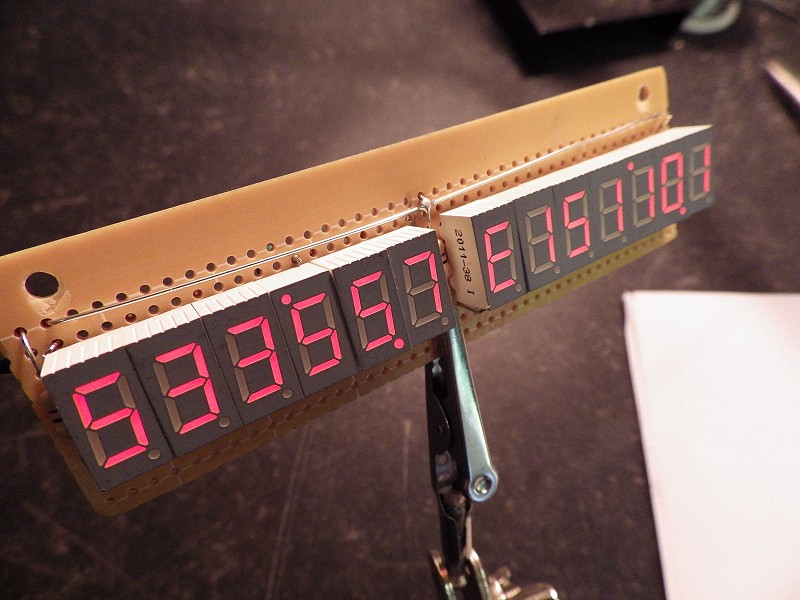
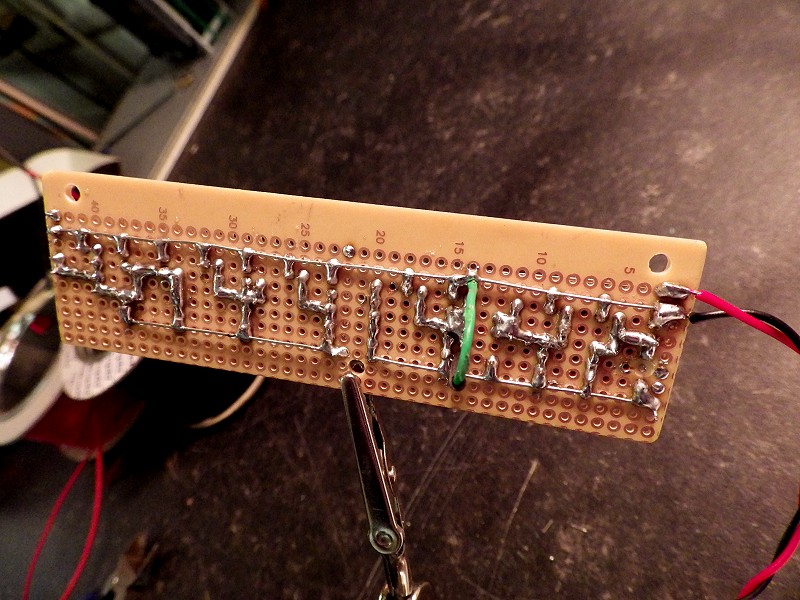
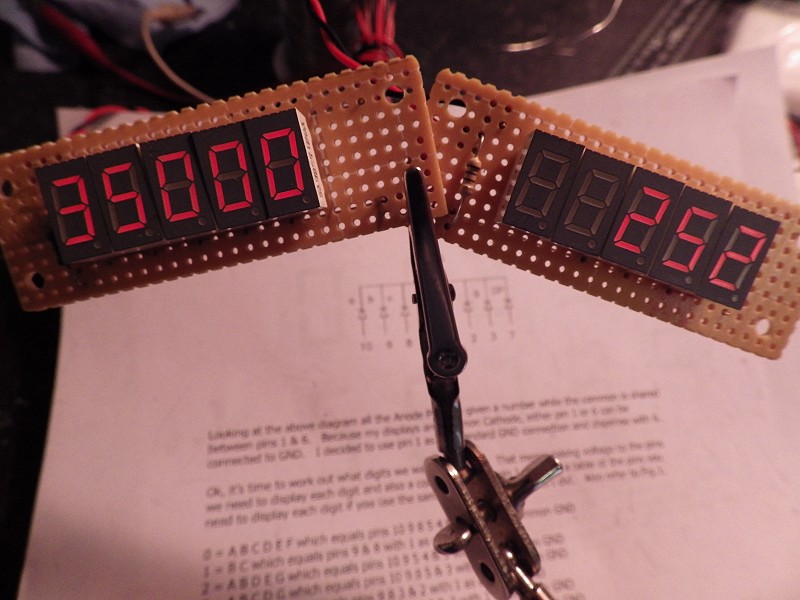
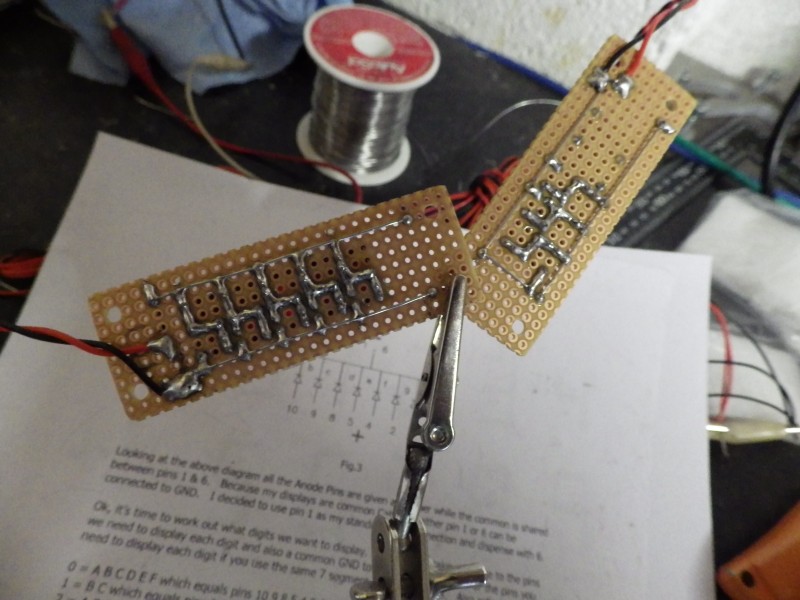
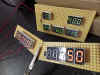
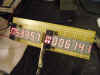
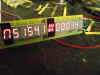
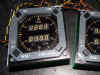
So, were
on a roll. Needed a day off from soldering LED's, so i decided
to make the displays. First off was to make the Electric Meter
displays. The hardest part of this is to make it so it fits the
faceplate SIMWORLD sends. You have to cut it to allow the
digits to fit into it. They make no allowances in their
cut. They need to make the cutouts a little bigger so when
soldered onto the board, the displays are a nice fit in the
faceplate. I have told them about it. My biggest problem
here was that the Black face plate had been glued into the Meter
Panel, so to cut it was very difficult - couldn't clamp it in a
vice. But it fitted OK.

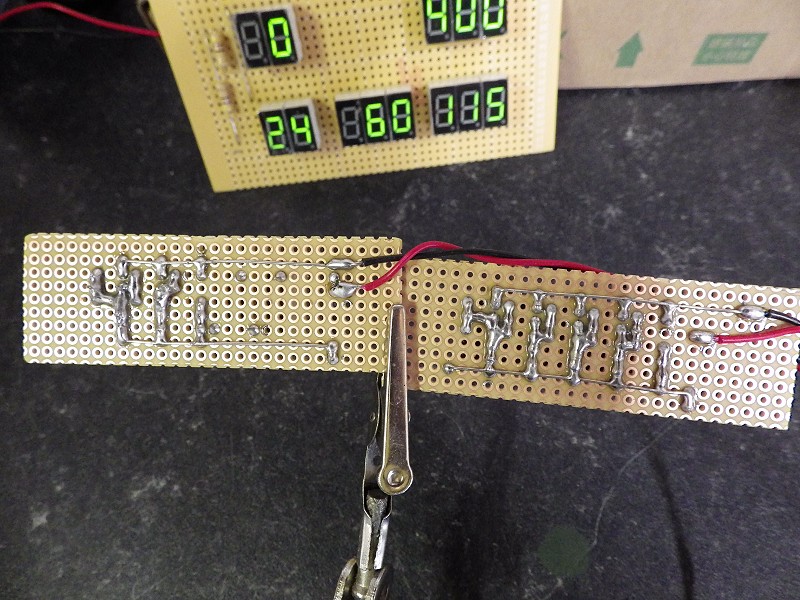
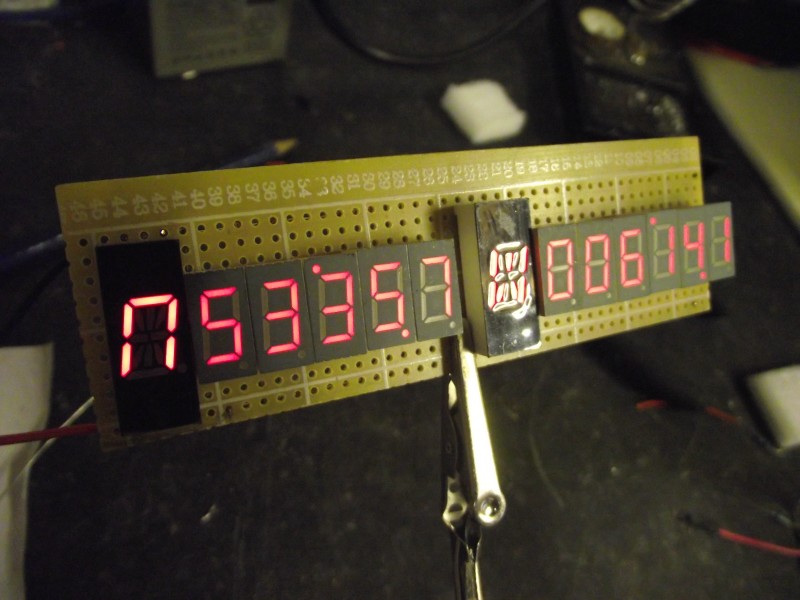
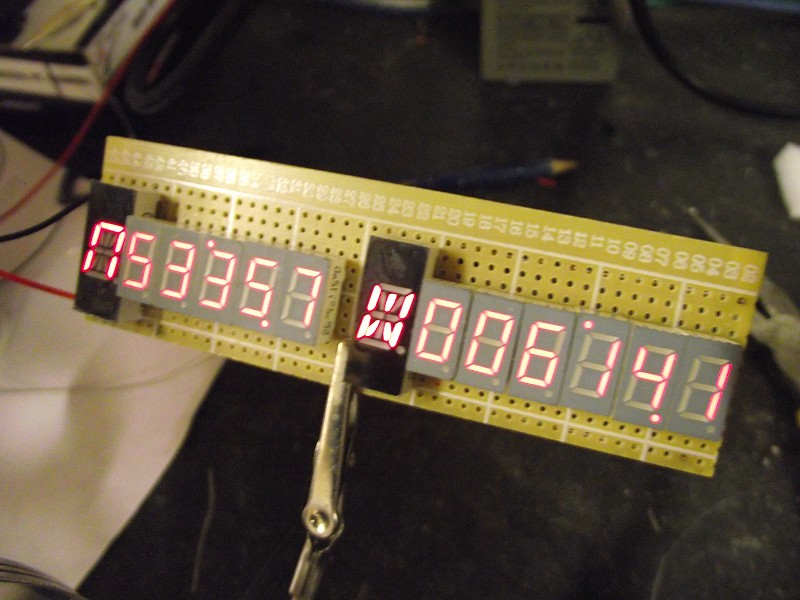
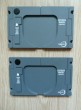
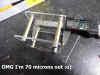
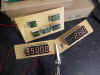
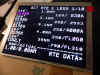
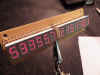
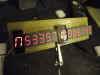
Why is
nothing ever easy :o) One of the components to make up the Land
Alt/Flt Alt displays did not travel well. All the pins on it had
been totalled ! Last digit should be a Zero, but the only
thing I could get working after bending/re-shaping/snapping off pins
in the process was a two. Ah well - life's a
bitch. Make your own displays - SEE
HERE.
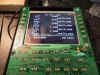
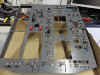
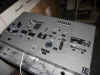
15/06/2013
Another
good day at it yesterday. Managed to get the first LED64ADV in place
and the led arrays for two of the 5 columns made and connected.
Been into PROSIM and assigned them. It's always very satisfying
when you get the first light on the panel with no issues
:o) Left the panel on 'Burn Test' for a couple of
hours. Panel now cosmetically complete except for the DZUS
and the Voice Recorder Switch and Panel which i have to wire up for
the 5vdc. Wiring LED's is 'mind numbing' work, so i
think I'll make the displays next and fit them. I'm very
pleased with the quality and finish on the SIMWORLD Overhead -
STUNNING !
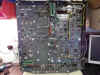
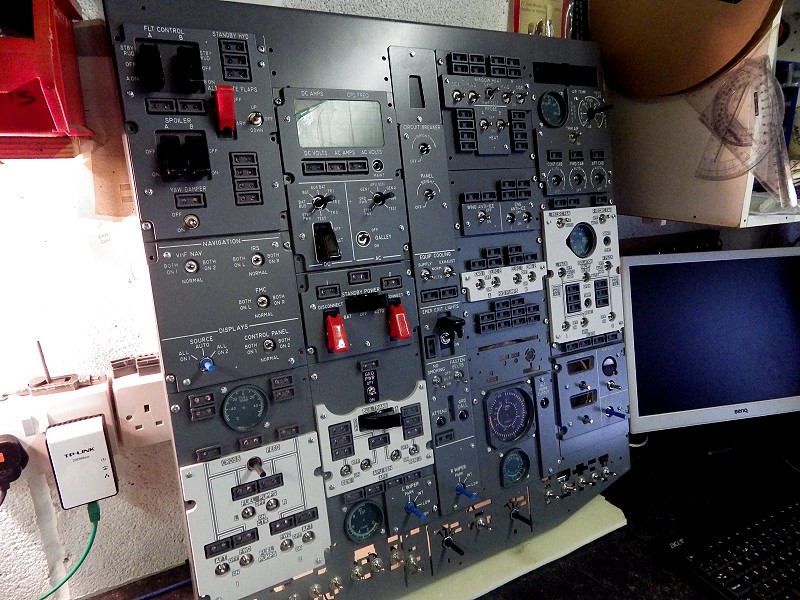
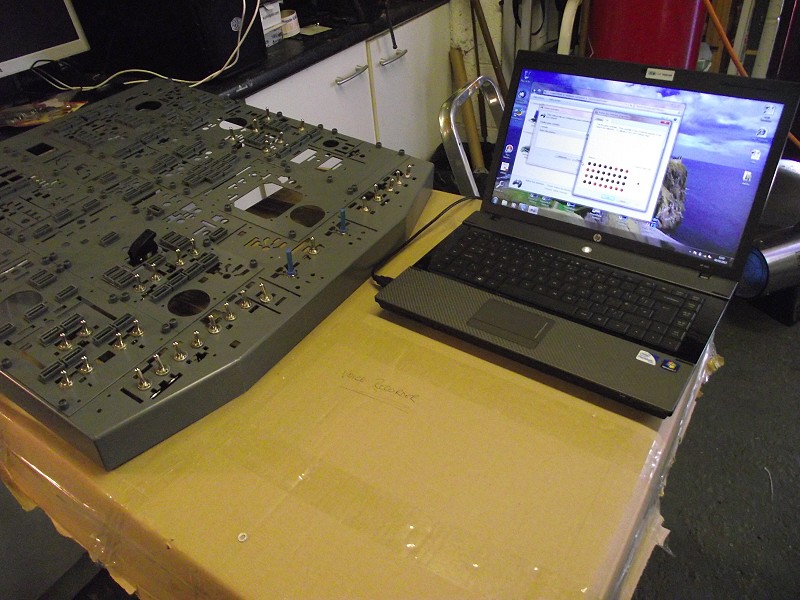
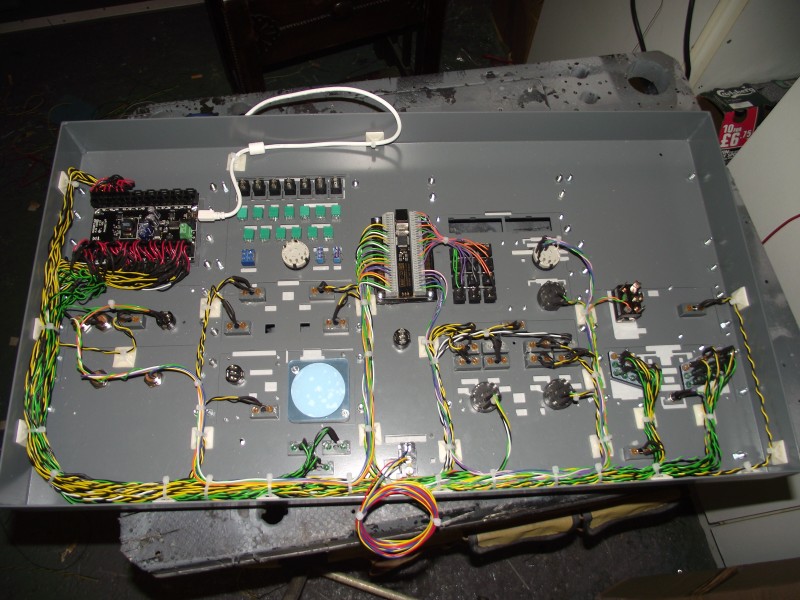
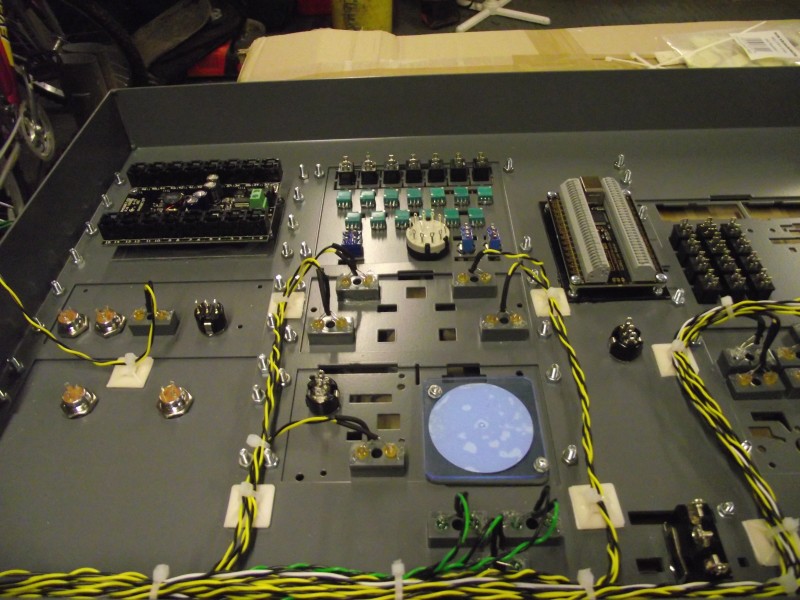
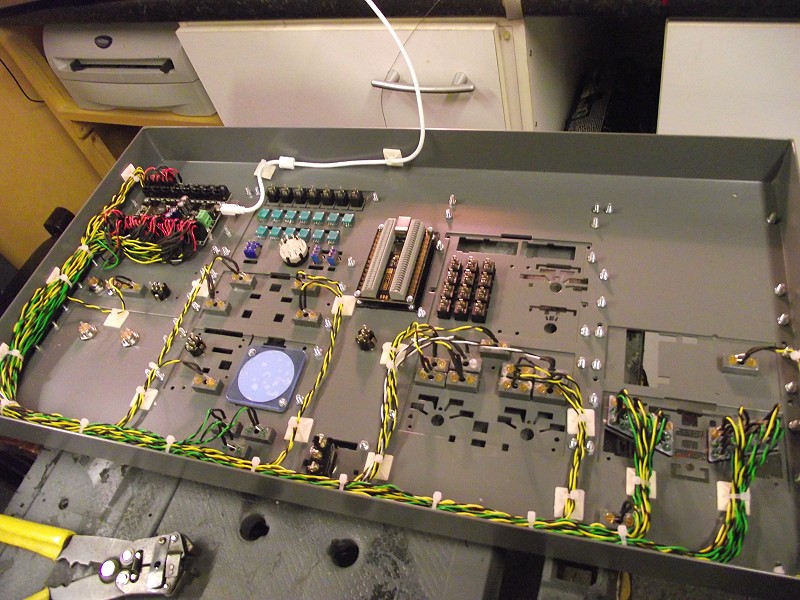
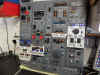
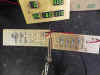
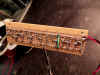
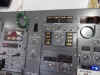
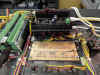
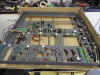
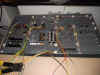
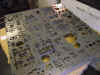
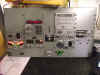
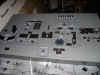
13/06/2013
Here's the state of play 13/06/2013. Third input card installed,
all wired up and the inputs tested. Started on the cosmetics as I have
to have the annunciators on the panel before I can start making the
LED arrays. Dummy Gauges fitted and most of the
lightplates. Still waiting for the DZUS to arrive, but
that can be left until last

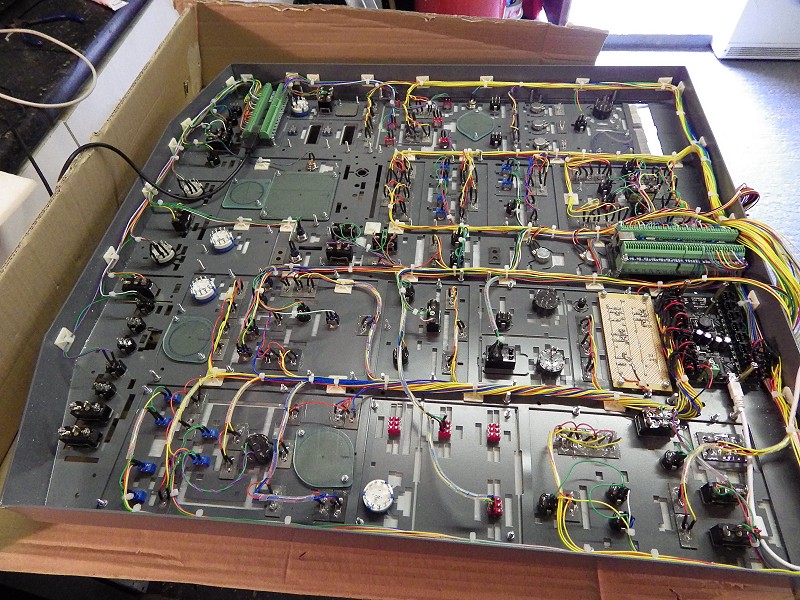
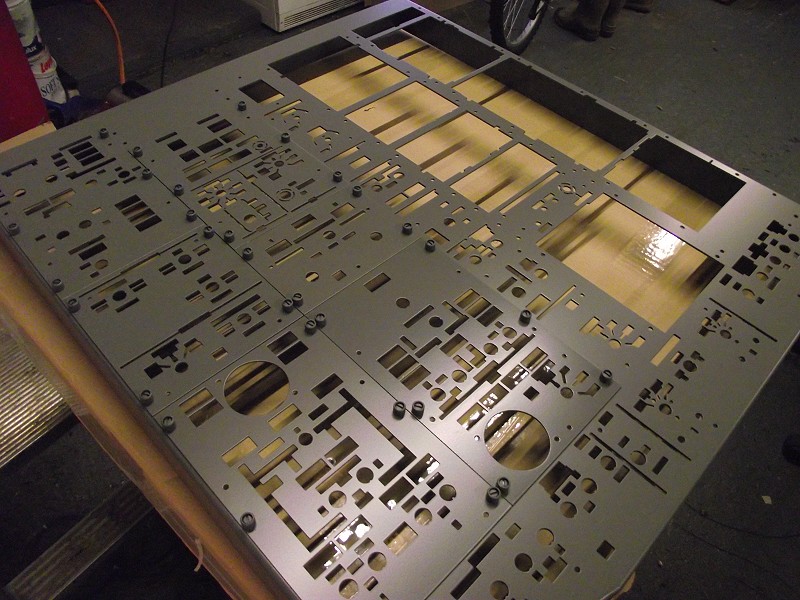
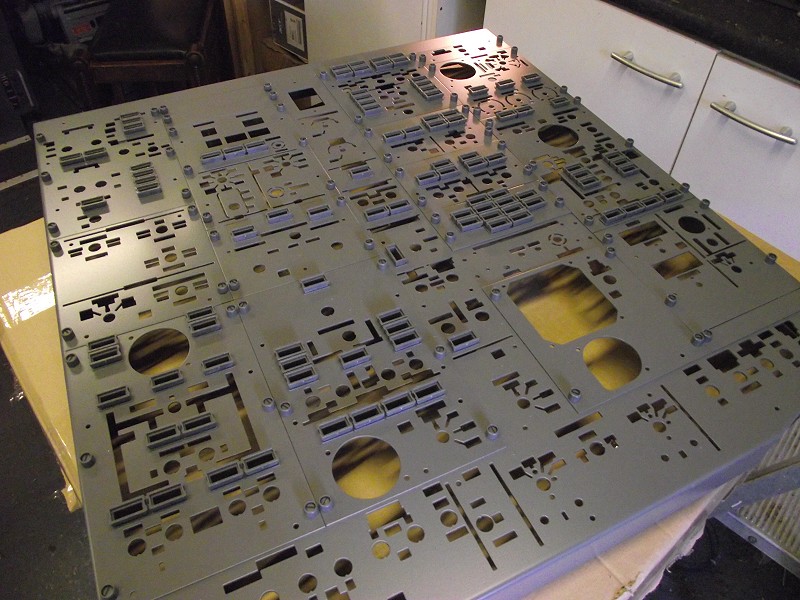
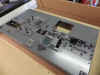
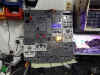
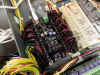
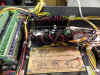
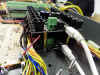
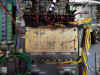
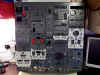
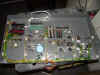
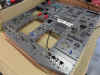 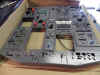 11/06/2013
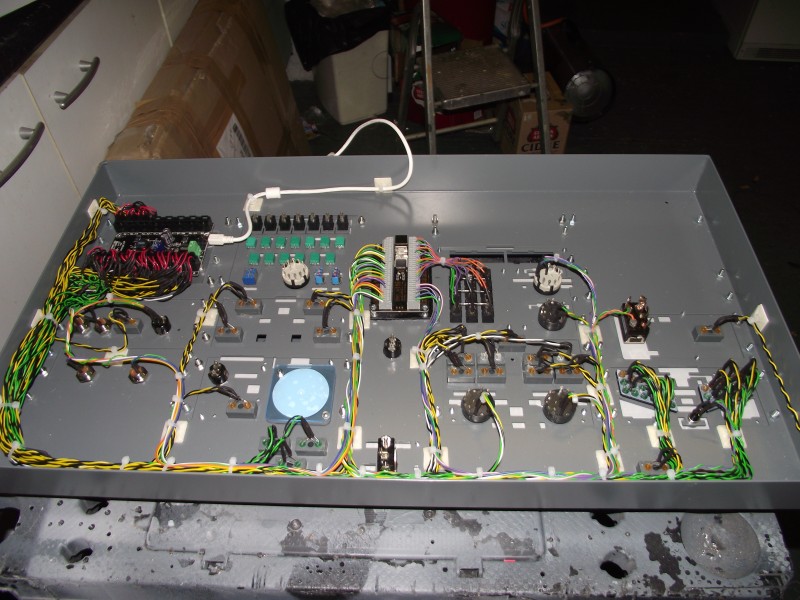
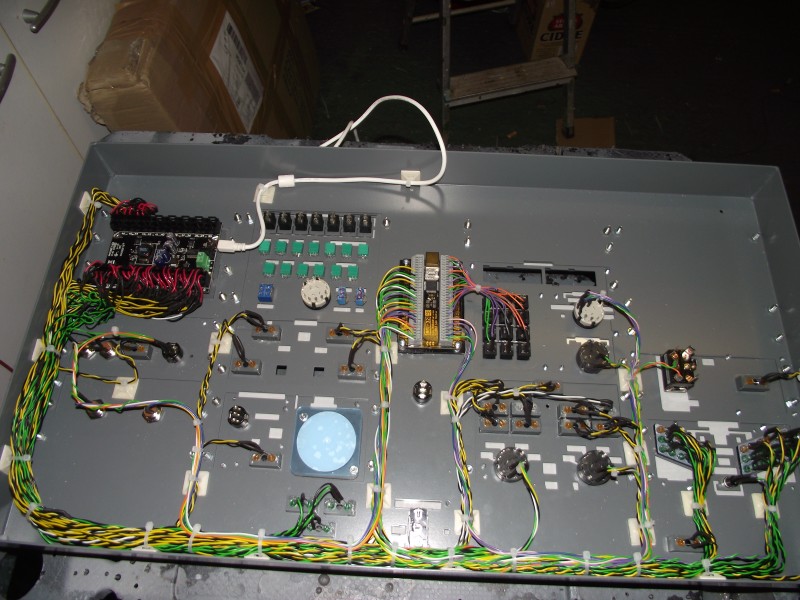
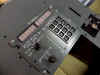
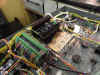
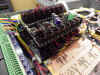
No, I
didn't die or run away to sea :o) Short update to briefly tell
whats happening because several people have mailed to see if i'm still
of this world. Just had a couple of weeks in
Zakynthos with the family and another Simworld Forward and Rear
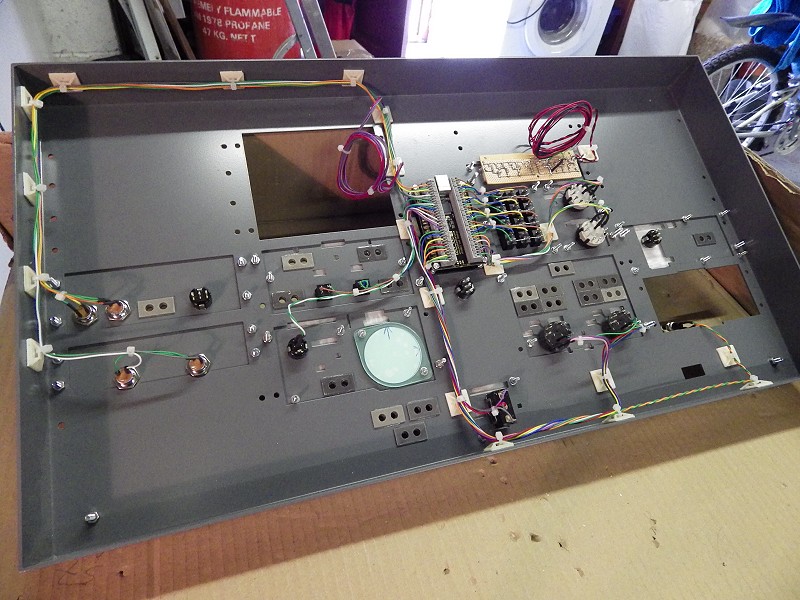
Overhead Panel Set has arrived for building. But this one
is NOT a Lite Version, this one is the FULL working set. Here's
some pics of progress as of 11/06/2013. More pics
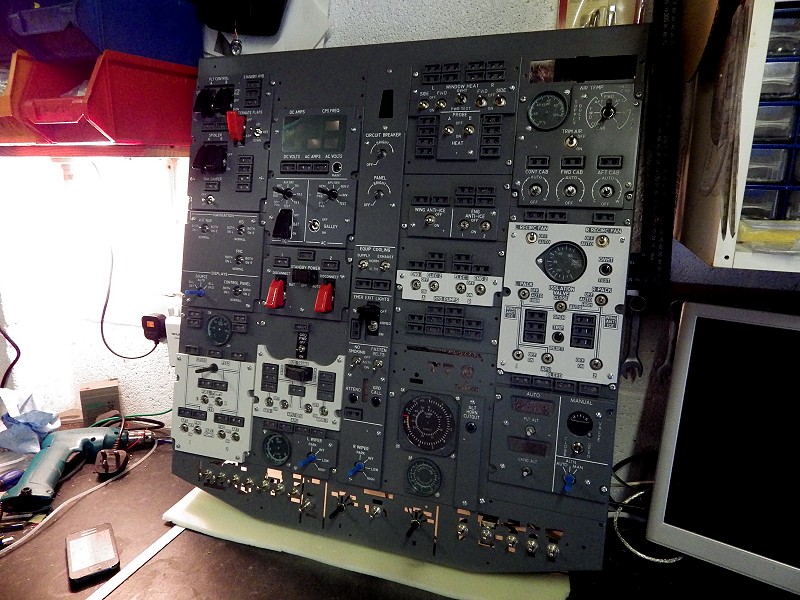
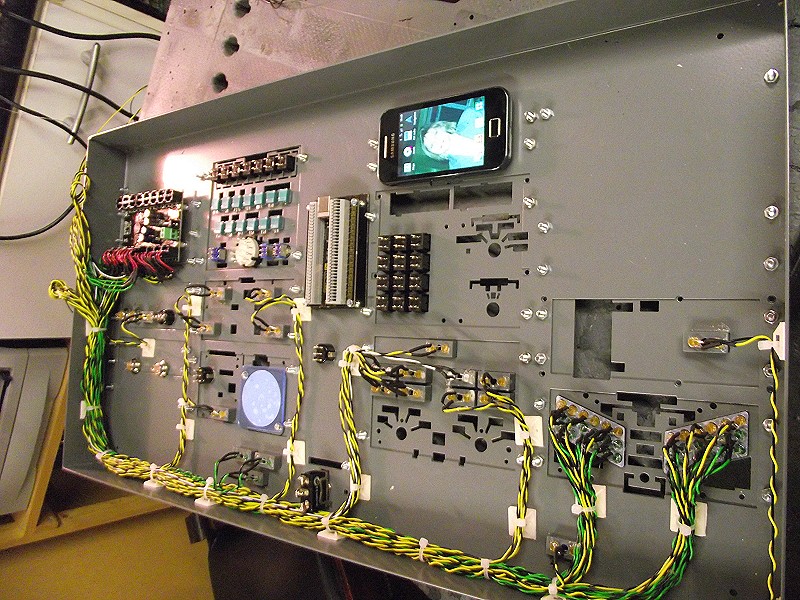
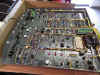
will follow shortly. 11/06/2013
No, I
didn't die or run away to sea :o) Short update to briefly tell
whats happening because several people have mailed to see if i'm still
of this world. Just had a couple of weeks in
Zakynthos with the family and another Simworld Forward and Rear
Overhead Panel Set has arrived for building. But this one
is NOT a Lite Version, this one is the FULL working set. Here's
some pics of progress as of 11/06/2013. More pics
will follow shortly.

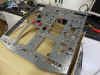

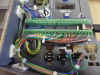
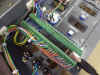
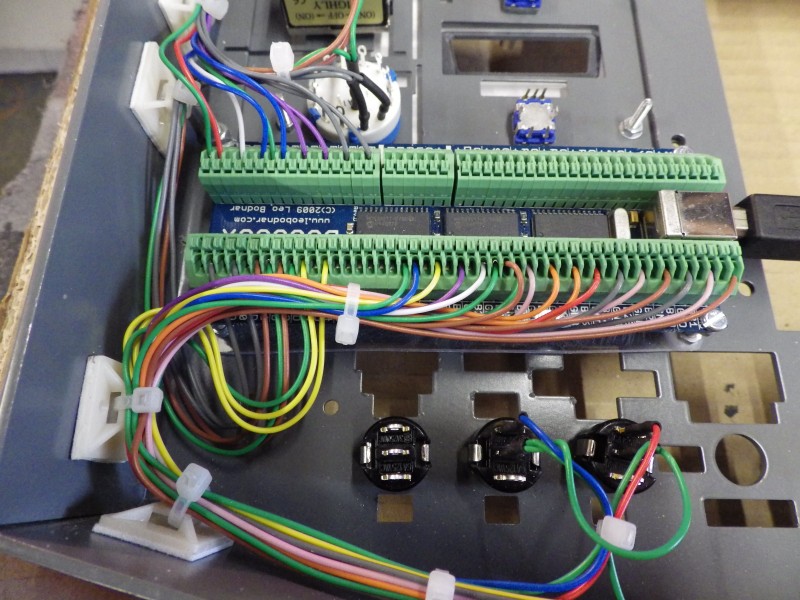
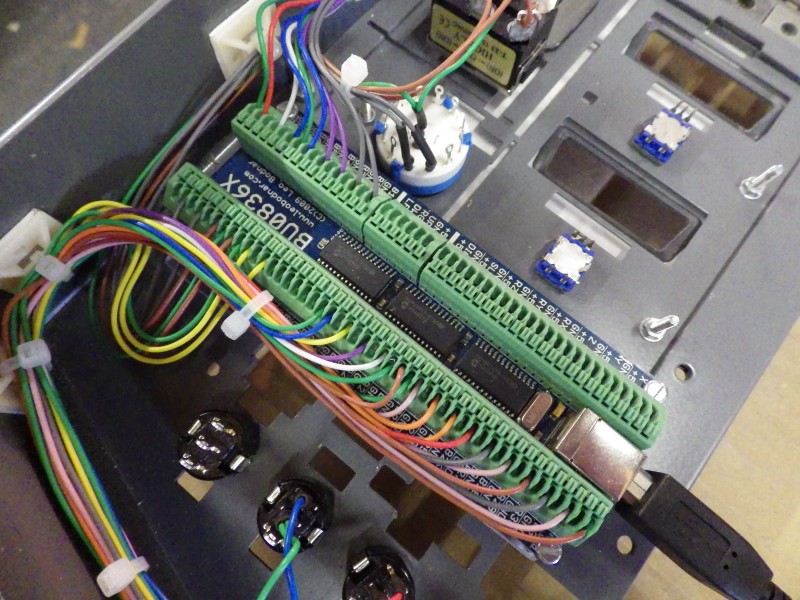
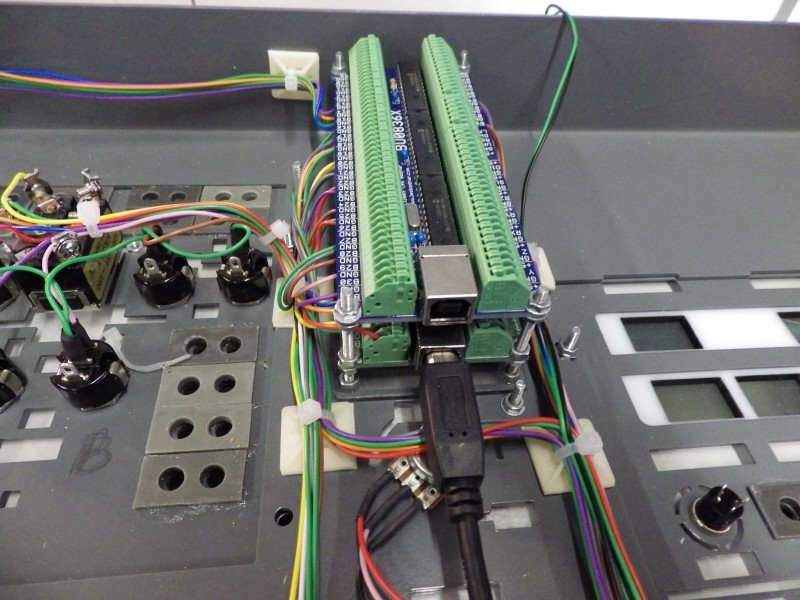
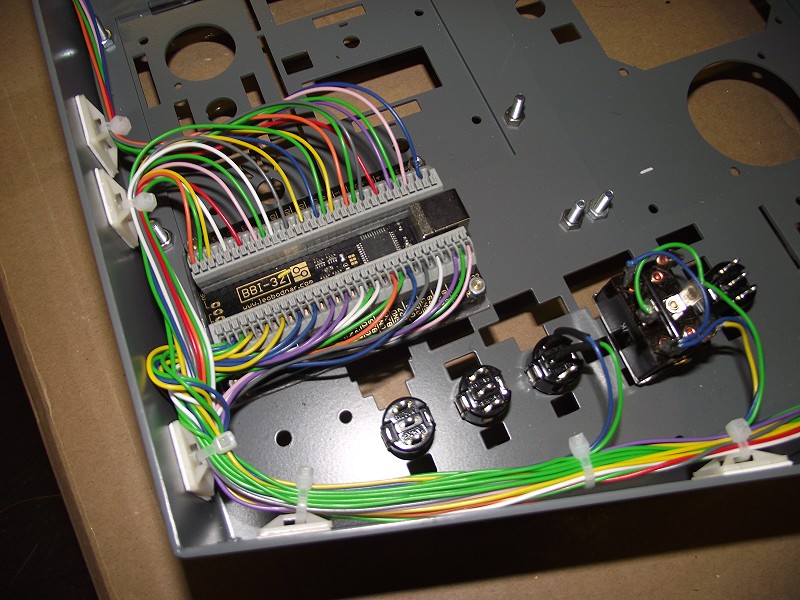
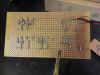
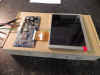
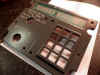
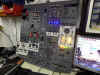
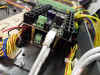
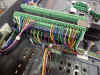
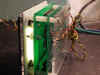
Having
to get all the Inputs and Outputs installed in what can only be
described as a 'tight space' means the only way is up. So what i
have done is 'stacked' the Input cards to give me what I need.
There's no other way to fit them really. I would have preferred
to use BBI-32 cards, but my colleague sent me BU0835X boards, so I had
to use them. BBI-32's would have given me more room to work.
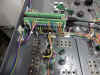


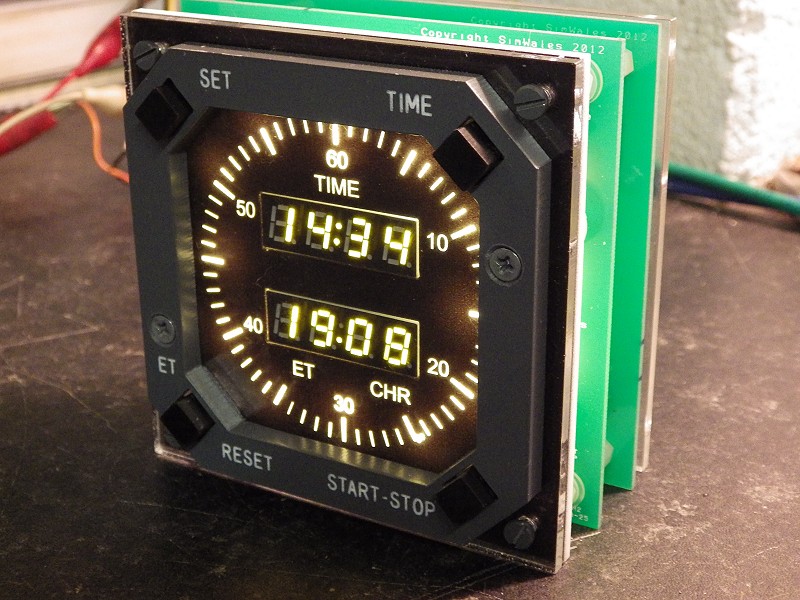
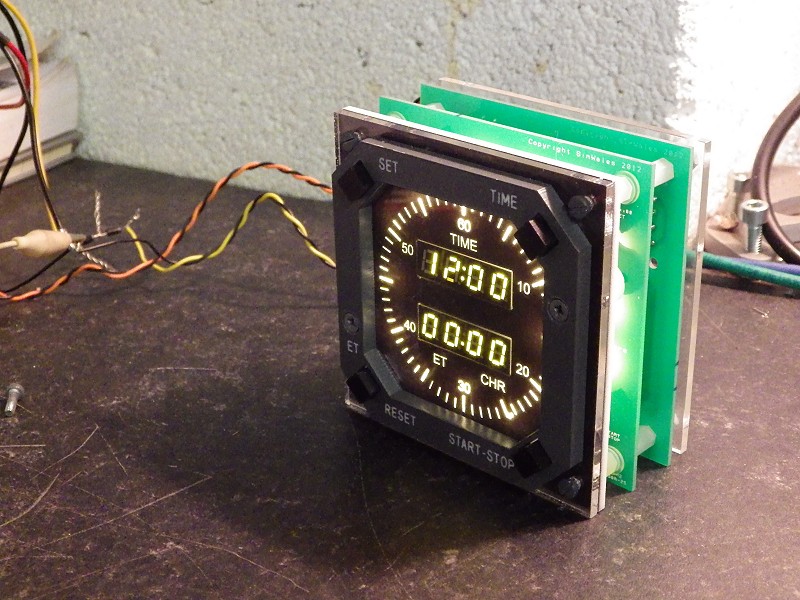
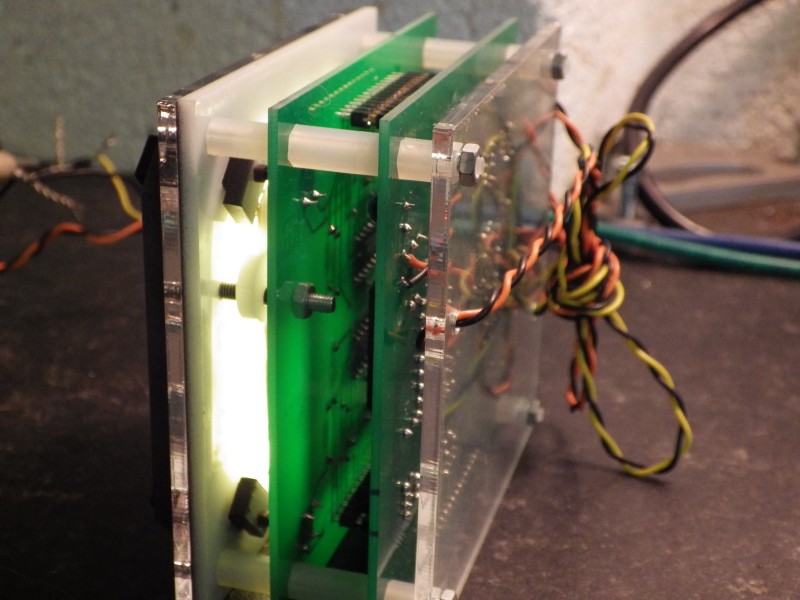
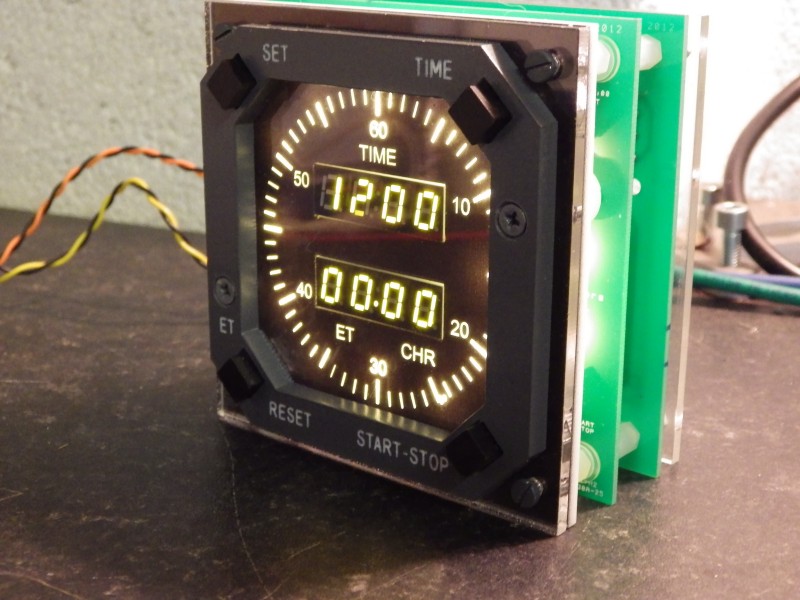
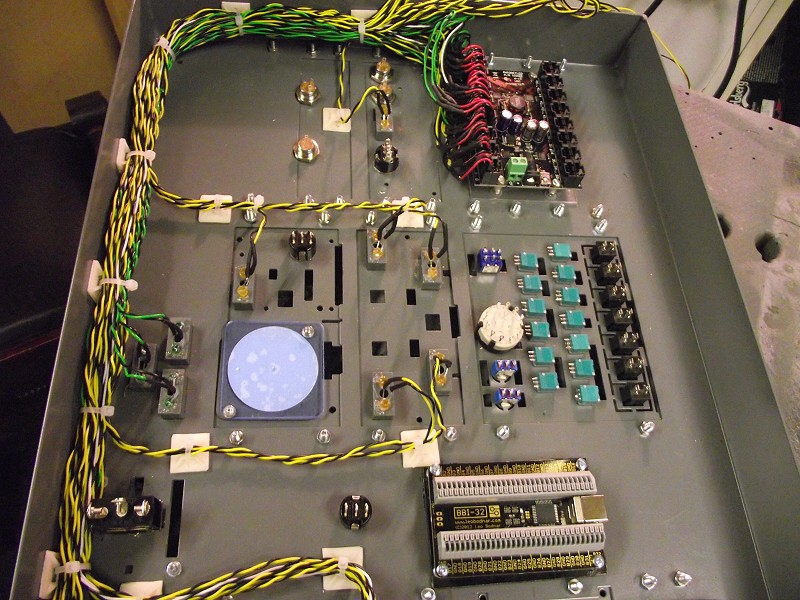
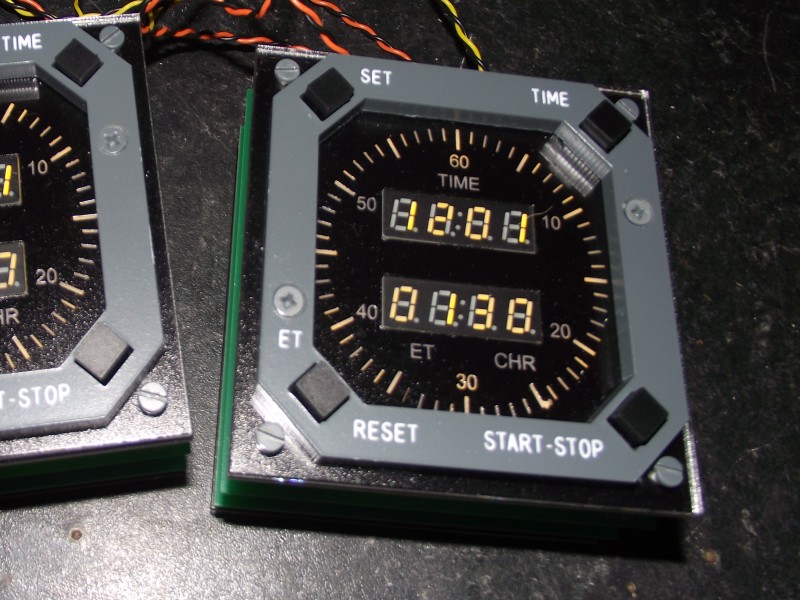
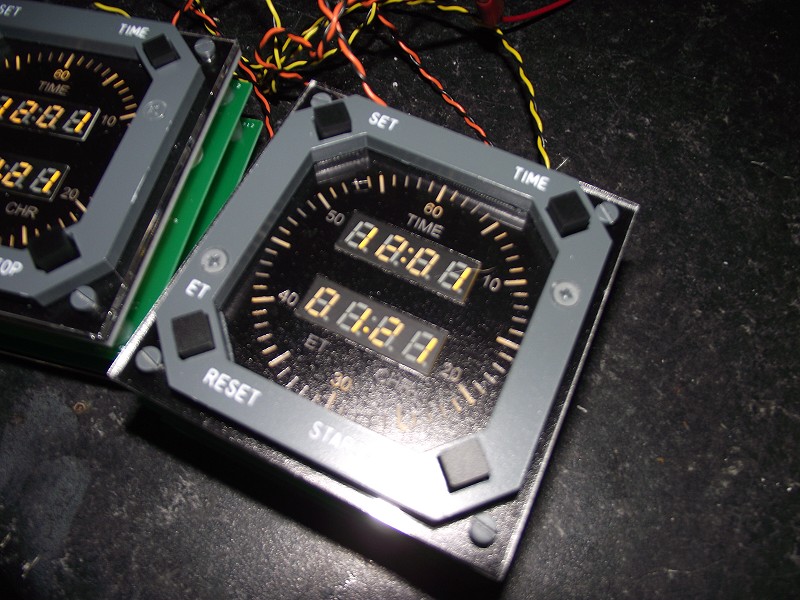
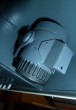
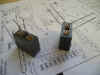
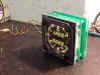
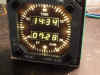
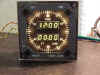 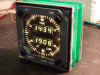 Then,
I've had Joe Lavery's clocks since Christmas and I've been looking at
the box for 5 months. After coming back off holiday, I had a clear
workbench, so I thought to myself, hmmm this might be a good
time to fit them. I have managed to get one in and running
before the afore mentioned Overhead arrived. Very pleased with
it. Works well and now we have chrono and elapsed and real time
in the cockpit. You just need to feed them with 5vdc for
the clock and 12v for the backlighting (although I have used a
resistor in that to prevent me getting sunburn - It is a little
bright). Then,
I've had Joe Lavery's clocks since Christmas and I've been looking at
the box for 5 months. After coming back off holiday, I had a clear
workbench, so I thought to myself, hmmm this might be a good
time to fit them. I have managed to get one in and running
before the afore mentioned Overhead arrived. Very pleased with
it. Works well and now we have chrono and elapsed and real time
in the cockpit. You just need to feed them with 5vdc for
the clock and 12v for the backlighting (although I have used a
resistor in that to prevent me getting sunburn - It is a little
bright).

   Also had a few visitors over since last update and that takes
time. Seems to me that Jet2 pilots have discovered the sim
:o) I've had several over in May and June. More pics and details to
follow because I've got shitloads more news......
Also had a few visitors over since last update and that takes
time. Seems to me that Jet2 pilots have discovered the sim
:o) I've had several over in May and June. More pics and details to
follow because I've got shitloads more news......


04/04/2013
My apologies to everyone requesting to visit for the
rejections. However, my workbench is now clear and we are again
taking visitors (and we've added LSZH Zurich to the choice of
destinations).
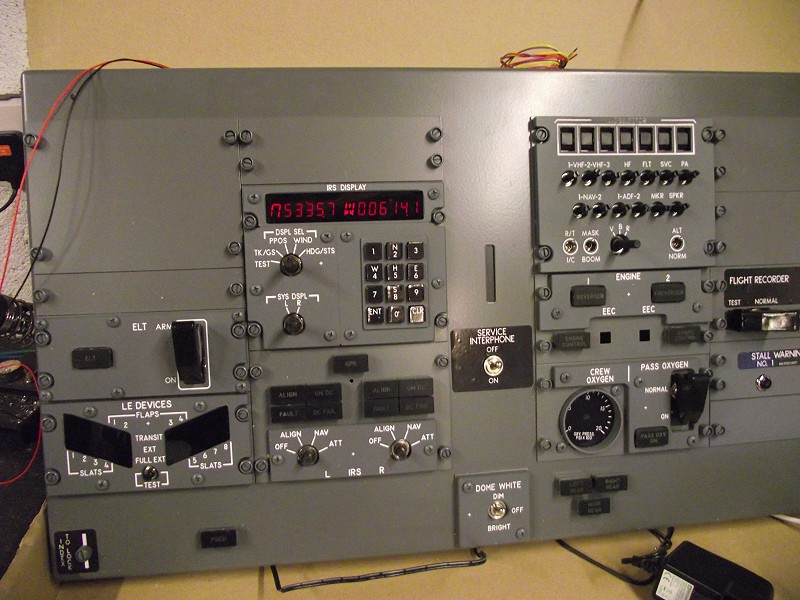
So then it's back
onto Tom's Rear Overhead. Made the display for it (this is
a gate at Dublin EIDW) and using 17 segment displays, it's possible to
construct a W for West on the IRS Display. I have a couple
of other panels to do later in the year, so I really should look at
automating these displays. But time is a commodity
here that is in short supply.
All the controls including the IRS Keypad are inputting to
Prosim. 26 spare outputs from the second LED64ADV can be
used to populate what is not already wired in on the Forward
Overhead. I've already drawn up how I will do the next one.
Then April 3rd/4th Tom (left) and Leo arrived from Ireland to collect
the panels. Two lovely chaps, we had a great time. What a
character he is, flown everything from a kite thru 707's, DC8's to
747's. 36,000 hours flight time and a lot of stories to
tell. Very entertaining and a 'damn good egg all
round' :o) :o) I'll be popping over to
Ireland in the summer to help iron out any issues.


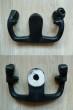
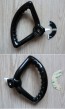
    Geremy's
had me at it again. I'm wiring up his 'Plug
& Play' Gear Levers for him and several arrived to be hooked
upto the 'Bombproof' BU0836 cards. For the money, these
are really good. They must be, I use
one. Have a look at it if you are in the market for
a Gear Lever Mechanism. Lifting 5v off the Card, it allows the Handle
Knob to be illuminated for that 'extra something'. Really
looks the part especially in a dark cockpit. Geremy's
had me at it again. I'm wiring up his 'Plug
& Play' Gear Levers for him and several arrived to be hooked
upto the 'Bombproof' BU0836 cards. For the money, these
are really good. They must be, I use
one. Have a look at it if you are in the market for
a Gear Lever Mechanism. Lifting 5v off the Card, it allows the Handle
Knob to be illuminated for that 'extra something'. Really
looks the part especially in a dark cockpit.
22/03/2013
Tom's Rear
Overhead Panel arrived from Simworld, so i've been cracking on
with that over the past couple of weeks. It is desperately
boring and tedious making the LED Arrays and wiring up, so i have to
do a couple of hours and walk away from it. Going back when i have a
fresh mind. Since October last year, I have done nothing
except build panels for other people, 7 in all and I get 'Panel'd
Out'. Still patience and perseverance
pay off because the end result is awesome.

  10/03/2013
Another busy
week. Why is it when you are under pressure, things conspire
against you? Rhys Bettridge came over for a 'Ryanair
Day' Id got three sectors planned, but we only got to do
two. Bugger. No throttle response when landing at
LDDU. Couldn't work it out until i took the TQ out to
investigate. Both the connector lugs had broken off the
Throttle Pots. Cant complain really, this Sim is
'thrashed' and in 2 years, i've never looked at the TQ.
10/03/2013
Another busy
week. Why is it when you are under pressure, things conspire
against you? Rhys Bettridge came over for a 'Ryanair
Day' Id got three sectors planned, but we only got to do
two. Bugger. No throttle response when landing at
LDDU. Couldn't work it out until i took the TQ out to
investigate. Both the connector lugs had broken off the
Throttle Pots. Cant complain really, this Sim is
'thrashed' and in 2 years, i've never looked at the TQ.
  But,
it doesn't end there, oh no ! Fixed the TQ and on the test
flight the aircraft kept veering to the left when braking. Odd
thinks me. So I looked in FSUIPC and I cant calibrate one of the
Brake But,
it doesn't end there, oh no ! Fixed the TQ and on the test
flight the aircraft kept veering to the left when braking. Odd
thinks me. So I looked in FSUIPC and I cant calibrate one of the
Brake
  Pots.
So
goes into Windows and same there. Bloody Potentiometer gone
faulty. Had to take the Captains Rudders out to fix.
No point in changing just the faulty pot, so I put 3 new ones in. Pots.
So
goes into Windows and same there. Bloody Potentiometer gone
faulty. Had to take the Captains Rudders out to fix.
No point in changing just the faulty pot, so I put 3 new ones in.
Had to sort it because with building the panels, i've been putting
people off coming, but I had Gareth Carnes coming who was going
for Sim Assessments with Jet2 and Sun Express and I wanted to give him
a fighting chance. Really put him through the mincer. All Raw
Data work, no flight director and no autothrottle on approach to EGBB
15 and EHAM 18R. Once he got comfortable, no holding
him down :o)
Tom's Forward Panel Is Finished. All Setup & Configured in Prosim.
It's really doing the business. THERE IS NO PANEL THAT COMES
CLOSE TO THIS FOR QUALITY AND REALISM. Check it out HERE
and the build pics HERE


  28/02/2013
Colin Batson came
over from Norfolk to Pick Up His Panels. He looks a very happy chappie
(just look at the grin on his face). And I've been
upto my neck in even more SIMWORLD Panels over the last few
weeks This one is for Tom McBennett in
Ireland. They truly are
magnificent. There's a
Full Set Of Build Pics on This
Page as I went along. 28/02/2013
Colin Batson came
over from Norfolk to Pick Up His Panels. He looks a very happy chappie
(just look at the grin on his face). And I've been
upto my neck in even more SIMWORLD Panels over the last few
weeks This one is for Tom McBennett in
Ireland. They truly are
magnificent. There's a
Full Set Of Build Pics on This
Page as I went along.


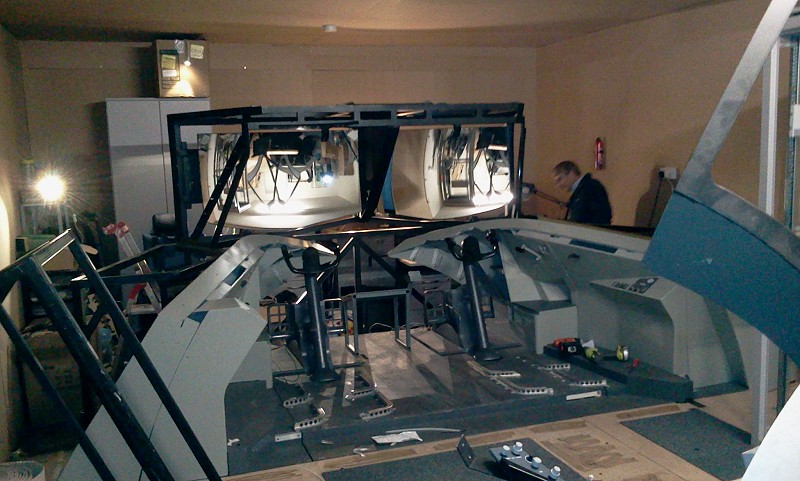
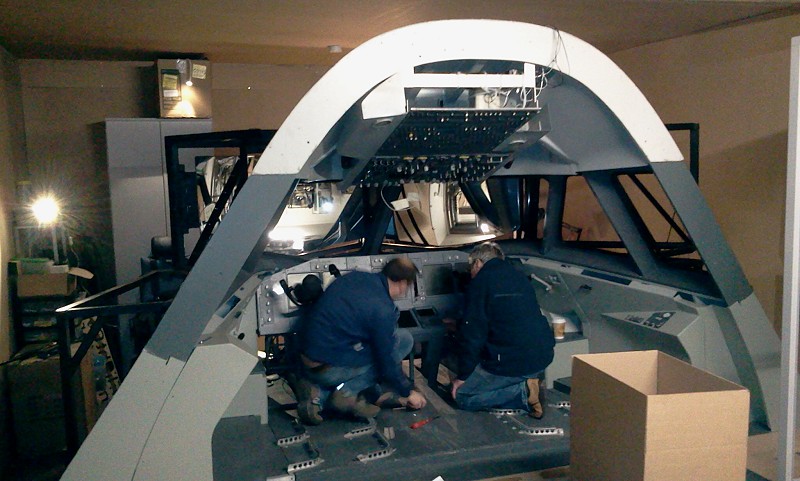
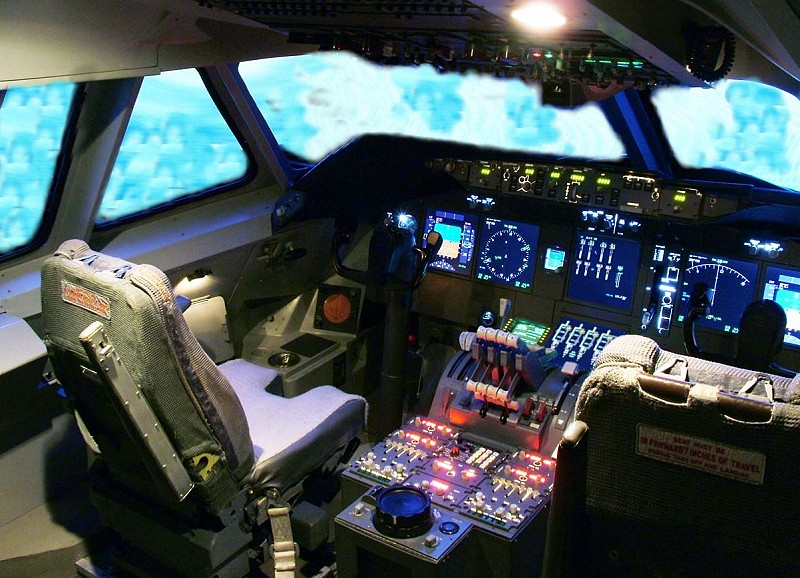
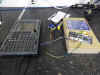
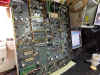
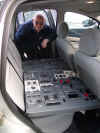
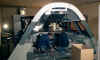
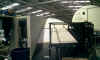
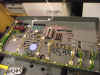
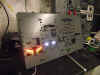
 21/02/2013
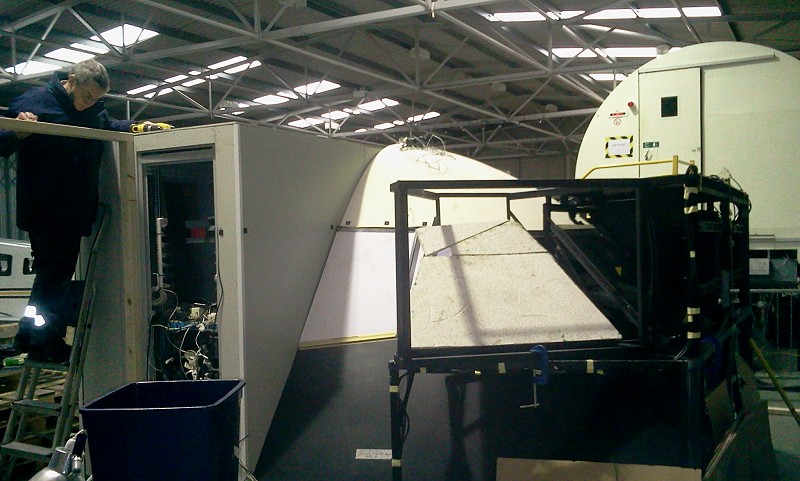
Some
of you may remember I was helping Chris Rigby at FLIGHTSIMULATOR
MIDLANDS set up his 737 Sim on Prosim. Well he's gone
out and bought a 747 Sim Now. Chris sent me these pics of
the Sim as they were installing it at Coventry Airport. Plan is to
have it up and running for 1st April and ready for booking. 21/02/2013
Some
of you may remember I was helping Chris Rigby at FLIGHTSIMULATOR
MIDLANDS set up his 737 Sim on Prosim. Well he's gone
out and bought a 747 Sim Now. Chris sent me these pics of
the Sim as they were installing it at Coventry Airport. Plan is to
have it up and running for 1st April and ready for booking.
Over 400 tons of aircraft fully loaded, how good are you ?


 22/01/2013
Well It's all
assigned, configured and working in Prosim. The Simworld Forward
and Rear Overhead panel pair for Colin Batson. All
i've got to do is a little cosmetic work to 'tidy up' a few loose
ends.
22/01/2013
Well It's all
assigned, configured and working in Prosim. The Simworld Forward
and Rear Overhead panel pair for Colin Batson. All
i've got to do is a little cosmetic work to 'tidy up' a few loose
ends.
I've never built a Simworld Rear Overhead before, so this was
something of a learning curve for me and there are some things i'll do
differently when the next set get here which are due to arrive end of
next week. Again, I cant tell you how good the
quality is, just awesome. Total build time, about 60 hours
which included making the displays. This is how it all
came together...
I've
really enjoyed building this Simworld Rear Overhead Panel. From
opening the Parts Box to seeing it running has been very rewarding and
i've learned a shitload as well :o) The pictures dont
really do it justice because the light in my workshop is OK, but not
great. I'll assemble all the pictures notes
onto a page of it's own when I have time which may just help somebody
else.

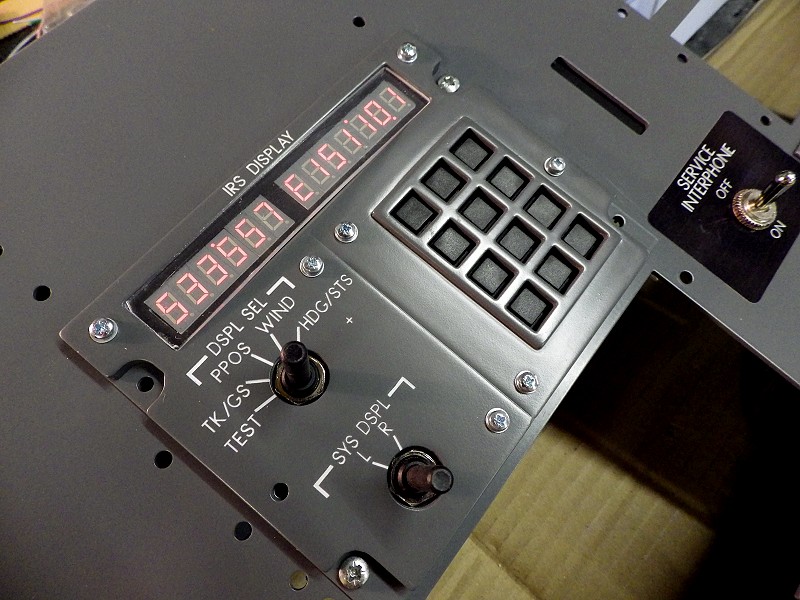
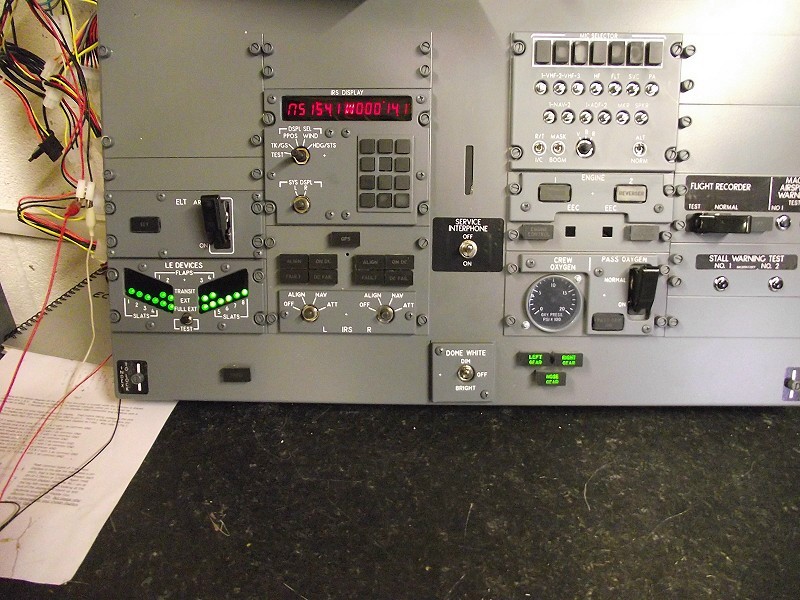
Once
the panel was built and wired, it was time to get the IRS Display
digits sorted and fitted. Usually Simworld supply
simple 7 segment displays for this, but that's no fun because you can
replicate an N & an E with these, but you cant replicate a W for
West. So I got some 17 segment displays and sorted
it. Also configured the LE Device indicator in Prosim and
here's the result. But I had to be quick so i got the shot while
the 'In Transit' lights were on :o)


Well I
used 1 x BBI-32
from Leo Bodnar and 1 x Phidgets
LED64ADV for the Inputs and Outputs on the Rear Overhead.
All the Inputs have been used, but after populating all the LED's
there remains 26 spare outputs on the LED64. So perhaps
that will allow expansion onto the forward overhead when the two
panels are in place. Shame to waste them :o) Here's the
finished wiring. On the next one i'll move the LED64 over to the
other side of the panel so there's no long cable run.
11/01/2013
New Year out of the
way, so it's back in the workshop and on with the SIMWORLD Rear
Overhead. This is the first one of these i've done, so
it's a bit of a 'voyage of discovery'. First
thing I've learnt is that I should have put the LED64 on the other
side. That would have cut down on the long cable run, but
it works and when I do the next one for Tom, i'll know better.
I've spent about 30 hours on this upto now, so over the weekend I hope
to have all the inputs finished, installed and assigned in Prosim so
that early part of the week we will be flying it.


31/12/2012
Well I hope you had a
great Christmas and you got all the 'Goodies' you wanted.
Well, look what Santa brought me.

My mate
Joe Lavery (of PCPilot Fame) is making 737 Chronographs and 'quite by
chance' two ended up in our house Christmas morning.
These are NOT expensive when you compare them to other options out
there. I don't know exactly what the bride paid for them, but I
seem to guess they were about £120 (about 145 euro) each.
Choice of two bezels, one to fit the Engravity MIP and one to fit the
FDS. Or choose the one you want for your home made
MIP. No point me going into 'in depth fitting' here
because Jeremy did a how I fitted them thread on MyCockpit http://www.mycockpit.org/forums/showthread.php?t=25431
Instructions and Bezel Size .pdf's are above. Just click
on the image for more information. Contact Joe HERE

I ended
up with some Christmas Cash didn't I. So I thought I'd make
Mathias a little richer and went over to Aerosoft to spend some of
it. Ended up adding 3 new destinations to the route
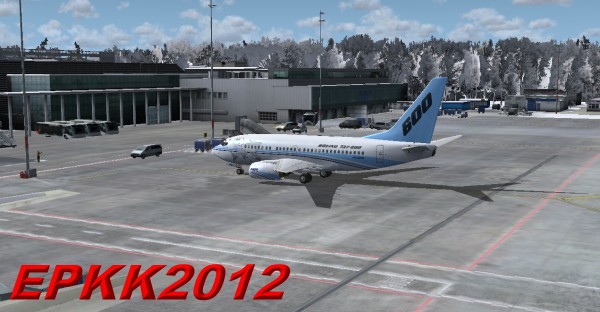
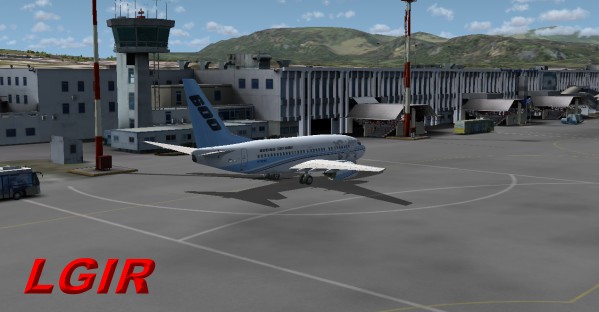
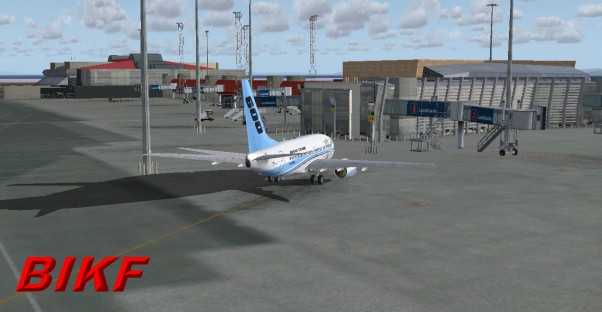
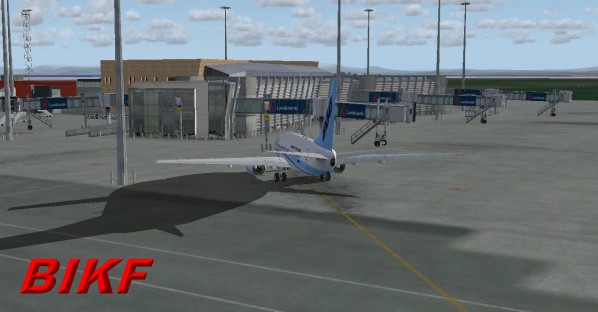
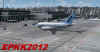
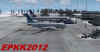
network. Bought the EPKK2012 Krakow, LGIR X Heraklion and
the BIKF Keflavik Scenery packages. EPKK & BIKF are
AES compatible so that's a plus :o) By far the
best of the three is the EPKK scenery, very detailed and
'busy'. Dont know what all the hype is about
Heraklion, dont get me wrong, it's OK, but just seems a bit 'Grey'
lacking colour and traffic. I prefer the Keflavik because
you never know visibility and wind speed going in there :o)
Just doing the 'end of year' round up, so hope to have that uploaded
sometime next week.
|


 HOME
HOME